
On this page
Before you start
Step 1 of 6
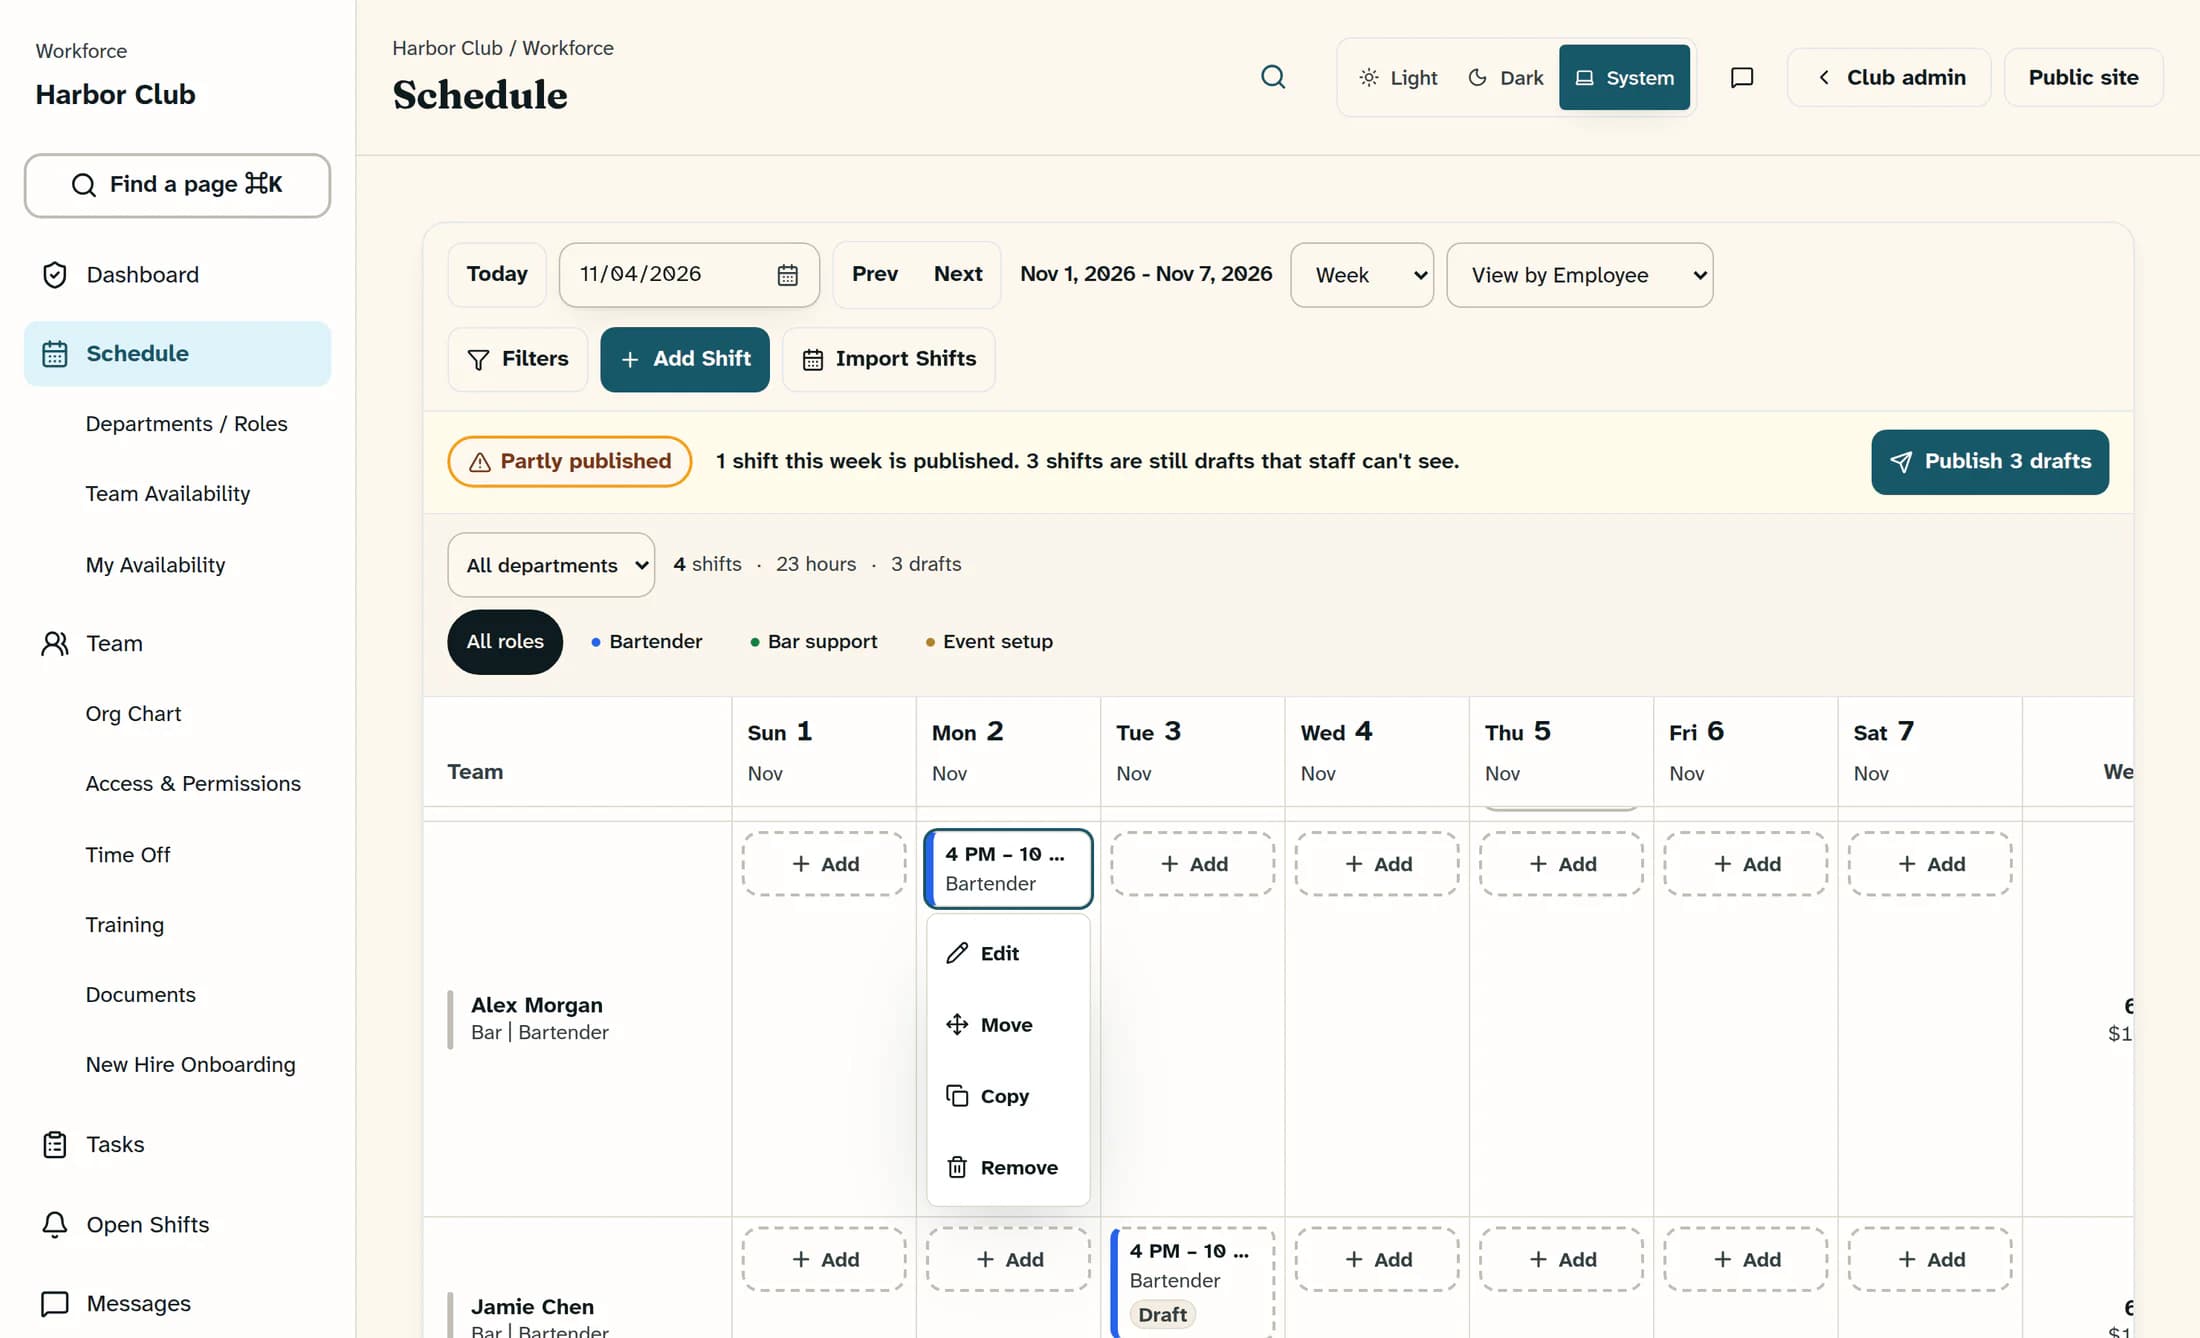
Find the shift and open Edit
In Workforce, open Schedule. Use the date navigation and filters to find the intended employee, day and role, then check the shift's status. In Week view, click the shift card and choose Edit from its menu. Other schedule views may open the editor directly when you select an editable shift. Confirm the person and date again in Edit Shift before changing anything.
Step 2 of 6
Change the shift details
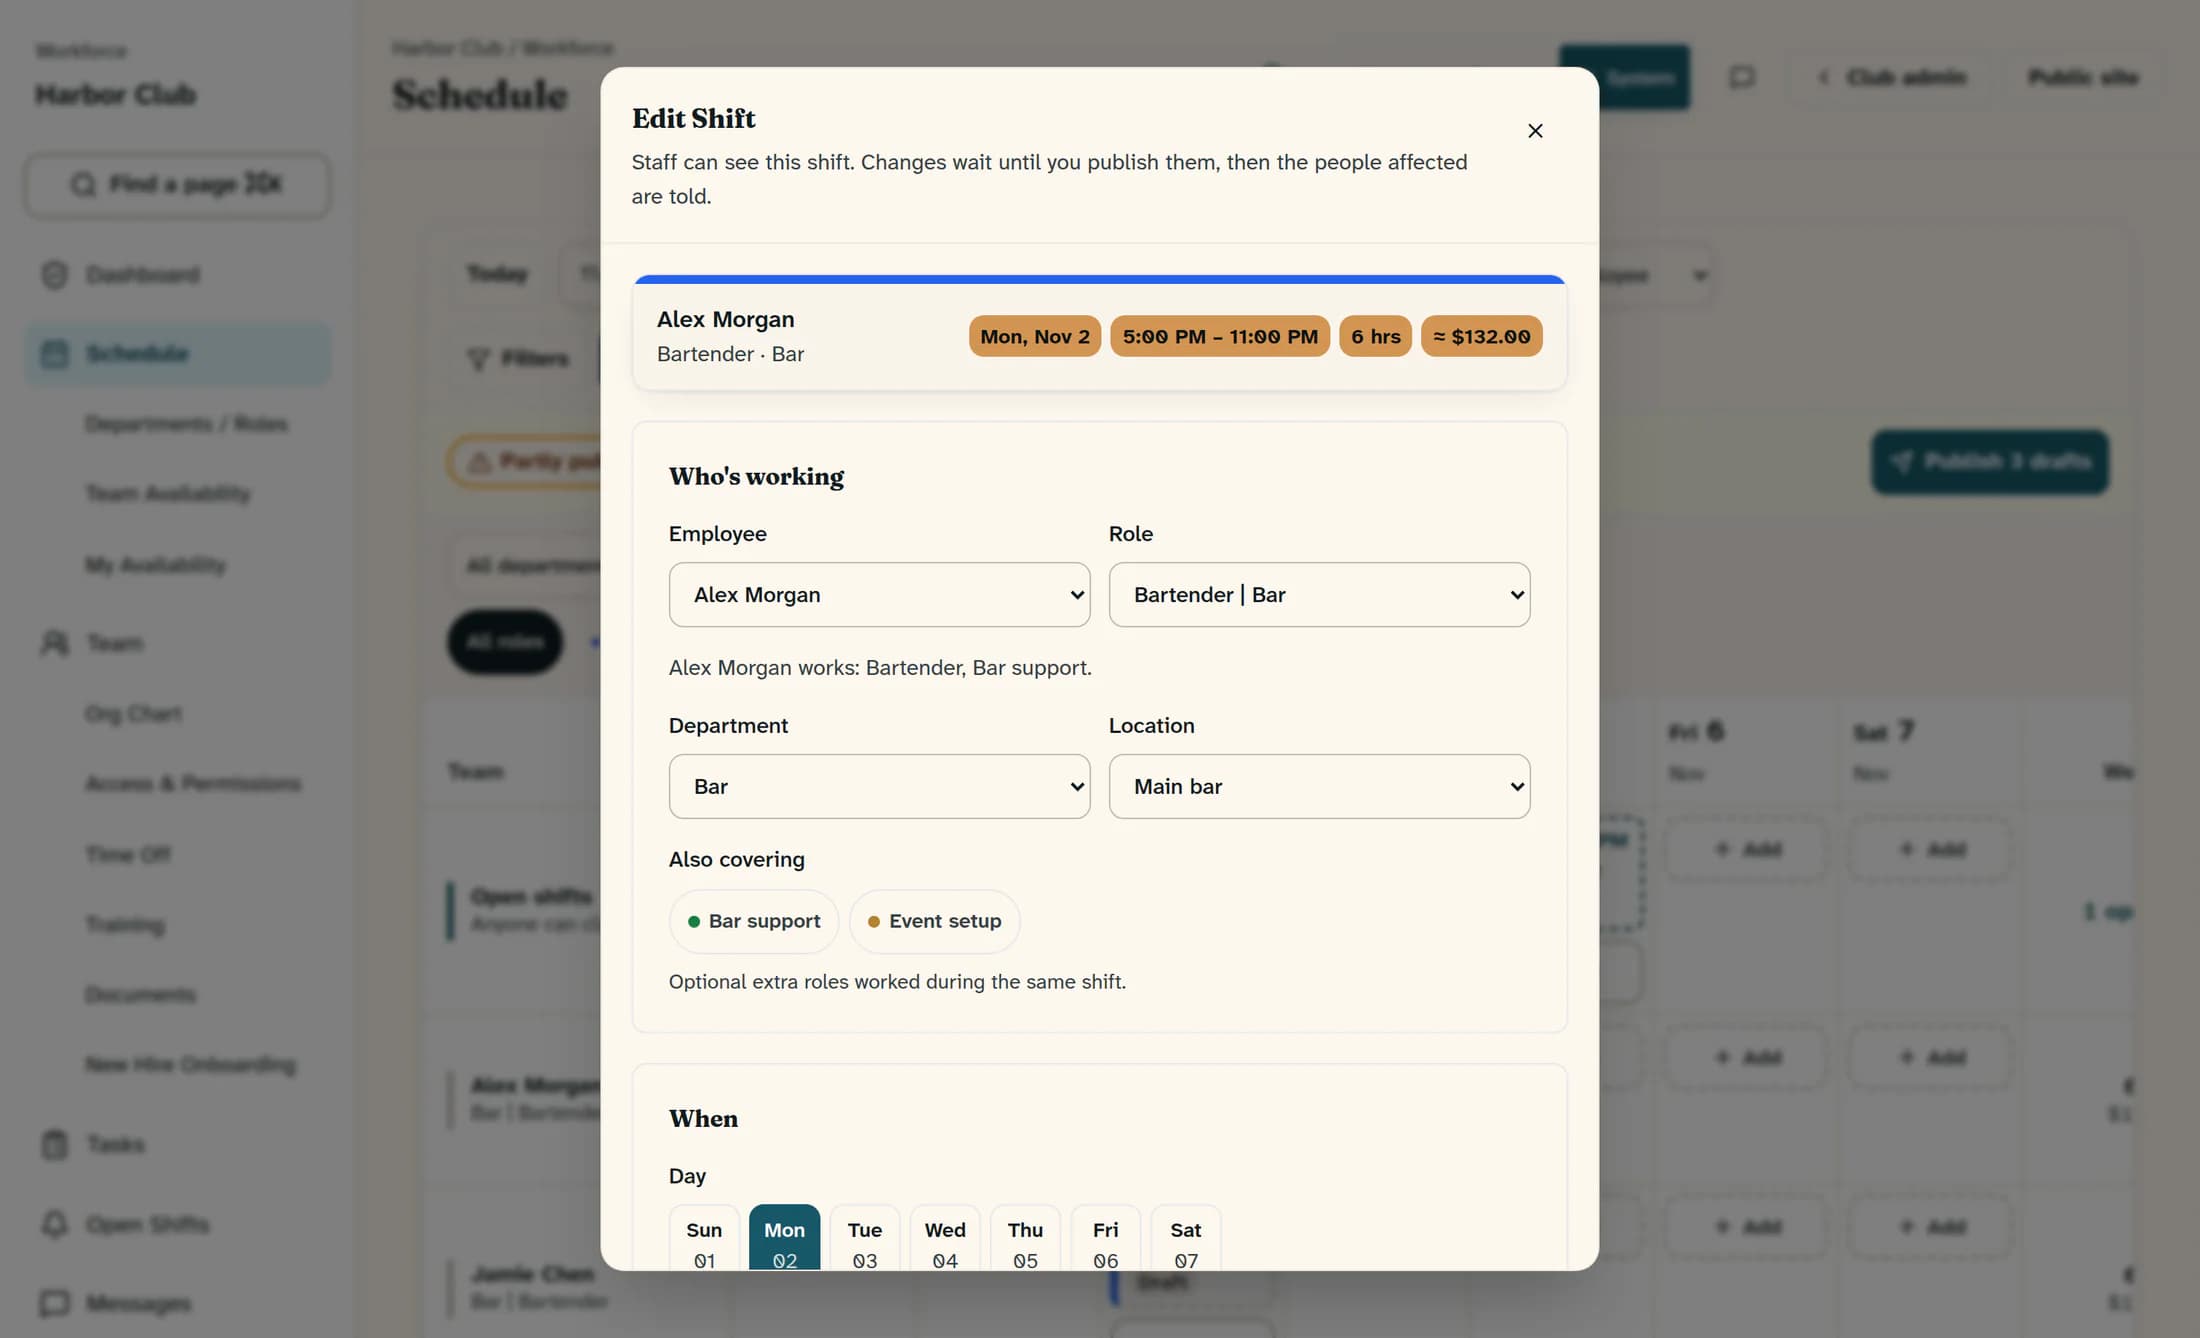
In Edit Shift, choose Employee, Role, Department and Location as needed. Employee choices may group the role's team and Everyone else. Role and department choices affect each other, so recheck both. Also covering, when available, adds other roles worked during the same shift.
Use Day or Start Time to move the shift; the editor carries its duration with the move. Review End Time, including the end date for an overnight shift. For a shift without a fixed finish, select No set end time and choose its open-ended label. Add instructions in Notes. Scroll within the editor to reach the remaining fields and footer; editing an existing shift has no repeat-days option.
Review any conflict warning for overlapping shifts, approved time off, recorded unavailability or more than 40 scheduled hours in a week. These are advisory: the form says you can still save. Missing or invalid dates, an end at or before the start, and scheduling permission checks can prevent saving. Open-ended shifts use an assumed four-hour window for overlap checks and do not add a known duration to weekly hours, so check coverage yourself.
Choose Update Shift at the bottom when the details are correct. A draft saves immediately and stays a draft. A published shift normally saves as a waiting change; staff still see the current version until you publish. Read the result and recheck the schedule: a concurrent change or an unchanged submission can produce a different result.
Step 3 of 6
Remove a shift when it is no longer needed
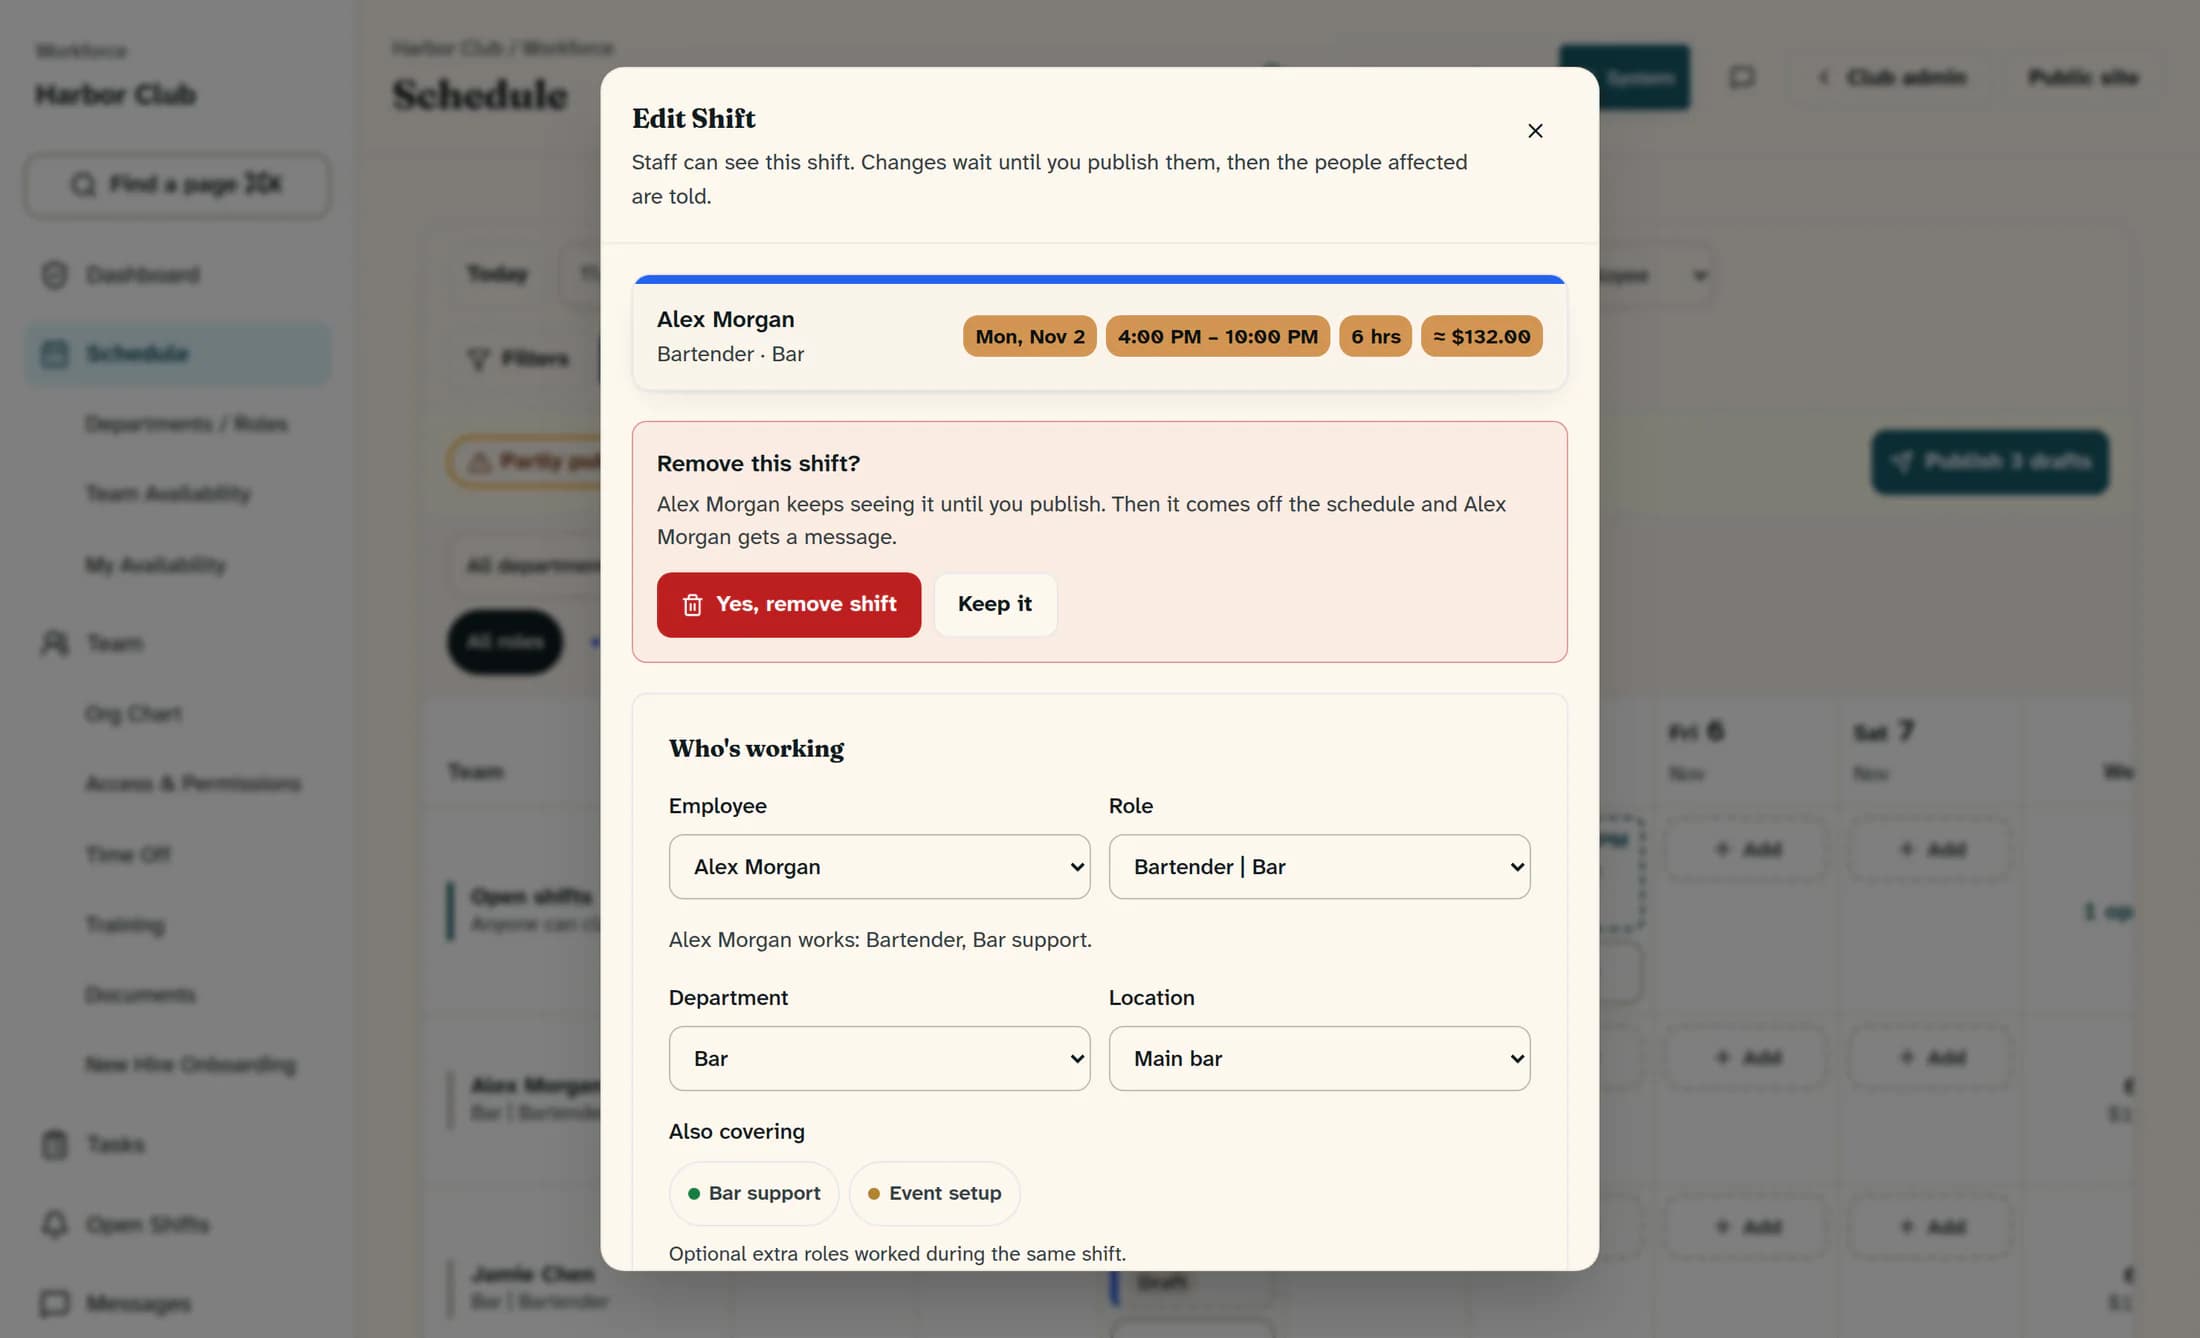
To remove the whole shift, open it and choose Remove shift in the editor's footer. In the Week card menu, Remove opens the editor at the same confirmation. Check Remove this shift?, the employee and the shift summary before choosing Yes, remove shift. Choose Keep it to dismiss this confirmation.
A draft is deleted immediately because staff have not seen it. There is no general undo for a deleted draft; recreating one requires checking its details again. Removing a published shift creates a waiting removal. Staff keep seeing the existing shift until you publish that removal. A waiting removal replaces earlier waiting edits for the same shift.
Step 4 of 6
Keep or undo a waiting change
Before publication, reopen the shift and choose Undo my changes to discard its waiting edits, or Keep this shift to discard a waiting removal and keep the current published shift. The Week card menu uses Undo change and Keep shift for these actions. The waiting-change list also offers Undo.
Cancel and the editor's Close control dismiss the editor without submitting the values you are currently typing. They do not undo changes already saved to the waiting list. Reopening a shift loads its waiting version, so compare it with the staff-visible version described in the editor. Once a change has been published, make a new correction; these waiting-change undo controls no longer restore it.
Step 5 of 6
Review the scope before publishing
If the shift was published, leave the change waiting until you are ready, or publish it after reviewing its details. In the Week card menu, Publish change publishes just that shift's waiting change.
The amber waiting-change area's Publish change or Publish N changes button submits the entire waiting set loaded for your permitted schedule, across the loaded dates and filters. It is not limited to the card you last opened or the first six entries displayed; And N more means additional changes are included. Review the full scope and count before using it.
The schedule status strip can also include drafts. When Publish all N appears, its count includes the drafts on screen and waiting changes that match the current dates and filters. Drafts are published first, followed by waiting changes, so an error can leave part of that work published. For the schedule-wide options and review steps, see Publish an employee schedule.
If a change moves or reassigns an accepted or declined shift, publication resets it to published so the employee can respond again. Changing only details such as the role or notes does not trigger that reset.
Step 6 of 6
Reopen the schedule and check the result
Refresh or reopen the relevant dates and filters. Check the employee, role, start and end, and whether the shift is still a draft, waiting to change, waiting for removal, published with the new details, or absent after removal. If you deliberately left a published change waiting, staff should still have its previous version.
For current or future shifts, publication can notify the affected employee; a reassignment can notify both the previous and new employee. Past shifts may not send notices. Notification eligibility requires Employee Management and an active or onboarding employee linked to a user account. A success or notification count does not prove a message was delivered or read. Follow your club's usual handover process if someone needs urgent notice.
If saving, removing or publishing reports an error or times out, inspect the refreshed schedule and waiting list before trying again. Publication updates the schedule before processing notifications, so an error does not prove nothing changed. Check which drafts or changes remain, and ask your Workforce administrator for help if the result is unclear. Avoid repeated submissions or promises that notices reached everyone.
Summary
Your check is complete when the intended shift has the right details or removal state, and you know whether staff can see the result yet. Publish any waiting change only after confirming its scope.