
On this page
Before you begin
The illustrations are reconstructed from the application source with fictional club details, credentials, and test results. They do not show a live provider connection or a verified test.
Step 1 of 4
Find the AI Assistant panel
In the admin menu, open Integrations under Settings. In the classic view, scroll to AI Assistant.
Step 2 of 4
Enter the key and review the models
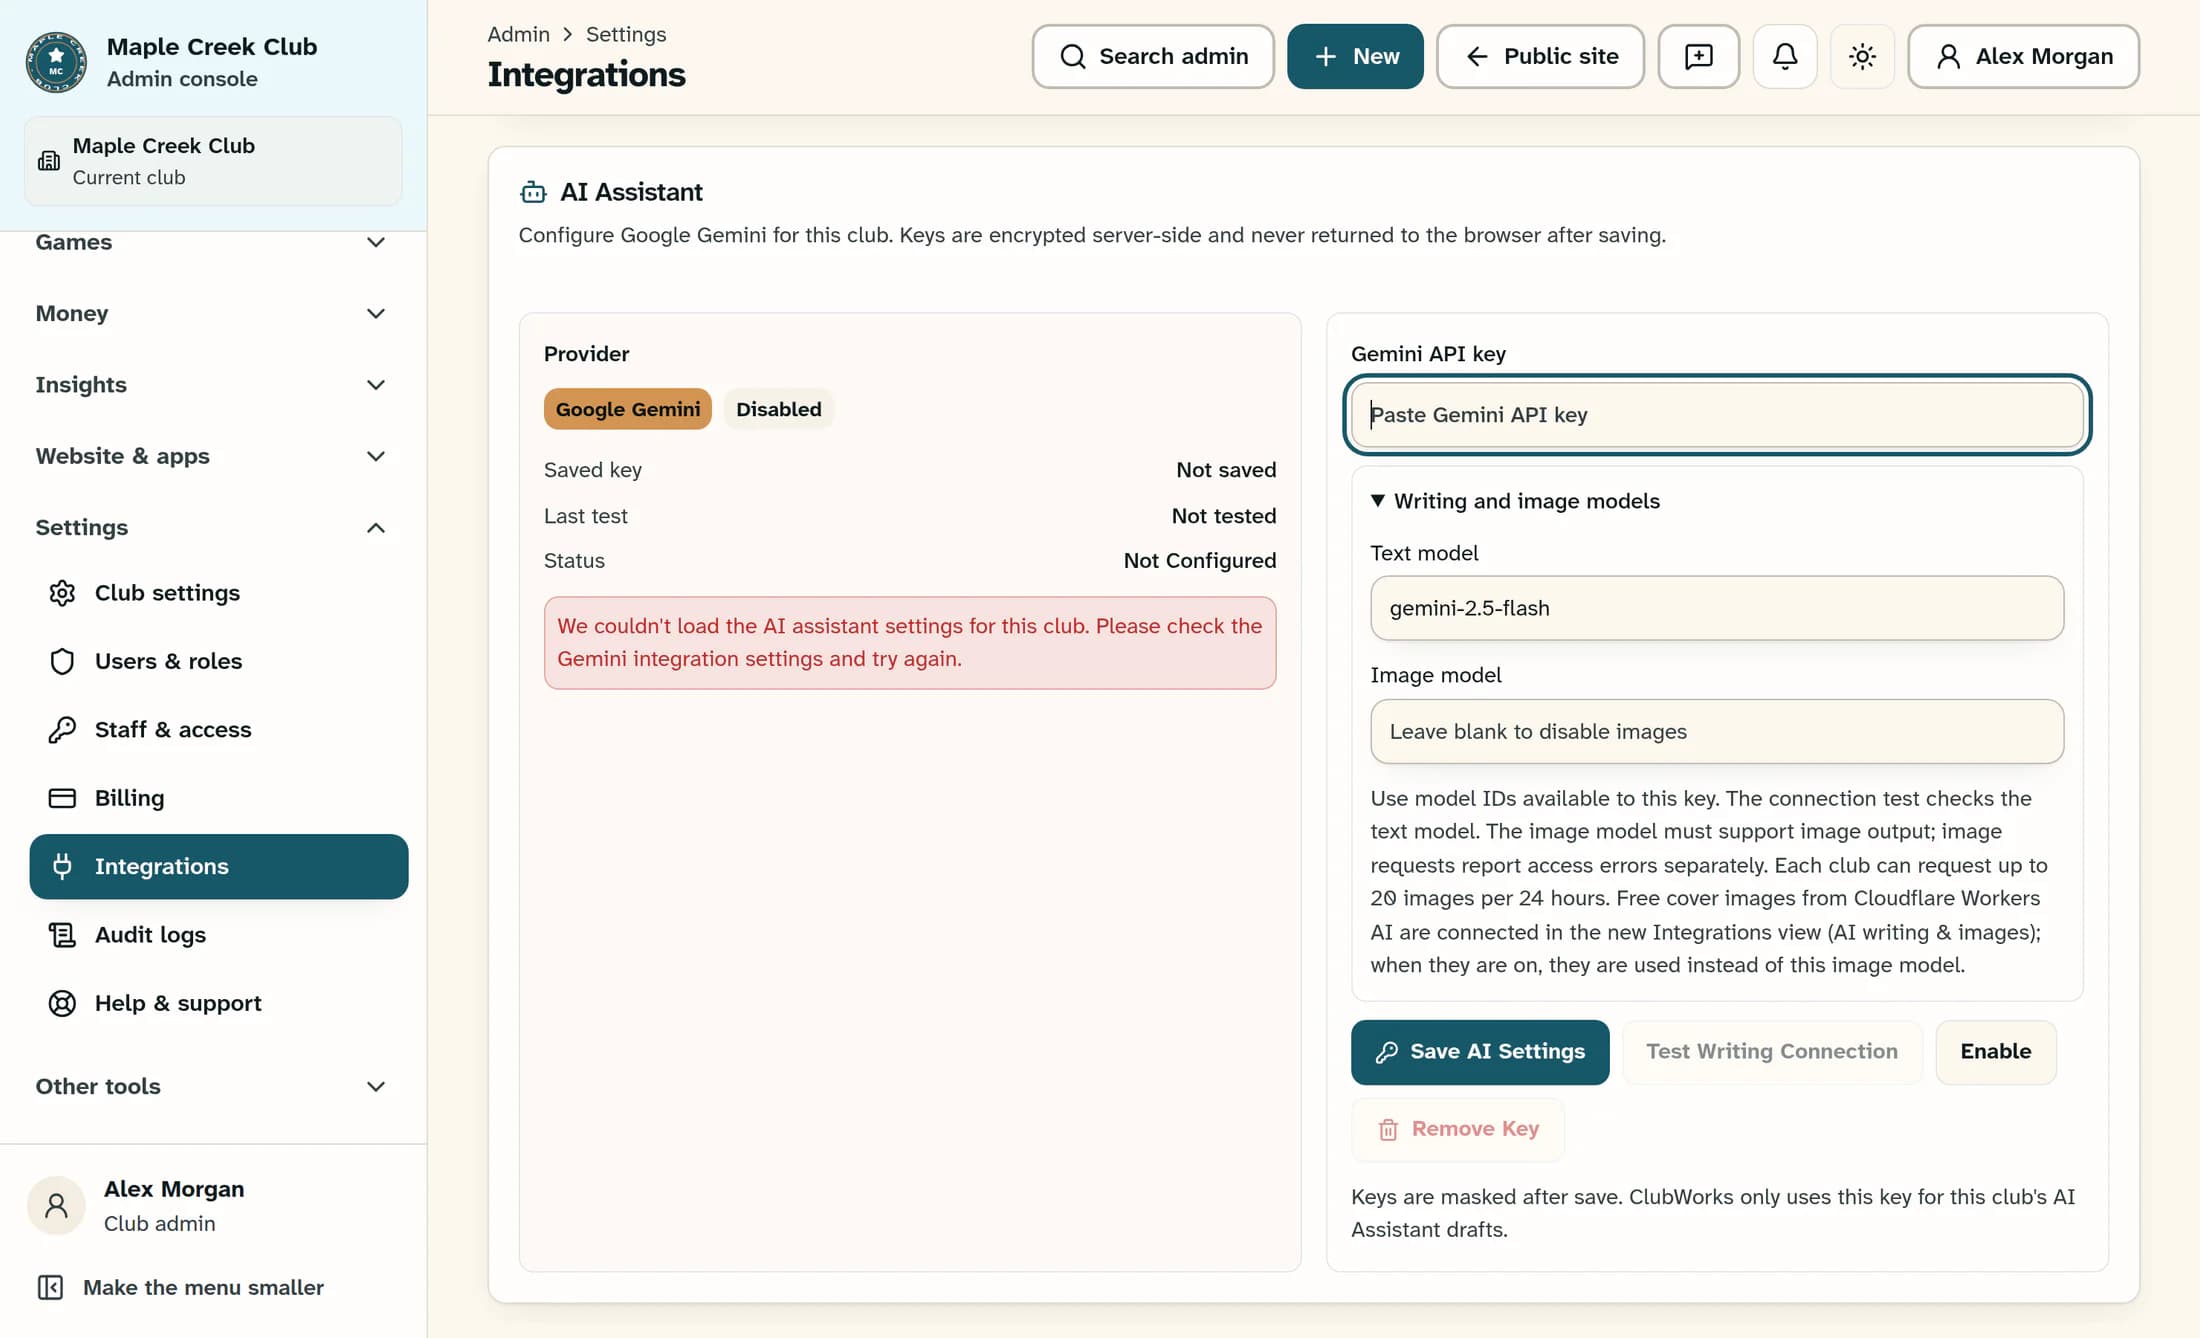
Paste your authorized key into Gemini API key, where Paste Gemini API key appears before entry. Open Writing and image models if you need to review the settings; Text model uses a model ID available to your key. Leave Image model empty if you do not want Gemini image generation.
Step 3 of 4
Save the connection
Select Save AI Settings to save the key and turn Gemini on for this club. Check that Saved key shows a masked value and Enabled appears; the key-entry field clears after a successful save. A saved key alone does not confirm that a writing request will succeed.
Step 4 of 4
Test the writing connection
Select Test Writing Connection after saving; it sends a small writing request that can use provider quota and also saves the current settings with Gemini turned on. If you are replacing a saved key, first enter the replacement where Enter a new key to replace the saved key appears and select Save AI Settings, then run the writing test.
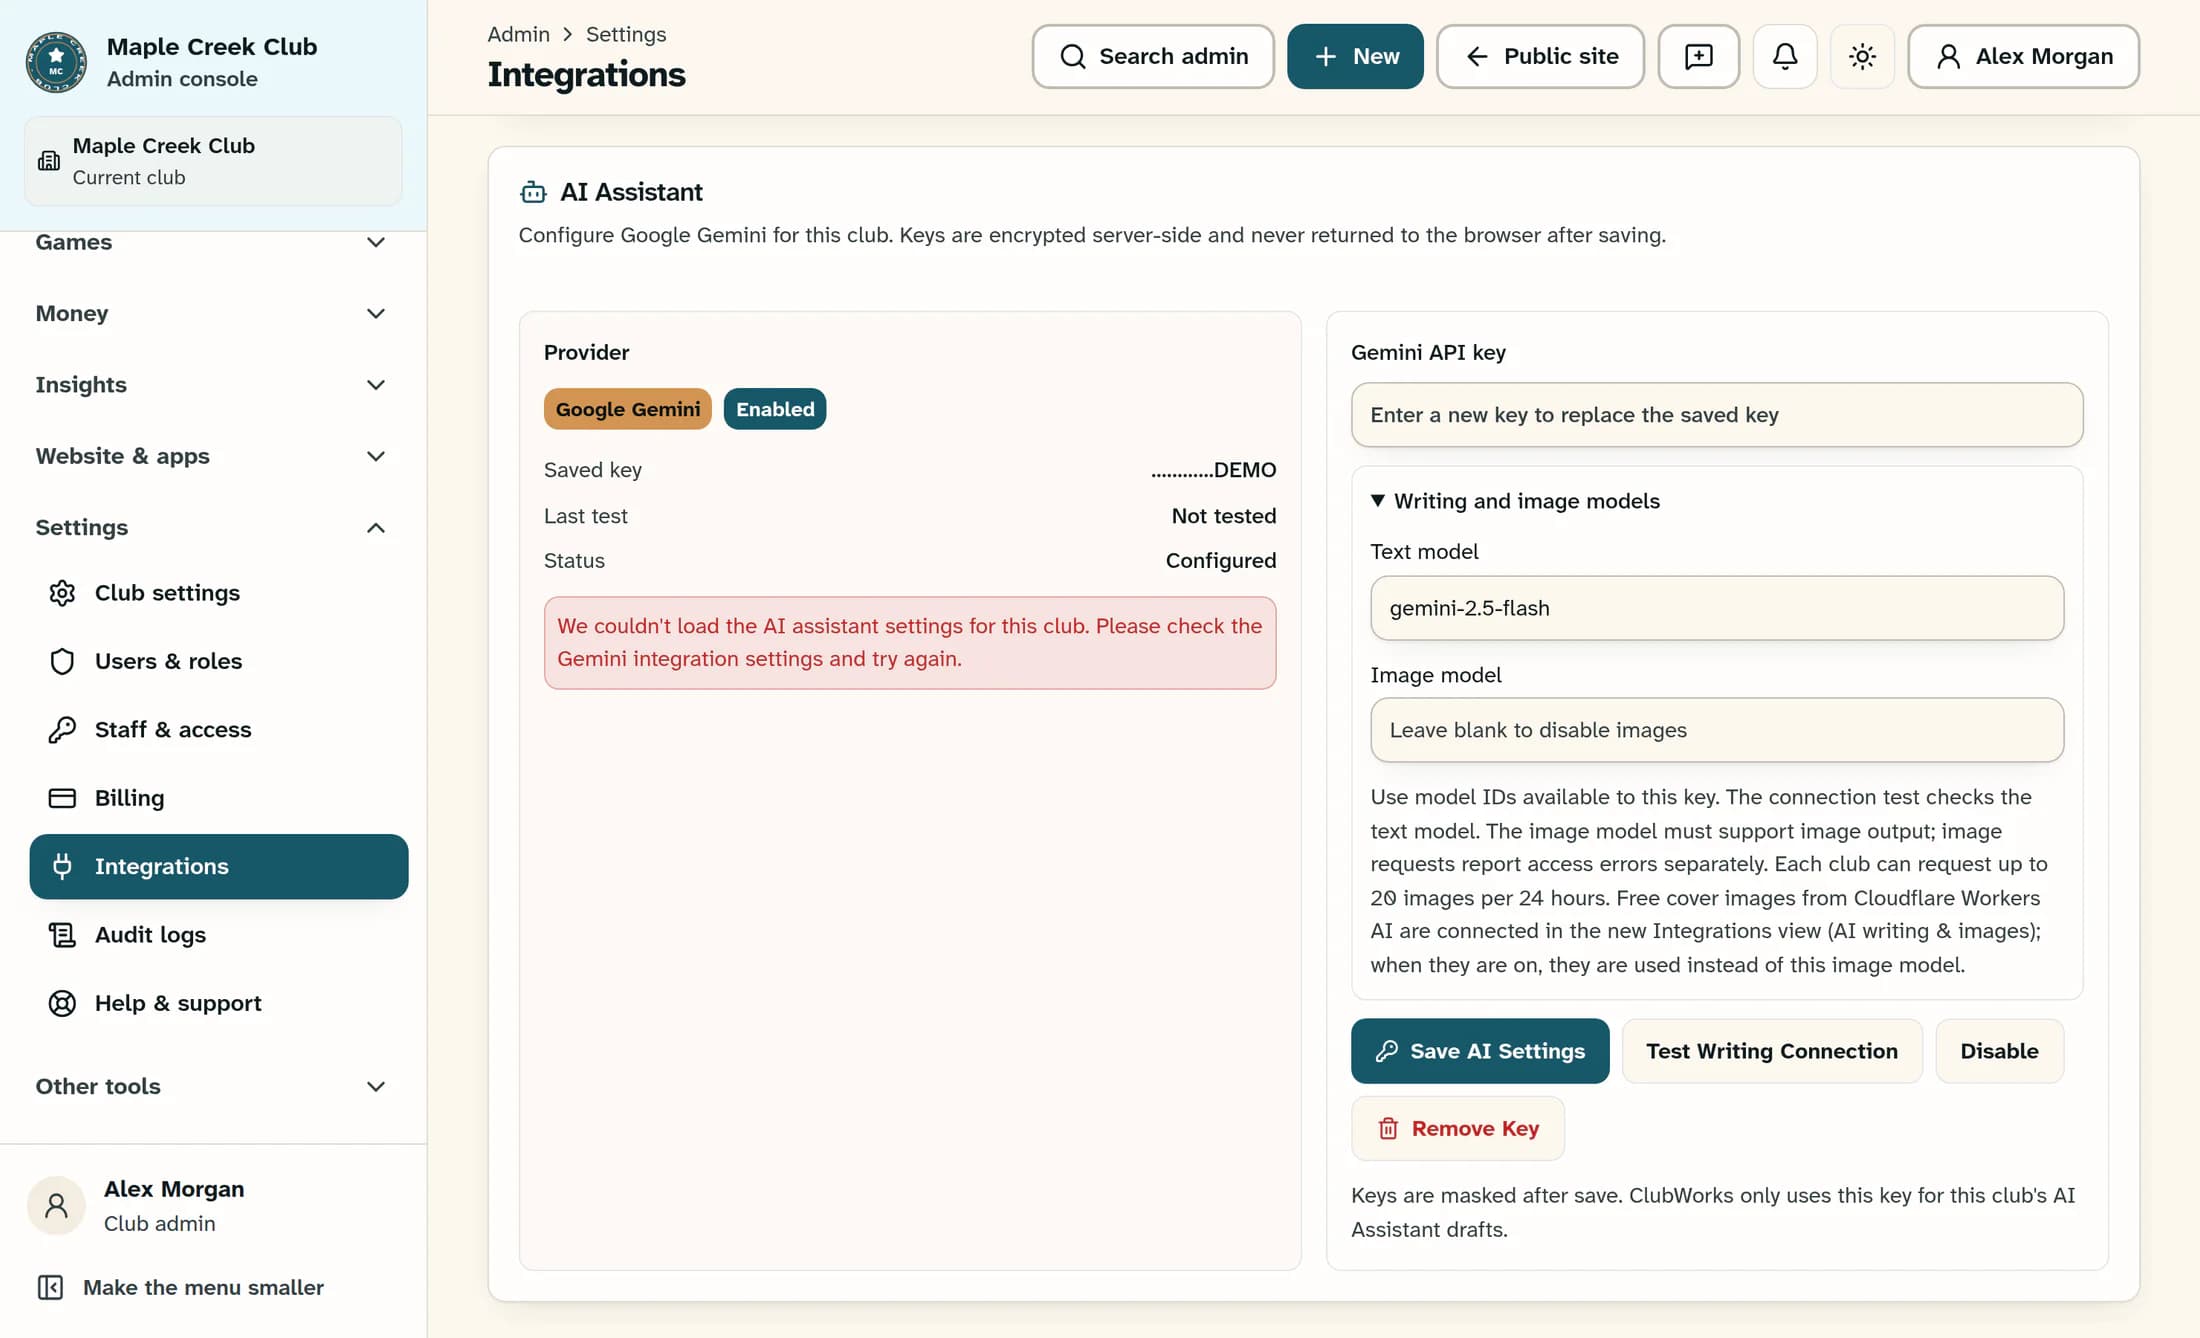
After the request, look for “Gemini connection test succeeded.” and check that Last test shows a fresh timestamp, Saved key remains masked, and Enabled and Connected appear. The test checks the text model only; image access can still fail separately.
If saving or testing fails
What success means
A successful writing-test message, a fresh timestamp, a masked saved key, and the enabled and connected states are the expected result. This checks Gemini writing at that moment; it does not verify image generation or future provider availability.