
On this page
- Who can do this and what you need
- Open the roster importer
- Get the blank template
- Prepare the columns
- Choose your files
- Check the category for every file
- Preview the import
- Check the results
- What the result groups mean
- Keep a review report
- If anything needs correcting
- Confirm the new-member count
- Import the new members
- Check the finished count
- What manual account linking means
- If you cannot finish
- Expected result
- Related tasks
Who can do this and what you need
Step 1 of 10
Open the roster importer
In web admin, open People > Members, then select Import a roster. The importer starts at Choose files.
Step 2 of 10
Get the blank template
Select Download a blank template in Spreadsheets we can read. Fill it in using the column guidance below, or use a supported original Aerie/Auxiliary membership export.
Prepare the columns
- Required:
member_number,first_nameandlast_name. Each member needs a number and both names; member numbers can contain letters, digits and hyphens, up to 40 characters. - Optional:
email,phone,statusandjoined_on. Leave unused optional cells blank. - For
status, useactive,inactive,suspended,deceasedorprospect. A blank status becomes active. - For
joined_on, use a valid date such as 2026-10-01 or 10/01/2026. Avoid ambiguous dates. - A missing, invalid or shared email does not by itself prevent a new member from being added. It means the member needs a unique email and manual account linking later.
- Required:
Step 3 of 10
Choose your files
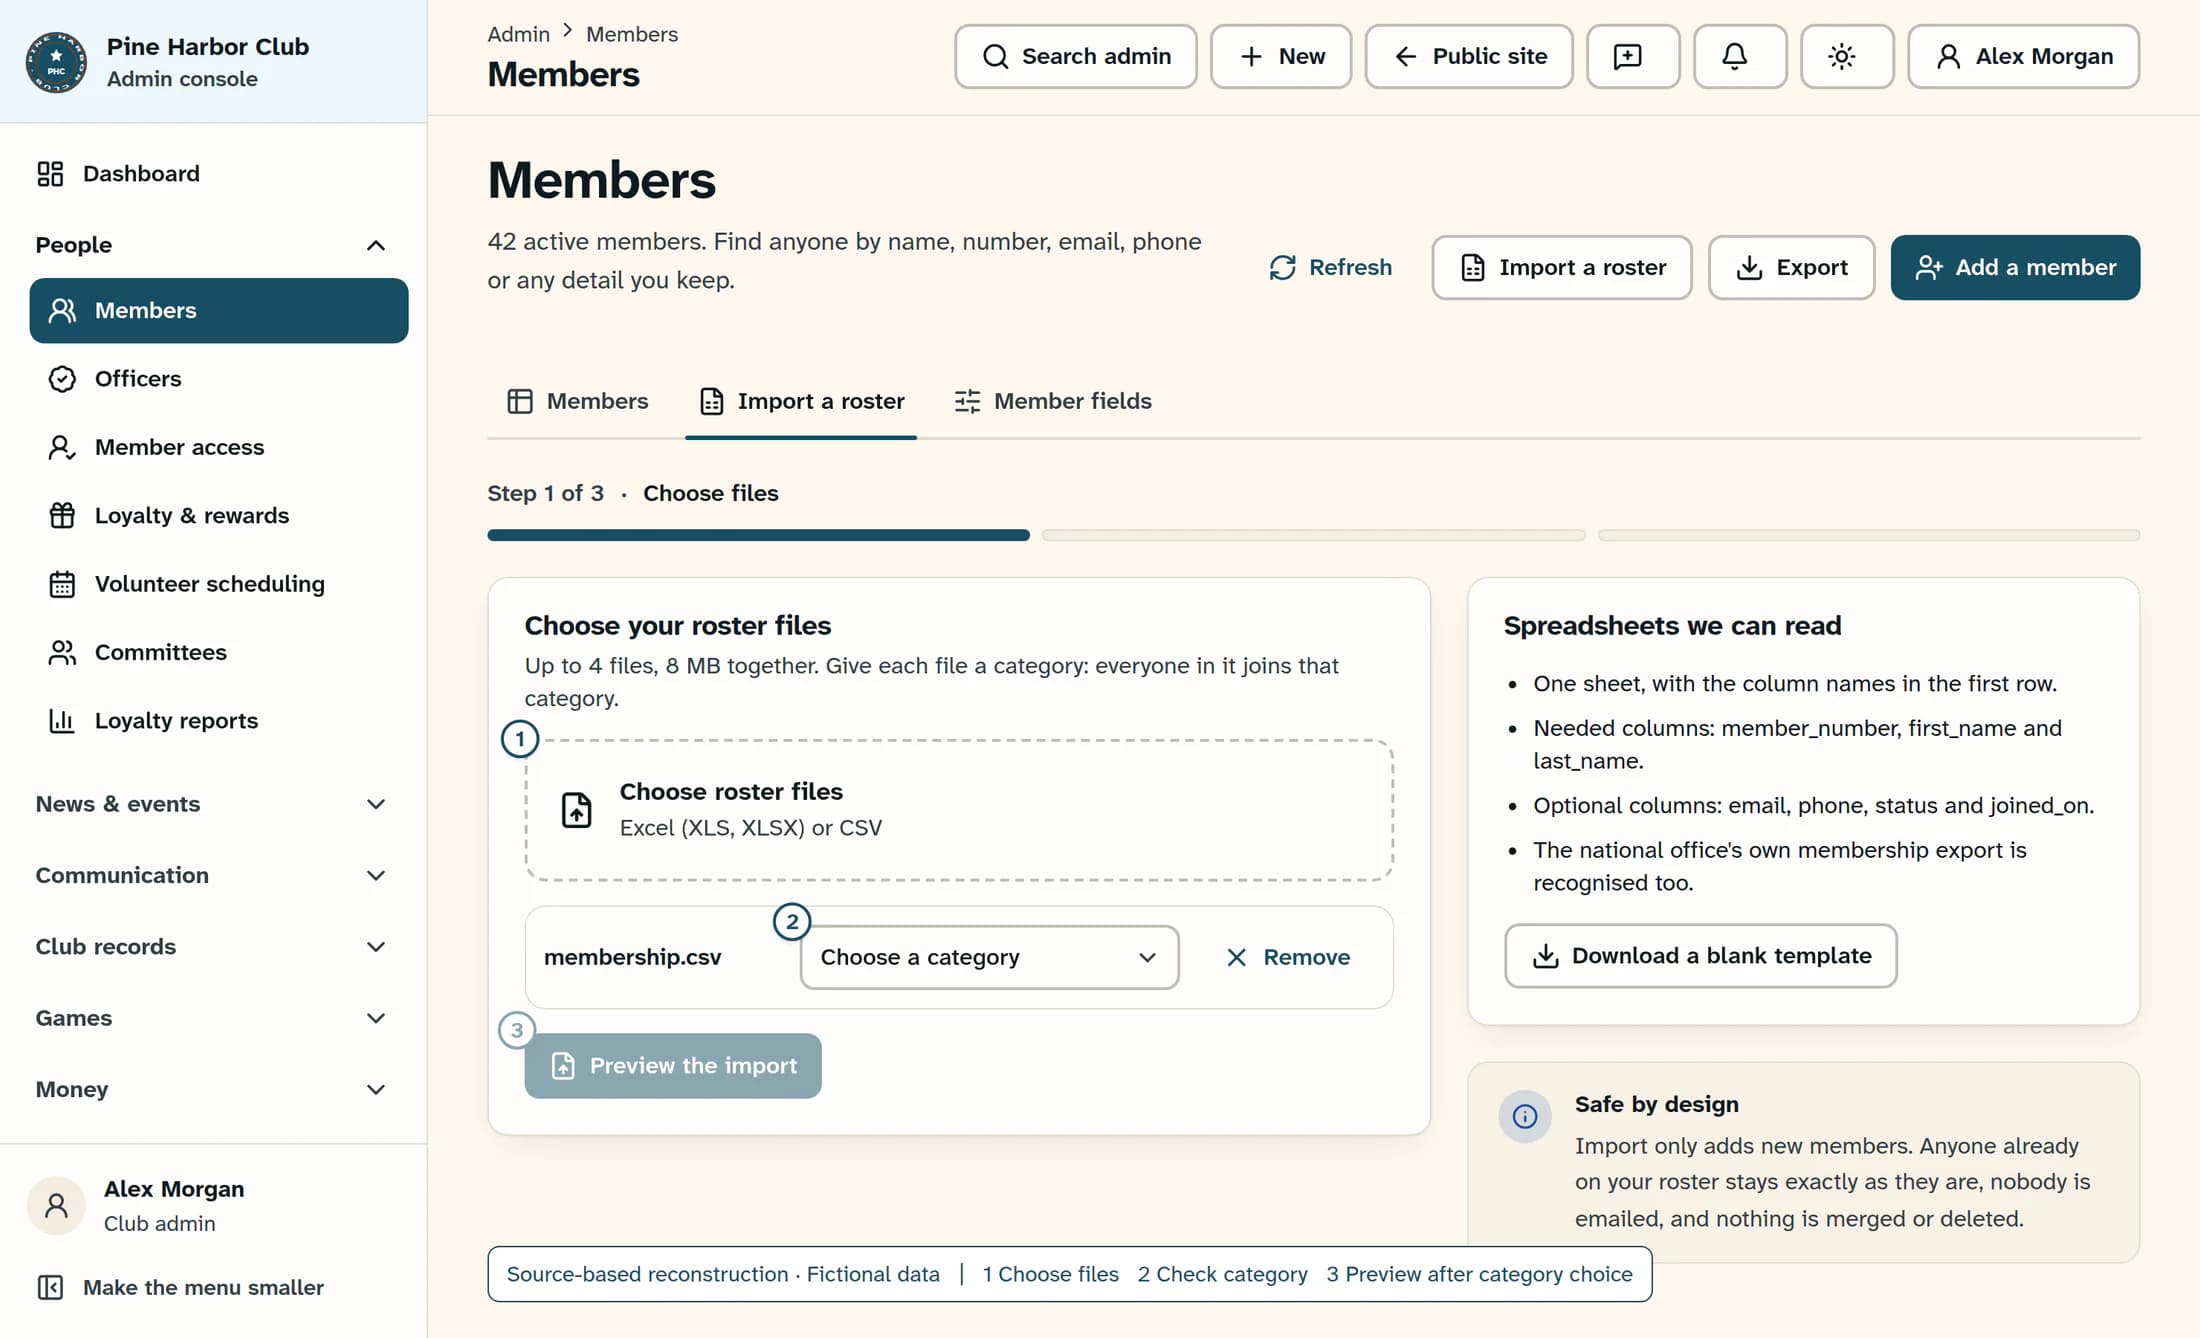
Select Choose roster files and pick the files you prepared. The selected filenames appear below the upload area; choosing a replacement set replaces the previous selection.
Step 4 of 10
Check the category for every file
Use Choose a category beside each file to select its active member category. Check any category filled in automatically—everyone in that file will join it.
Step 5 of 10
Preview the import
Select Preview the import. This reads your files and checks them against the club roster; it does not add members yet.
Step 6 of 10
Check the results
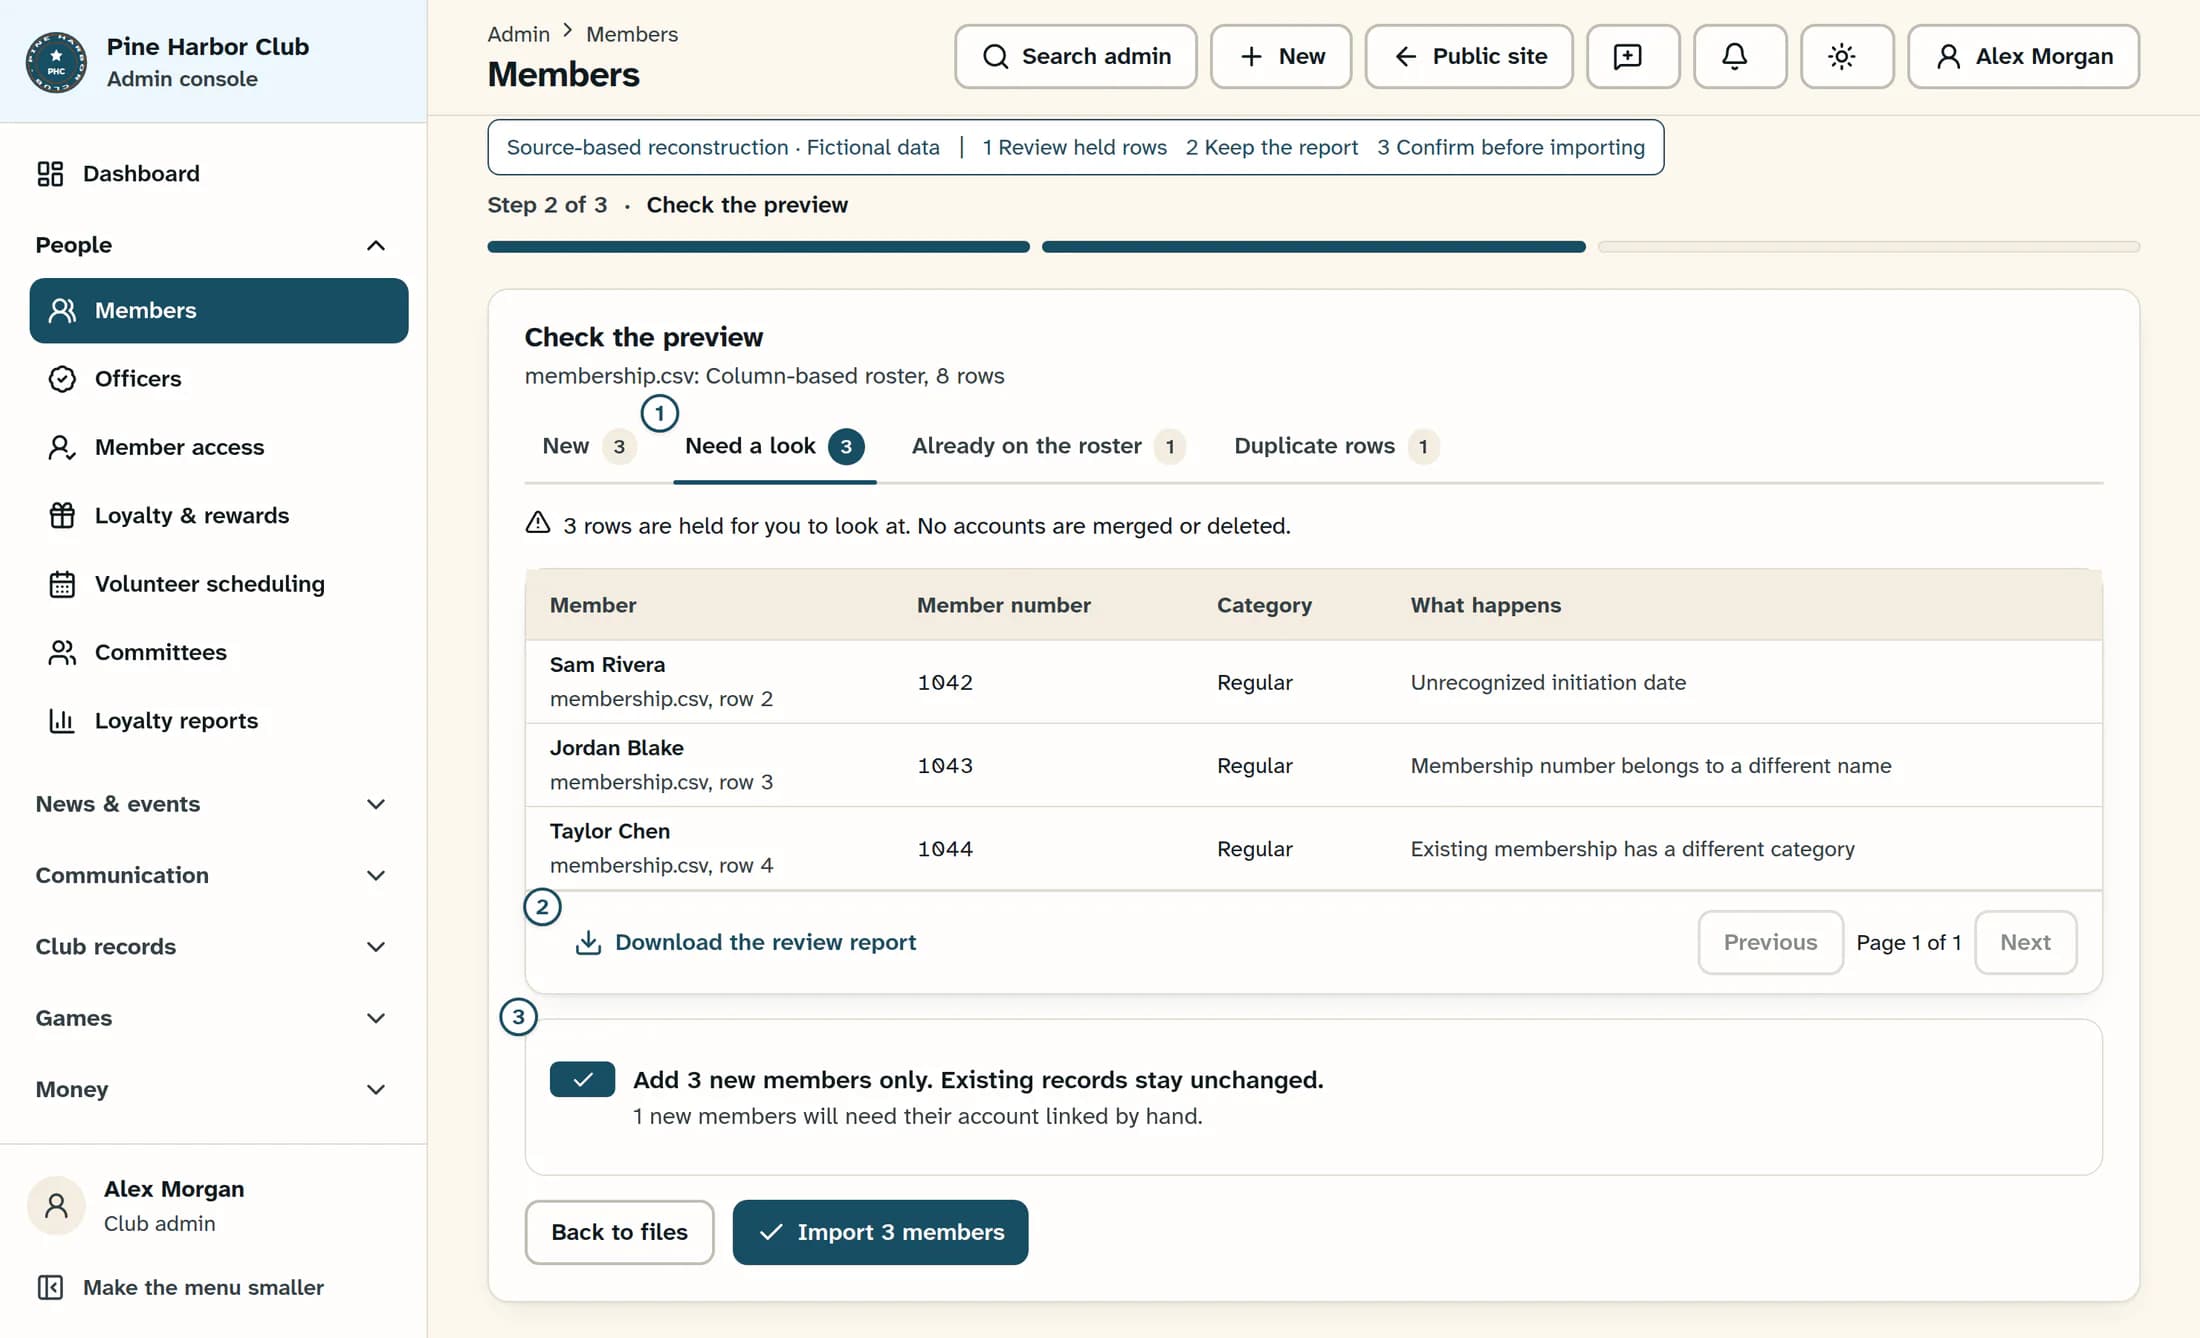
Read the four result tabs in Check the preview, including each row's What happens explanation. Select Need a look to inspect held rows before deciding whether to proceed with the new ones.
What the result groups mean
- New: these rows are ready to be added. A row may still need manual account linking.
- Need a look: these rows are held and will not be imported. Reasons can include invalid data, conflicting member numbers, a name that may already exist, or an existing membership in a different category.
- Already on the roster: the member number and name match an existing member without a category conflict. The record stays as it is, even if the file contains newer details.
- Duplicate rows: an exact repeated roster row is skipped; it is not added twice.
Step 7 of 10
Keep a review report
Select Download the review report. It includes the file, row number, member number, name, category, result and reason for every row, so you can find issues in the original spreadsheet.
If anything needs correcting
Correct the original spreadsheet; the preview is not an editor. Select Back to files, choose the corrected files again, check their categories and select Preview the import again. Rows in Need a look stay out of the import until their issues are resolved; you can still import the rows in New.
Step 8 of 10
Confirm the new-member count
Tick the confirmation checkbox beneath the preview table. It states how many new members will be added and that existing records stay unchanged; check any message about manual account linking too.
Step 9 of 10
Import the new members
Select the Import button showing the new-member count—for example, Import 3 members in the illustration. Wait for Import finished before treating the import as complete.
Step 10 of 10
Check the finished count
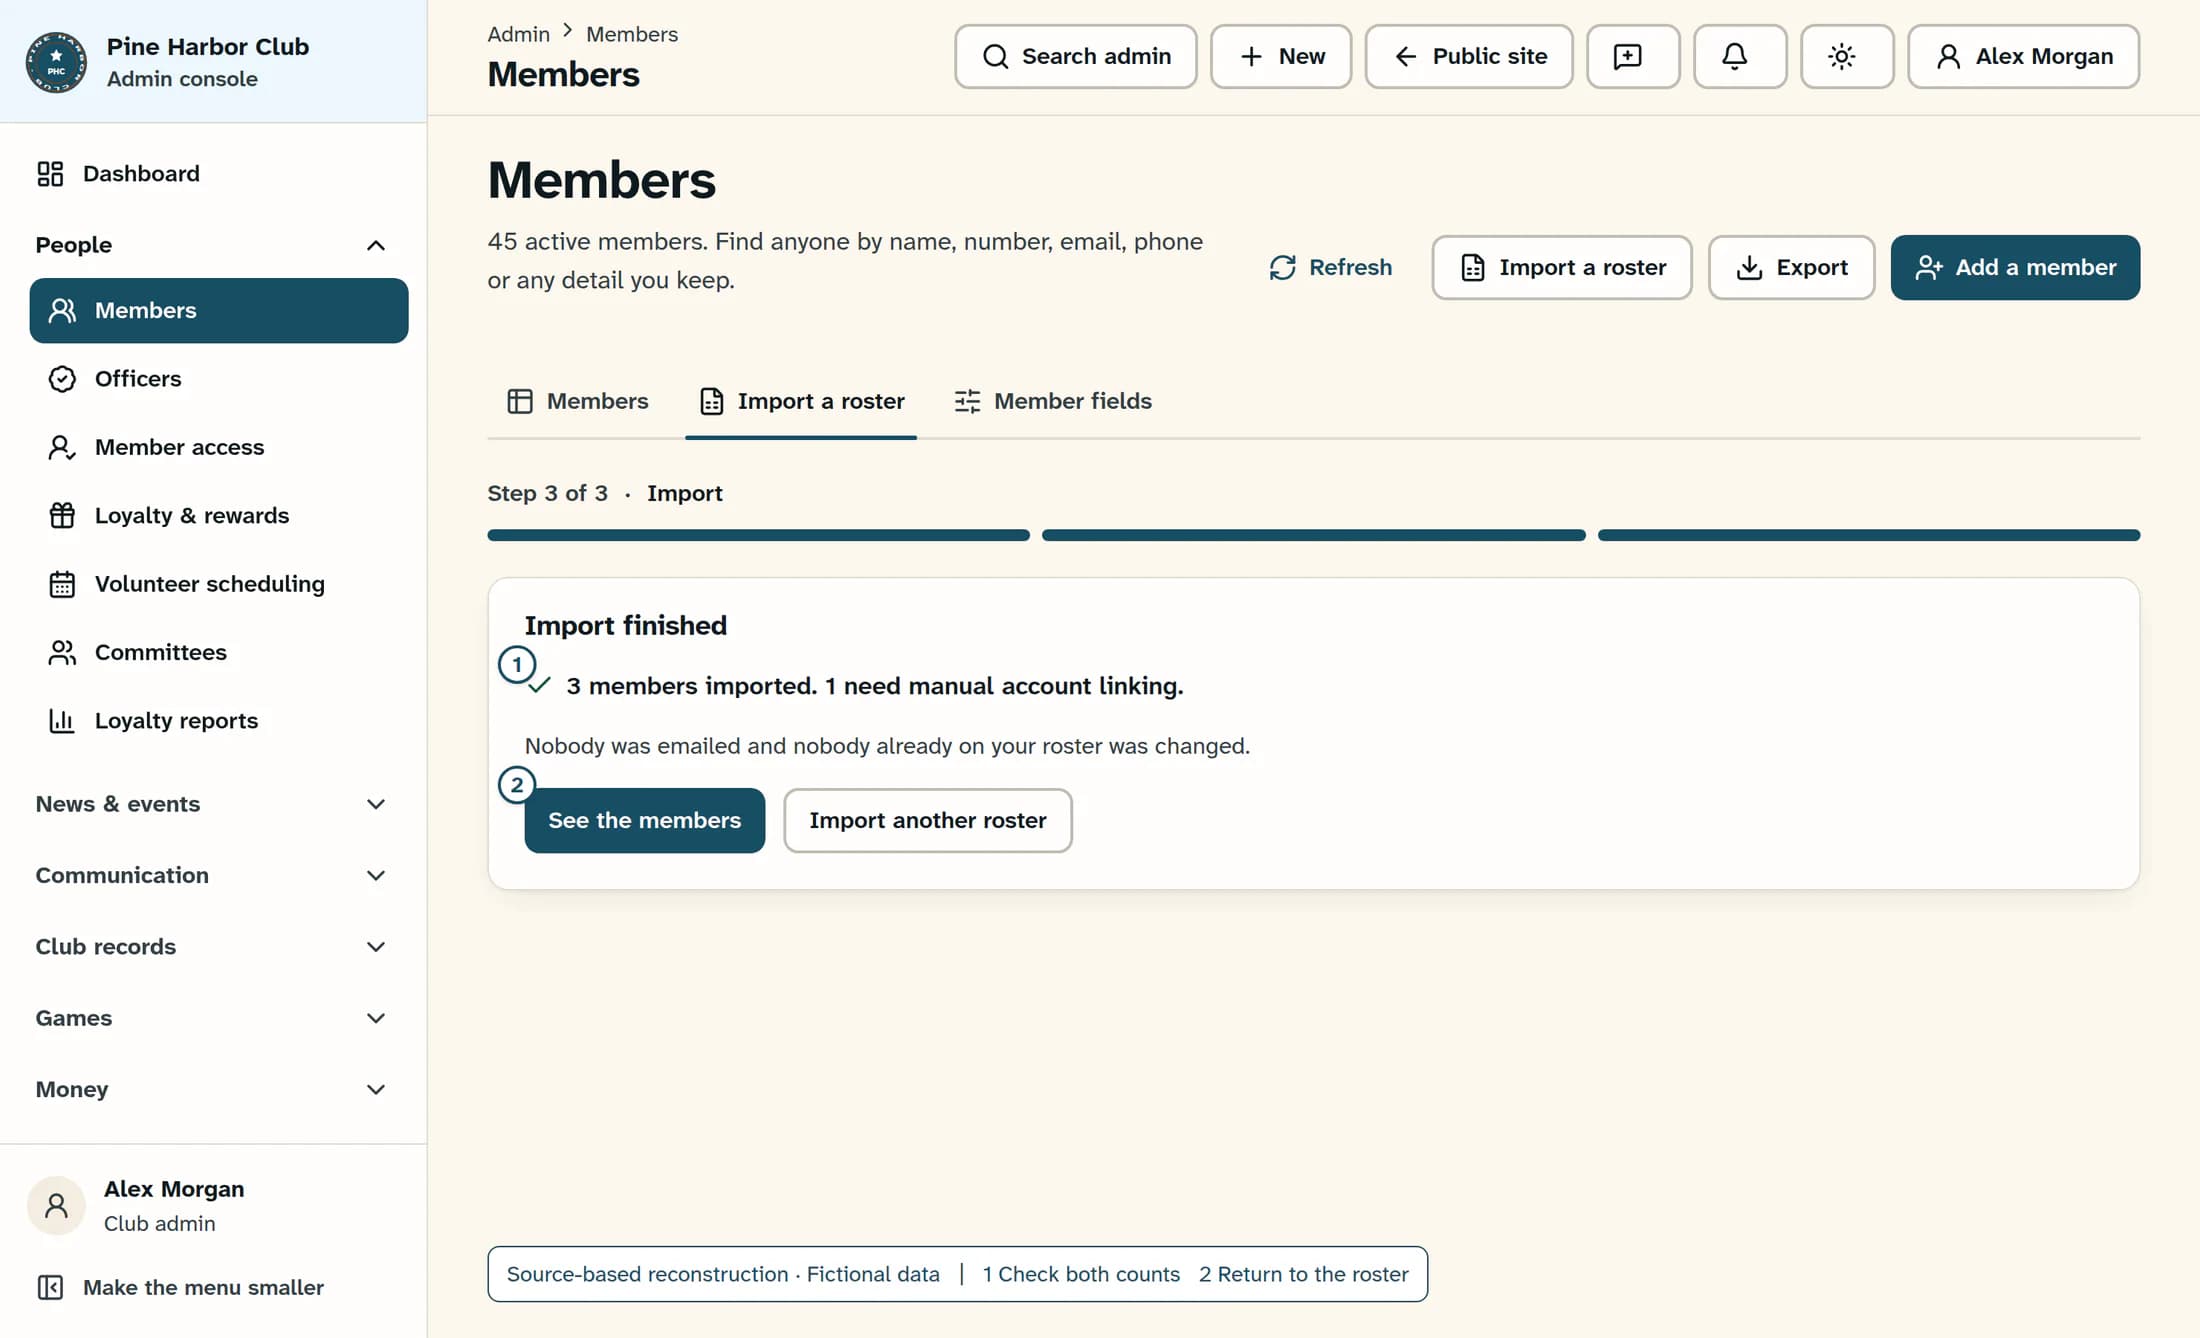
Read the imported count and how many members need manual account linking under Import finished. Select See the members to return to the roster.
What manual account linking means
The membership record exists, but its sign-in account still needs attention. Arrange a unique usable email and have an authorized manager link the account separately. Importing does not send invitations or create sign-in accounts, even for rows with usable emails.
If you cannot finish
Expected result
The confirmed new rows are added in their selected categories. Existing, duplicate and held rows are not changed, and nobody is emailed. Keep the review report for rows that need further attention.
About this guide
This guide covers ClubWorks web admin in the Clubhouse design. Clubs using the classic design may see different screens and labels. Source behavior was checked on 21 October 2026. The three annotated illustrations are source-based reconstructions with fictional data, not live production captures. No live import was performed, and this draft does not verify the member or Workforce mobile apps.
The screens in this guide show example clubs and people. Your club's name, colours and some labels may look different.