
On this page
Before you start
Step 1 of 6
Check whether the member already exists
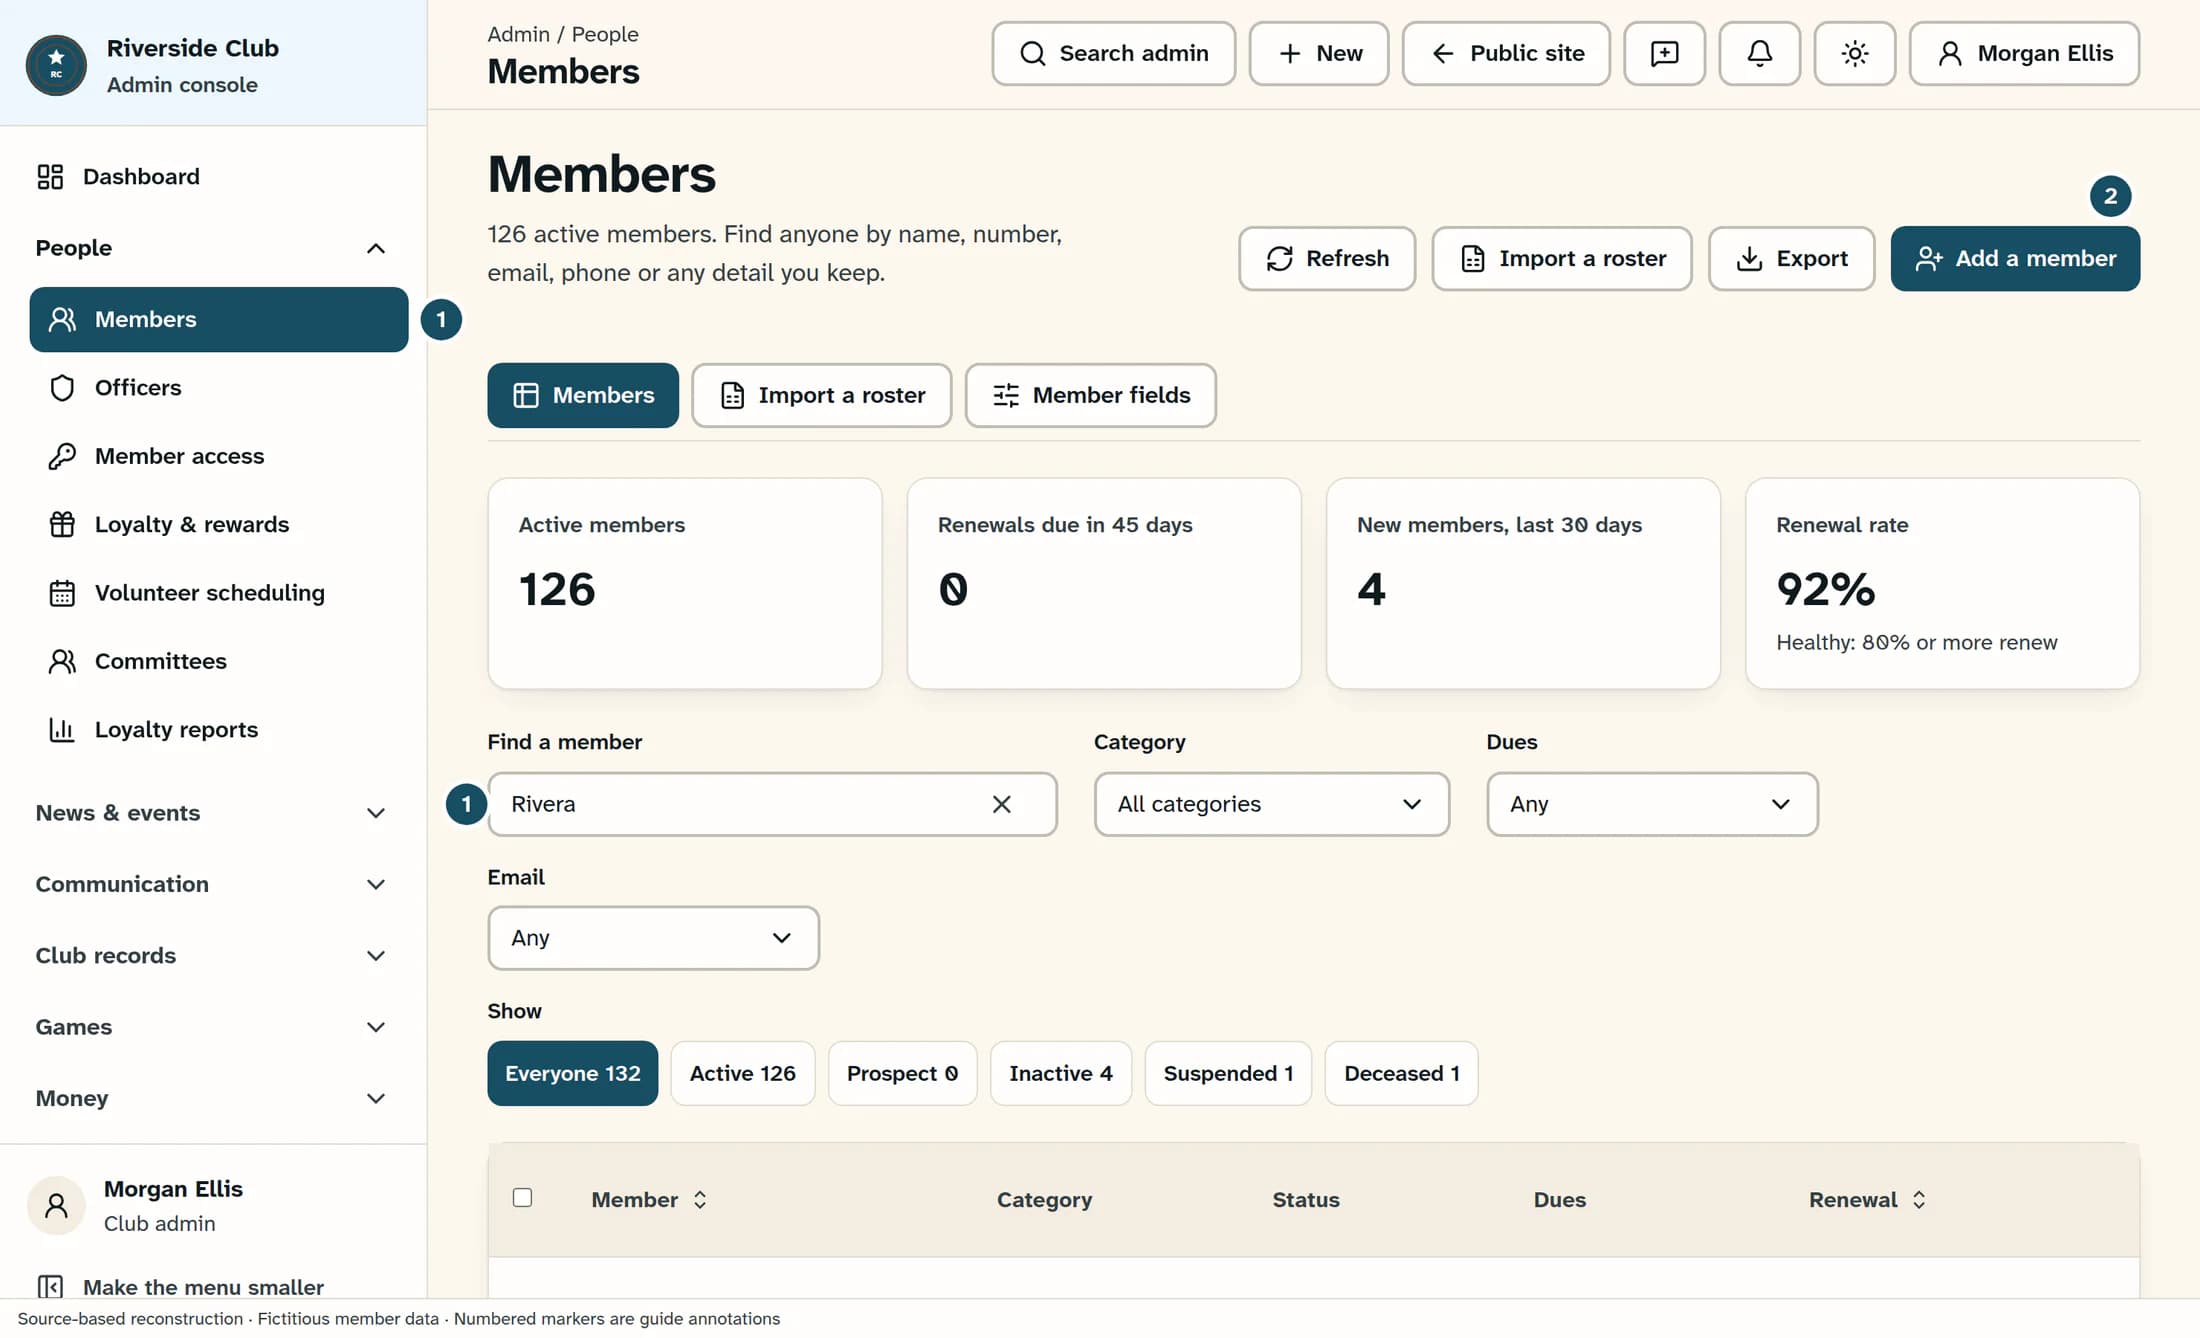
Open People > Members in the admin menu. Use Find a member to check their name, member number or email before adding them; check Everyone and broad filters so an inactive record is not missed. If you find the person, open their name and update that record instead.
Step 2 of 6
Add their name and contact details
Select Add a member, then fill in Name and contact. Enter their First name, Last name, required Email and any Phone number you have. Check the email carefully, especially if a warning appears beside it; your club may use different field labels.
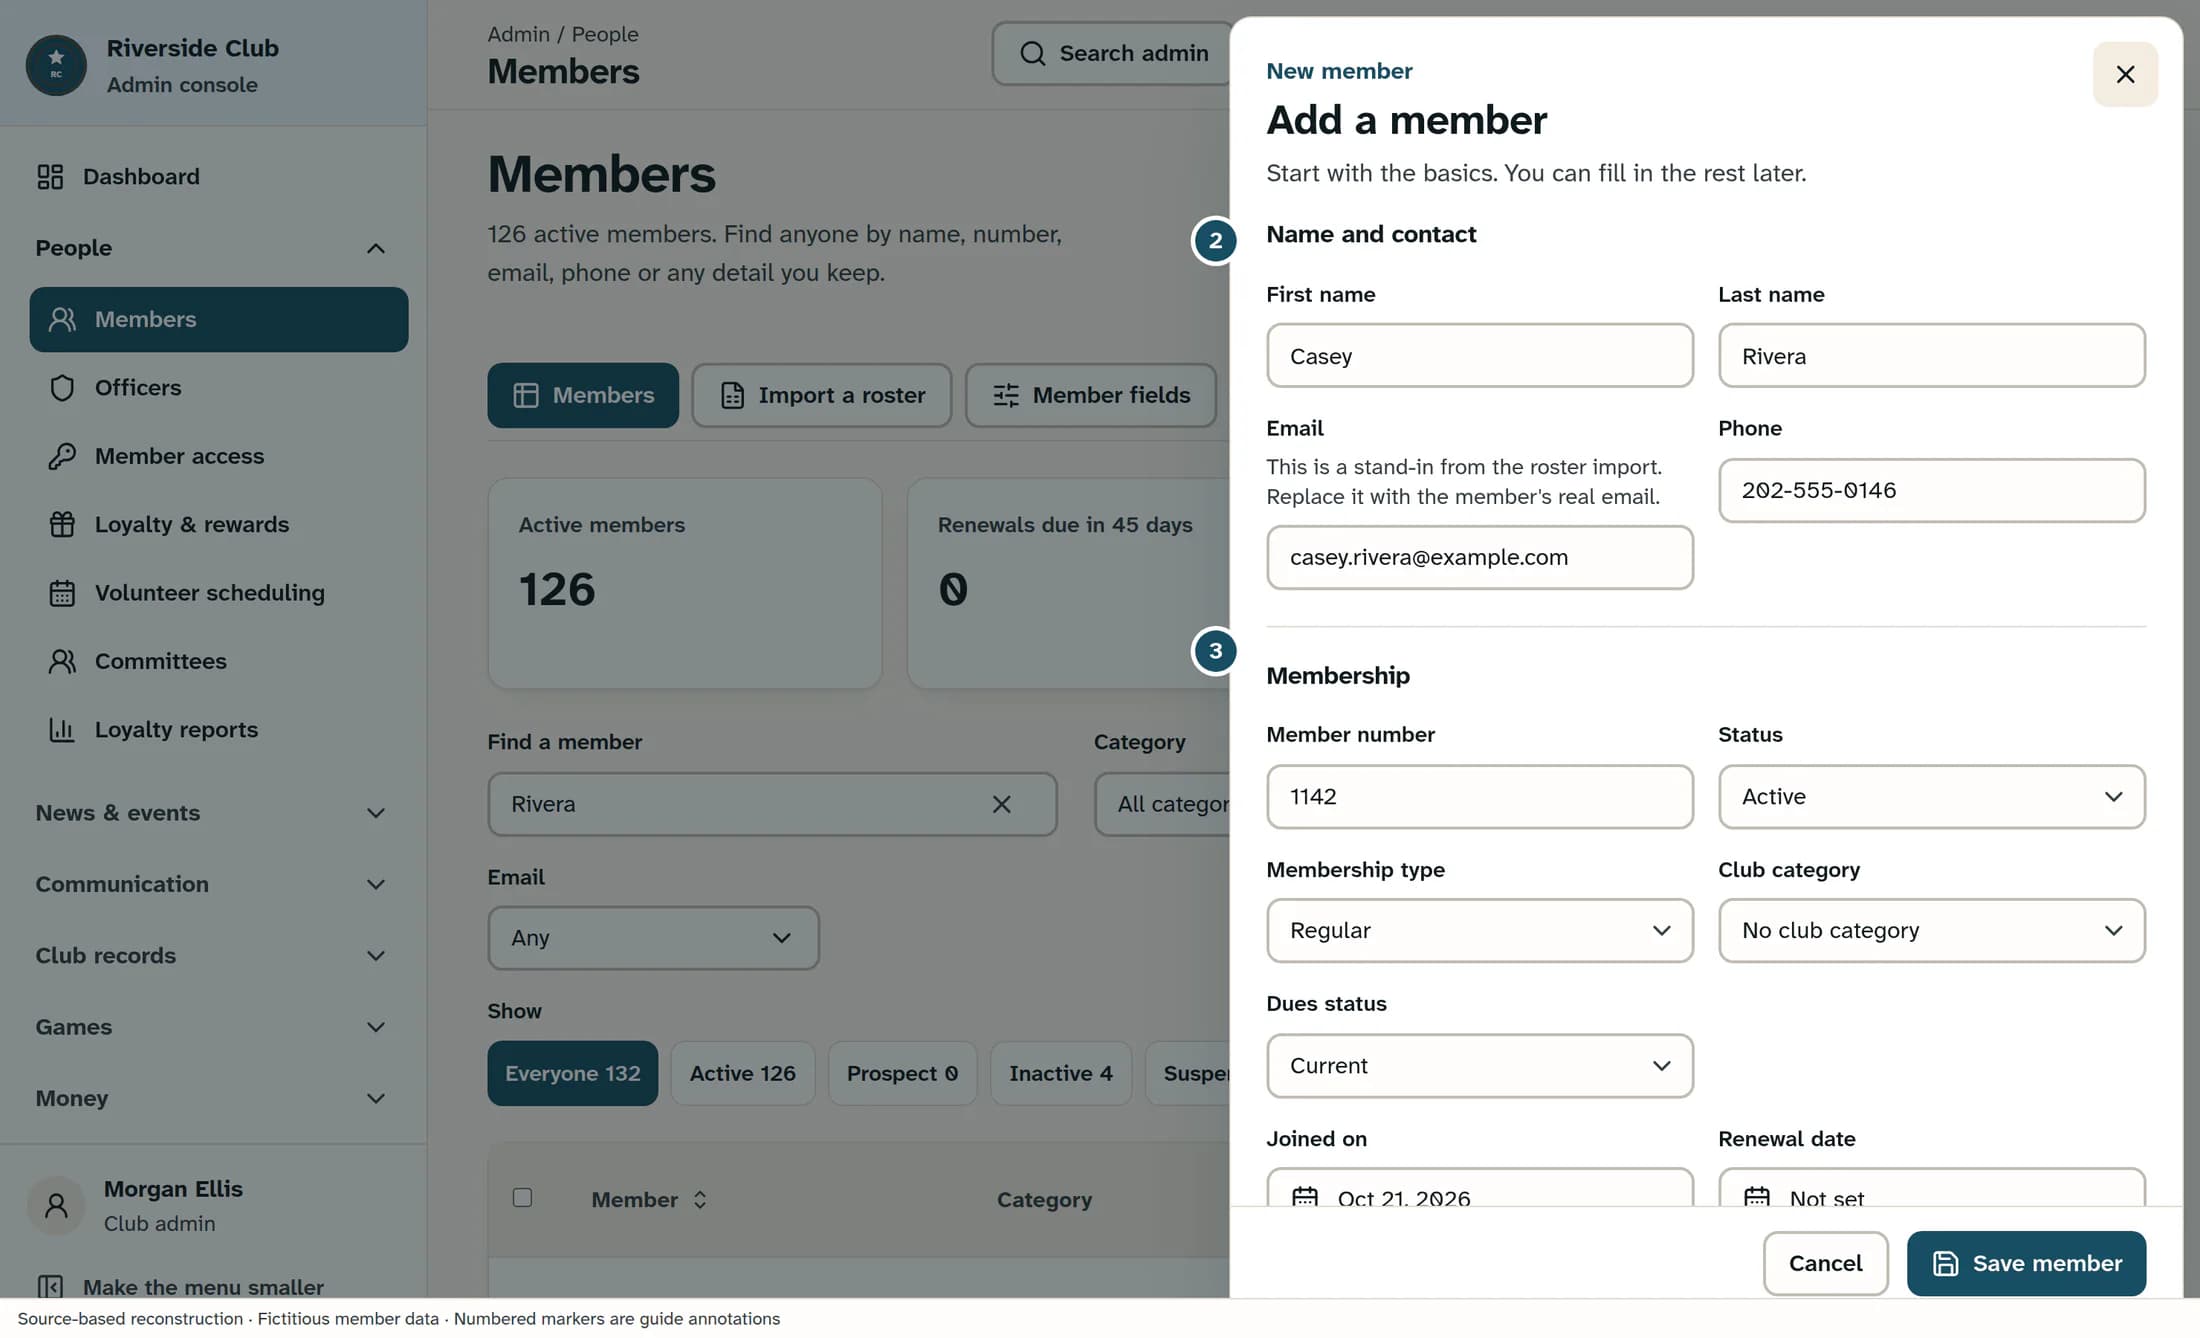
The illustration deliberately uses a fictitious example email address, which triggers the stand-in warning. Use the member’s real email address when creating their record.
Step 3 of 6
Set their membership details
In Membership, enter the member number and choose the correct Status, Membership type, Club category and Dues status. Check the defaults against your records, then fill in the joining, renewal and other dates you know. Scroll inside the panel to reach the remaining fields.
Choose values that match your records
- New records start with Active status. The other choices for a new record are Inactive, Deceased and Prospect; use Prospect for someone who has not yet become a member.
- Membership types are Regular, Auxiliary, Social, Honorary and Lifetime, but your club can rename them. Club category is a separate club-defined grouping; No club category is available.
- Dues status starts at Current. Choose Current, Due Soon, Overdue, Exempt or Not set to match what you know. This field records a status; saving it does not record or collect a dues payment.
- The form includes the joining date, Renewal date, Expiration date, Paid through and Last renewed. If Expiration date is blank, saving uses Renewal date when one is supplied.
Step 4 of 6
Check their sign-in access
In Access, keep Role set to Member for an ordinary member. Leave Active login profile on if they should be allowed to sign in; turning it off keeps their membership record and history but stops sign-in. Only a club admin can grant an admin or officer role; choose one only when that person should have the club tools allowed by that role.
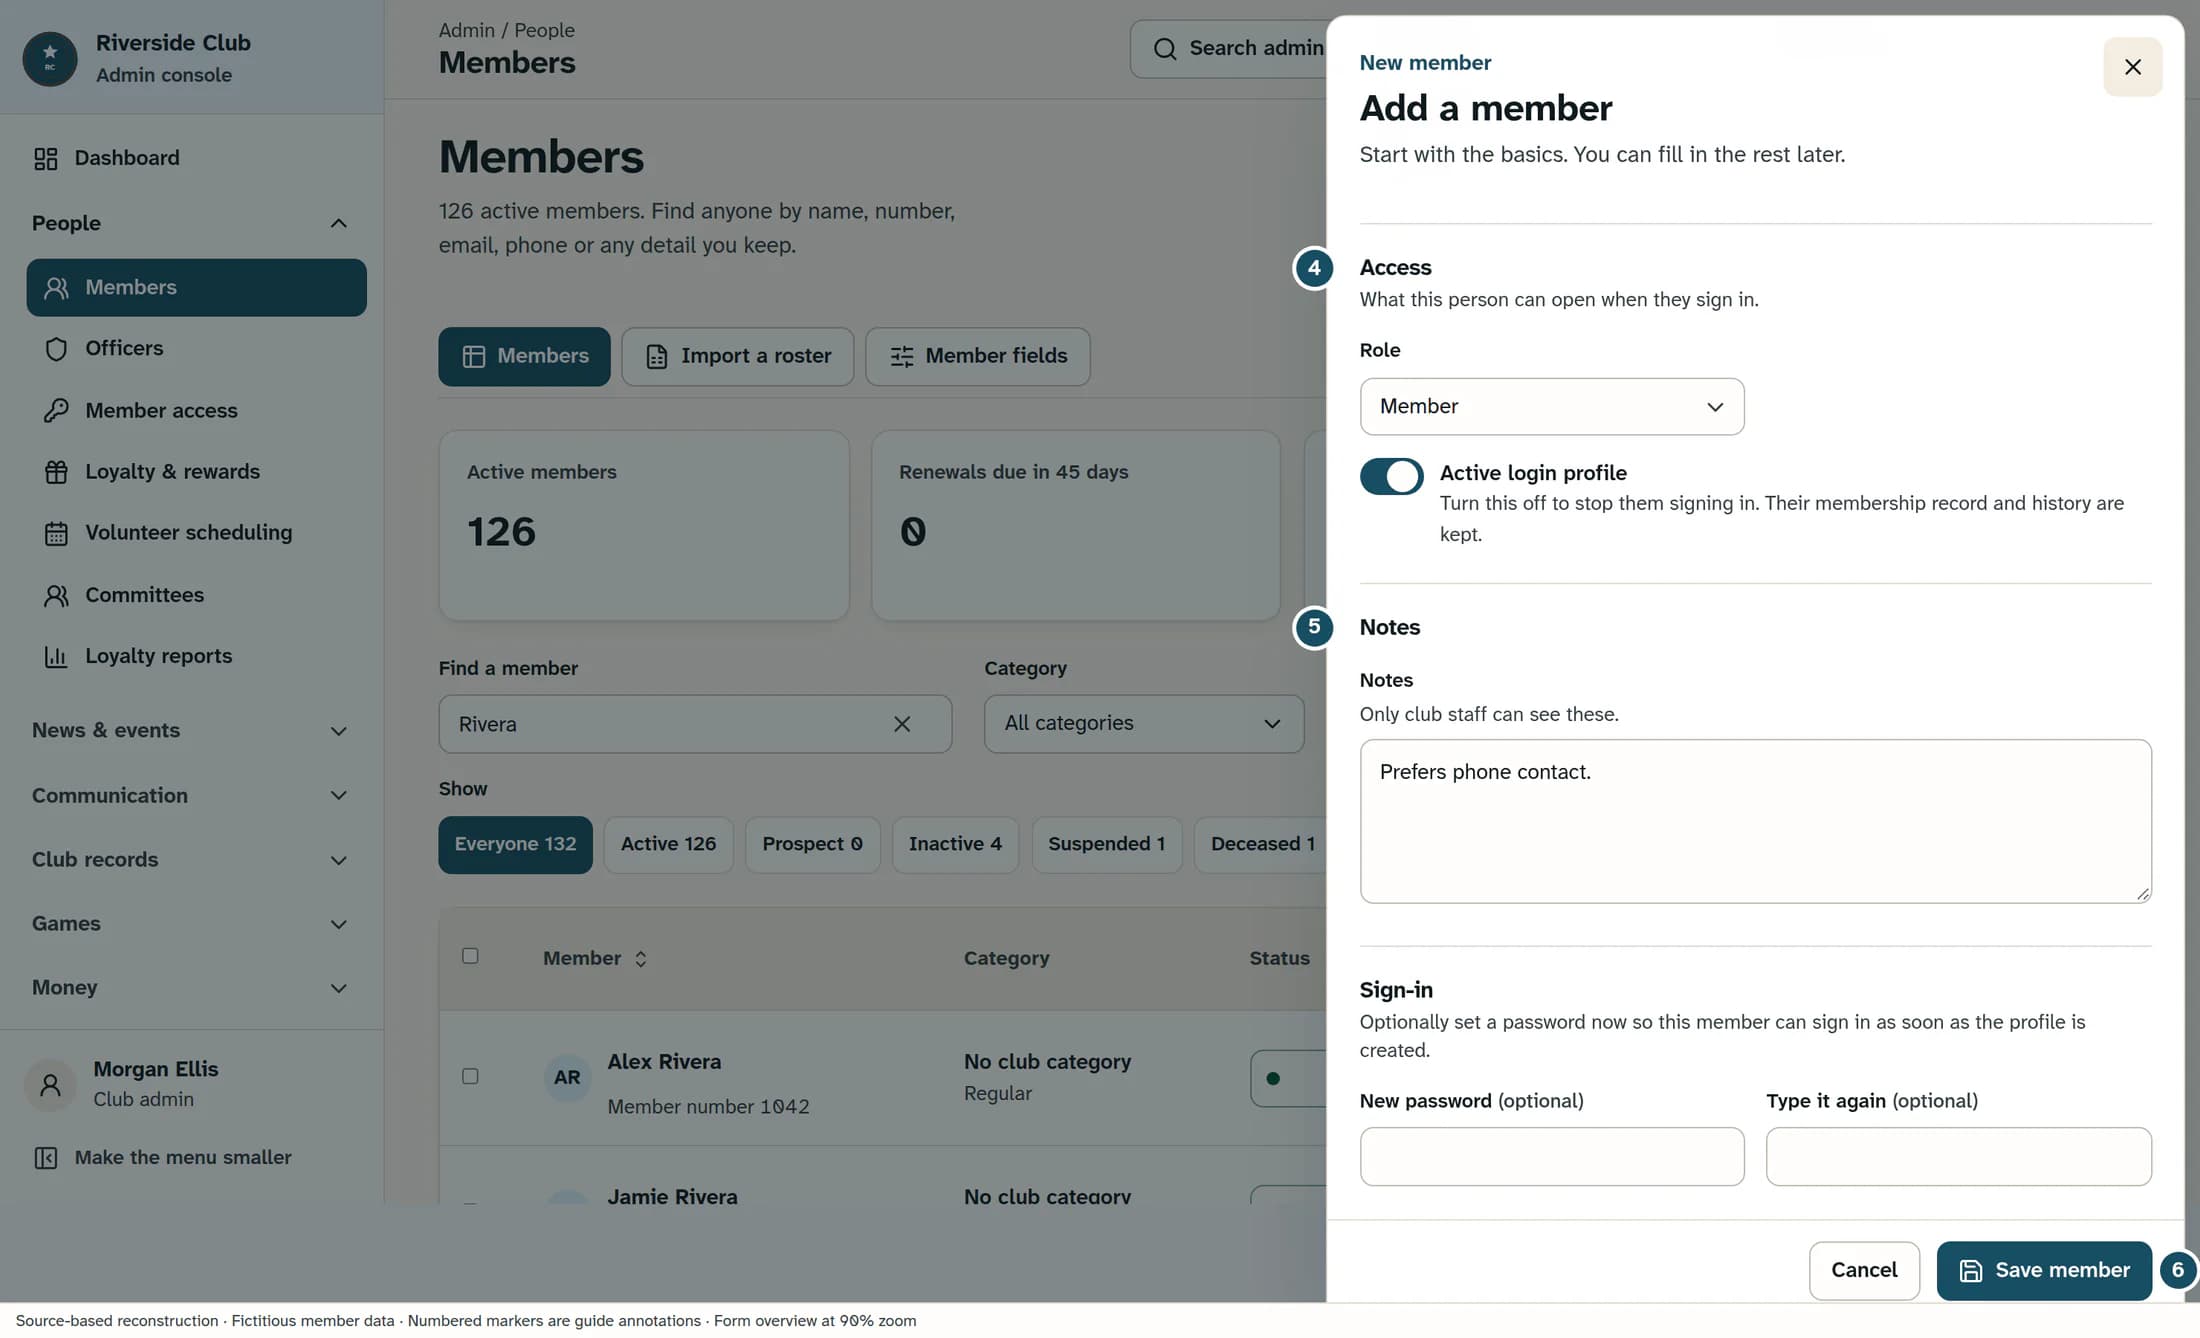
If a club admin grants an admin or officer role, Save asks you to confirm because it opens those admin tools to the person. Review the role and person before confirming. A member profile and an active login setting do not by themselves grant physical door access.
Step 5 of 6
Complete any extra details and optional password
Complete any required fields in Extra details, if that section appears, and add Notes only for information club staff should see. If you are a club admin setting an initial password, enter at least 8 characters in New password under Sign-in and enter the same value in Type it again. Otherwise leave both password fields blank.
Step 6 of 6
Save the member
Review the details, then select Save member at the bottom of the panel. A successful save closes the panel and shows “Member profile created.”, or “Member profile created and password set.” if the password was also saved. Use Find a member to locate the new record and confirm the details.
What saving does
Saving creates the member profile and membership record. It does not send an invitation or create sign-in credentials when you leave the password fields blank; the member can follow Sign in to ClubWorks with your password or a one-time code when ready.
If something does not save
Illustrations are source-based reconstructions of the current Clubhouse web interface, with fictitious names and example data. Your club’s branding, field labels and categories may differ.
You’re done
The member is now on the roster with the membership and access settings you saved. Invitations, dues payments and door access are separate tasks.