
On this page
Before you start
Step 1 of 5
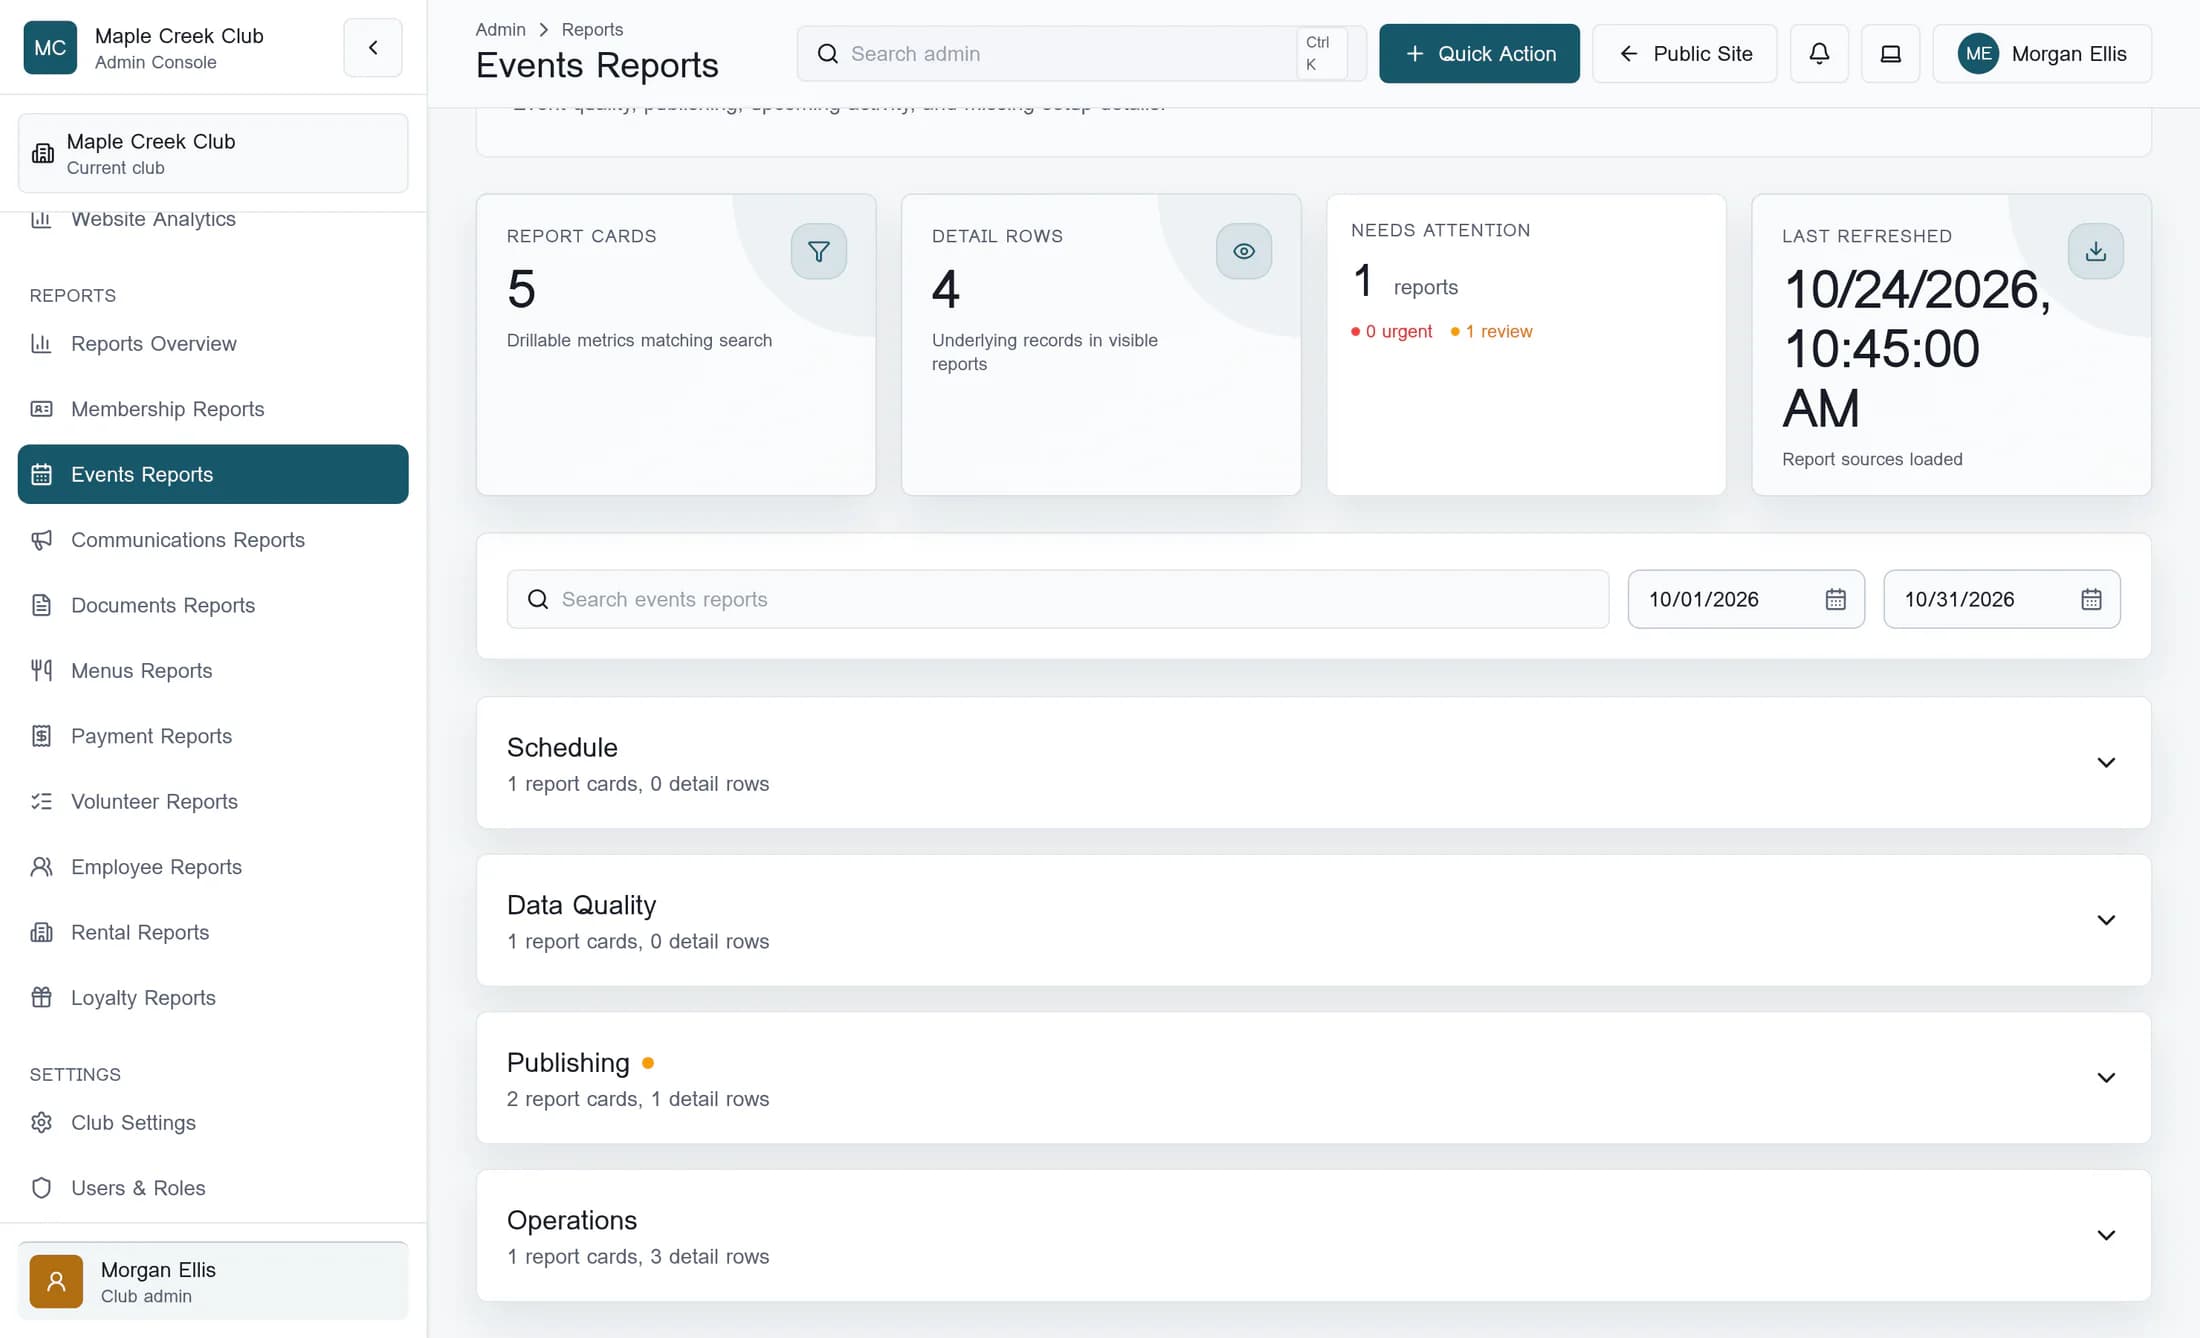
Open Events Reports and enter the date range
In the classic admin menu’s Reports category, open Events Reports. Wait for the loading message to disappear; if Some report data could not be loaded, so a few reports may be incomplete. Refresh the page to try again. appears, reload the browser page and resolve any continuing access or loading issue before relying on the results.
In Report date from, enter October 1, 2026; in Report date to, enter October 31, 2026. The native date fields may display your browser’s date format. Dates apply as the values change; there is no Apply dates button in this classic view.
Events are filtered by their stored start date. Our example includes three October dinner events and excludes a November dinner event. The dates do not filter event creation dates or individual registrations.
Step 2 of 5
Open Registration Required under Operations
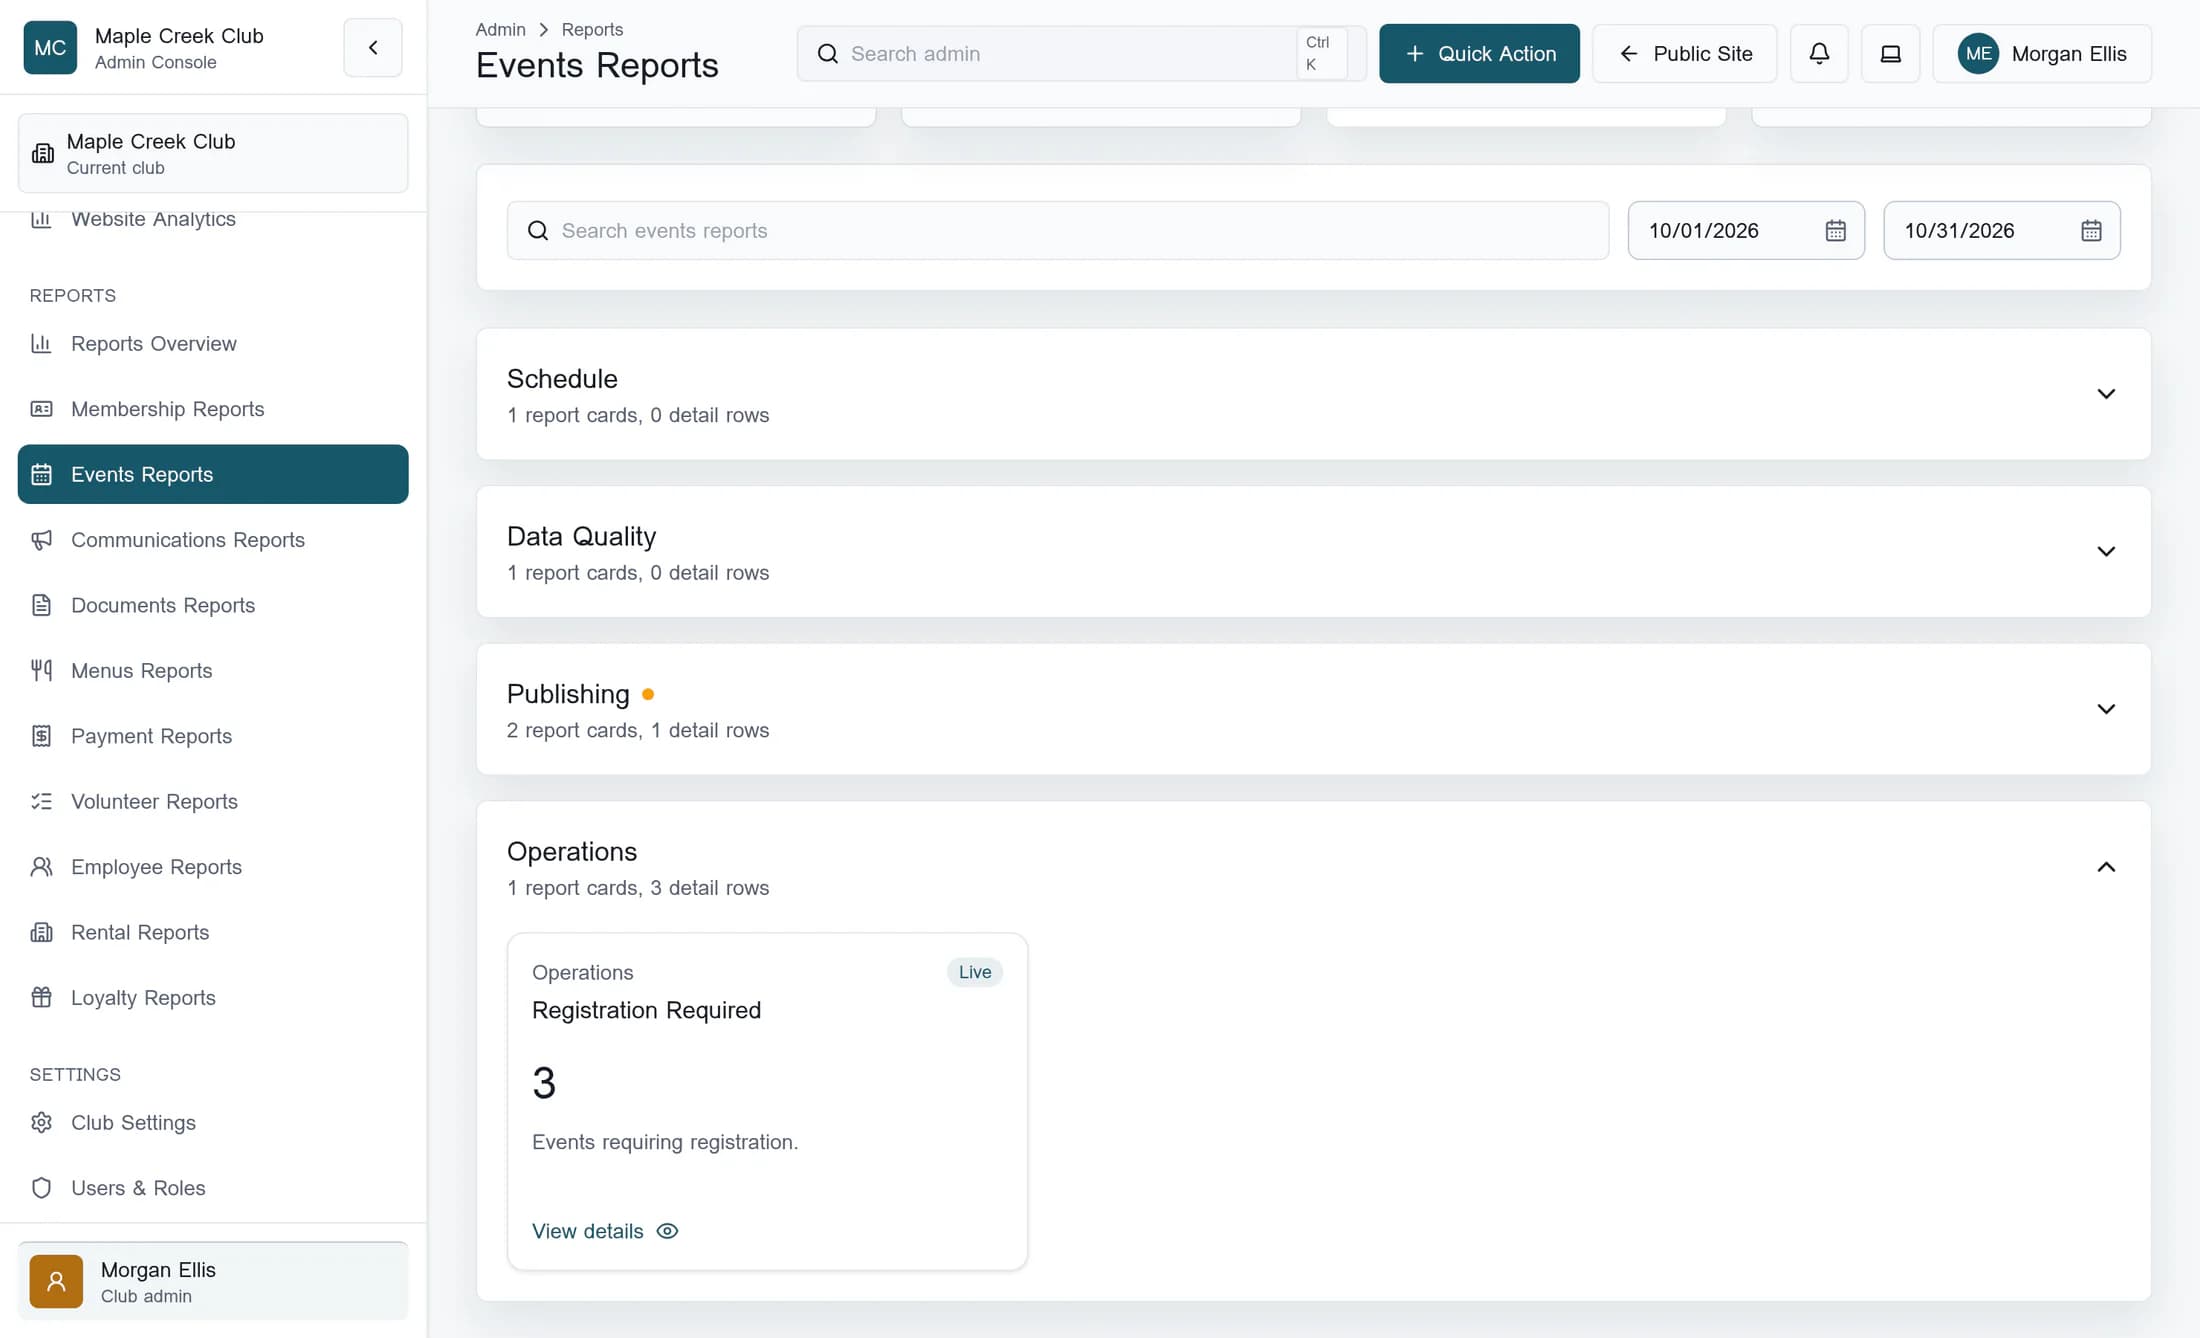
Expand Operations, then find Registration Required and click its card using the View details prompt. The whole card is the button. This report contains events that require registration, not registrations, guests or attendance totals.
The fictional card has three events after the October range is applied. Opening the drawer clears its previous row search and status choice, and sorts the first column, Event, ascending.
Step 3 of 5
Combine row search and status
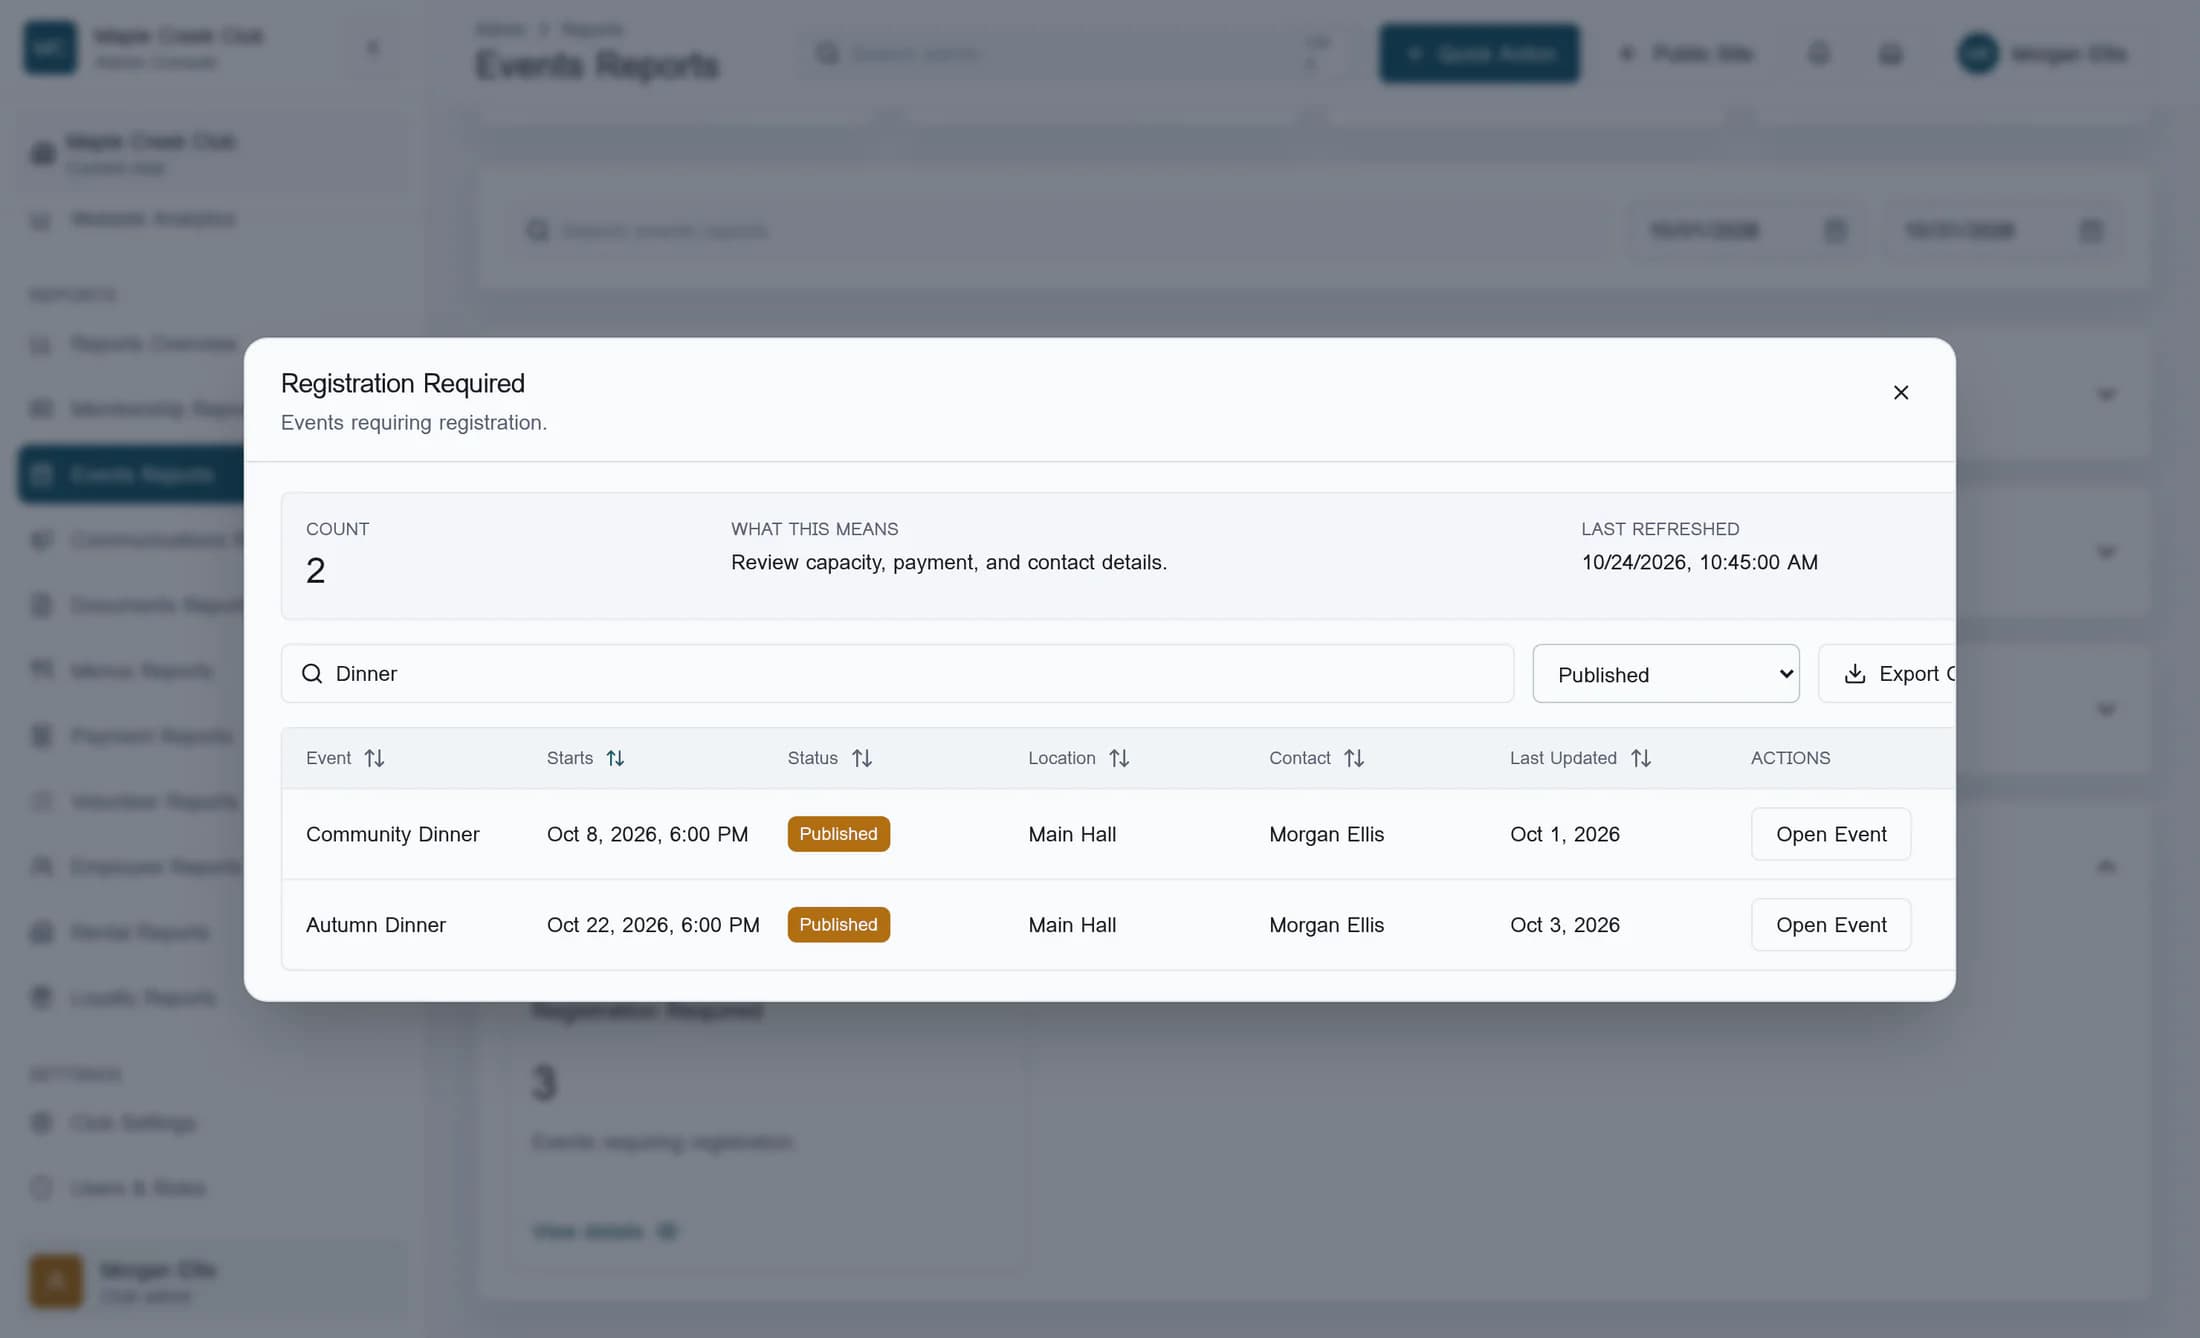
In the drawer’s Search names, emails, status, dates, or numbers field, type Dinner. In Detail status filter, choose Published. The two filters work together: a row must match both the search and the selected status.
The search checks the record’s searchable details and displayed cells. The available statuses come from the current report rows; for this event report, they are publication statuses, such as Draft and Published.
Count now shows two matching events: Community Dinner and Autumn Dinner. The October draft event is excluded by status, and the November event remains outside the page’s date range. Detail Rows on the page behind the drawer does not change when you use these drawer-only filters.
Step 4 of 5
Sort the matching rows
Click Starts in the drawer’s column headings. A newly selected column sorts ascending; clicking that same heading again reverses the direction. Sorting compares displayed text, not timestamps. Check dates and times yourself: month names, years and 12-hour times can produce an order that is not chronological.
The illustrated result shows Community Dinner on October 8 followed by Autumn Dinner on October 22. Sorting changes the order, not which rows match.
Step 5 of 5
Clear the row filters and date range
To see all rows in the current date range again, delete Dinner from Search names, emails, status, dates, or numbers, then choose All statuses in Detail status filter. The example returns to three October events.
Click Close at the drawer’s top right. Clear both Report date from and Report date to on the report page to remove the date restriction. Clearing only one date leaves a one-sided range. There is no Clear dates button in this classic view.
If the results are empty or unexpected
Your filters are under control
You can now apply a date range to a dated report, combine row search with status, sort the results and clear each filter. Check the report’s date meaning and loading state before interpreting a zero or comparing totals.