
On this page
Before you start
Step 1 of 8
Open the volunteer job
Under People, open Volunteer Scheduling. On Jobs, open the job you want to schedule. From its page, select Add a role; if it already has the role you need, you can use Add shifts instead.
Step 2 of 8
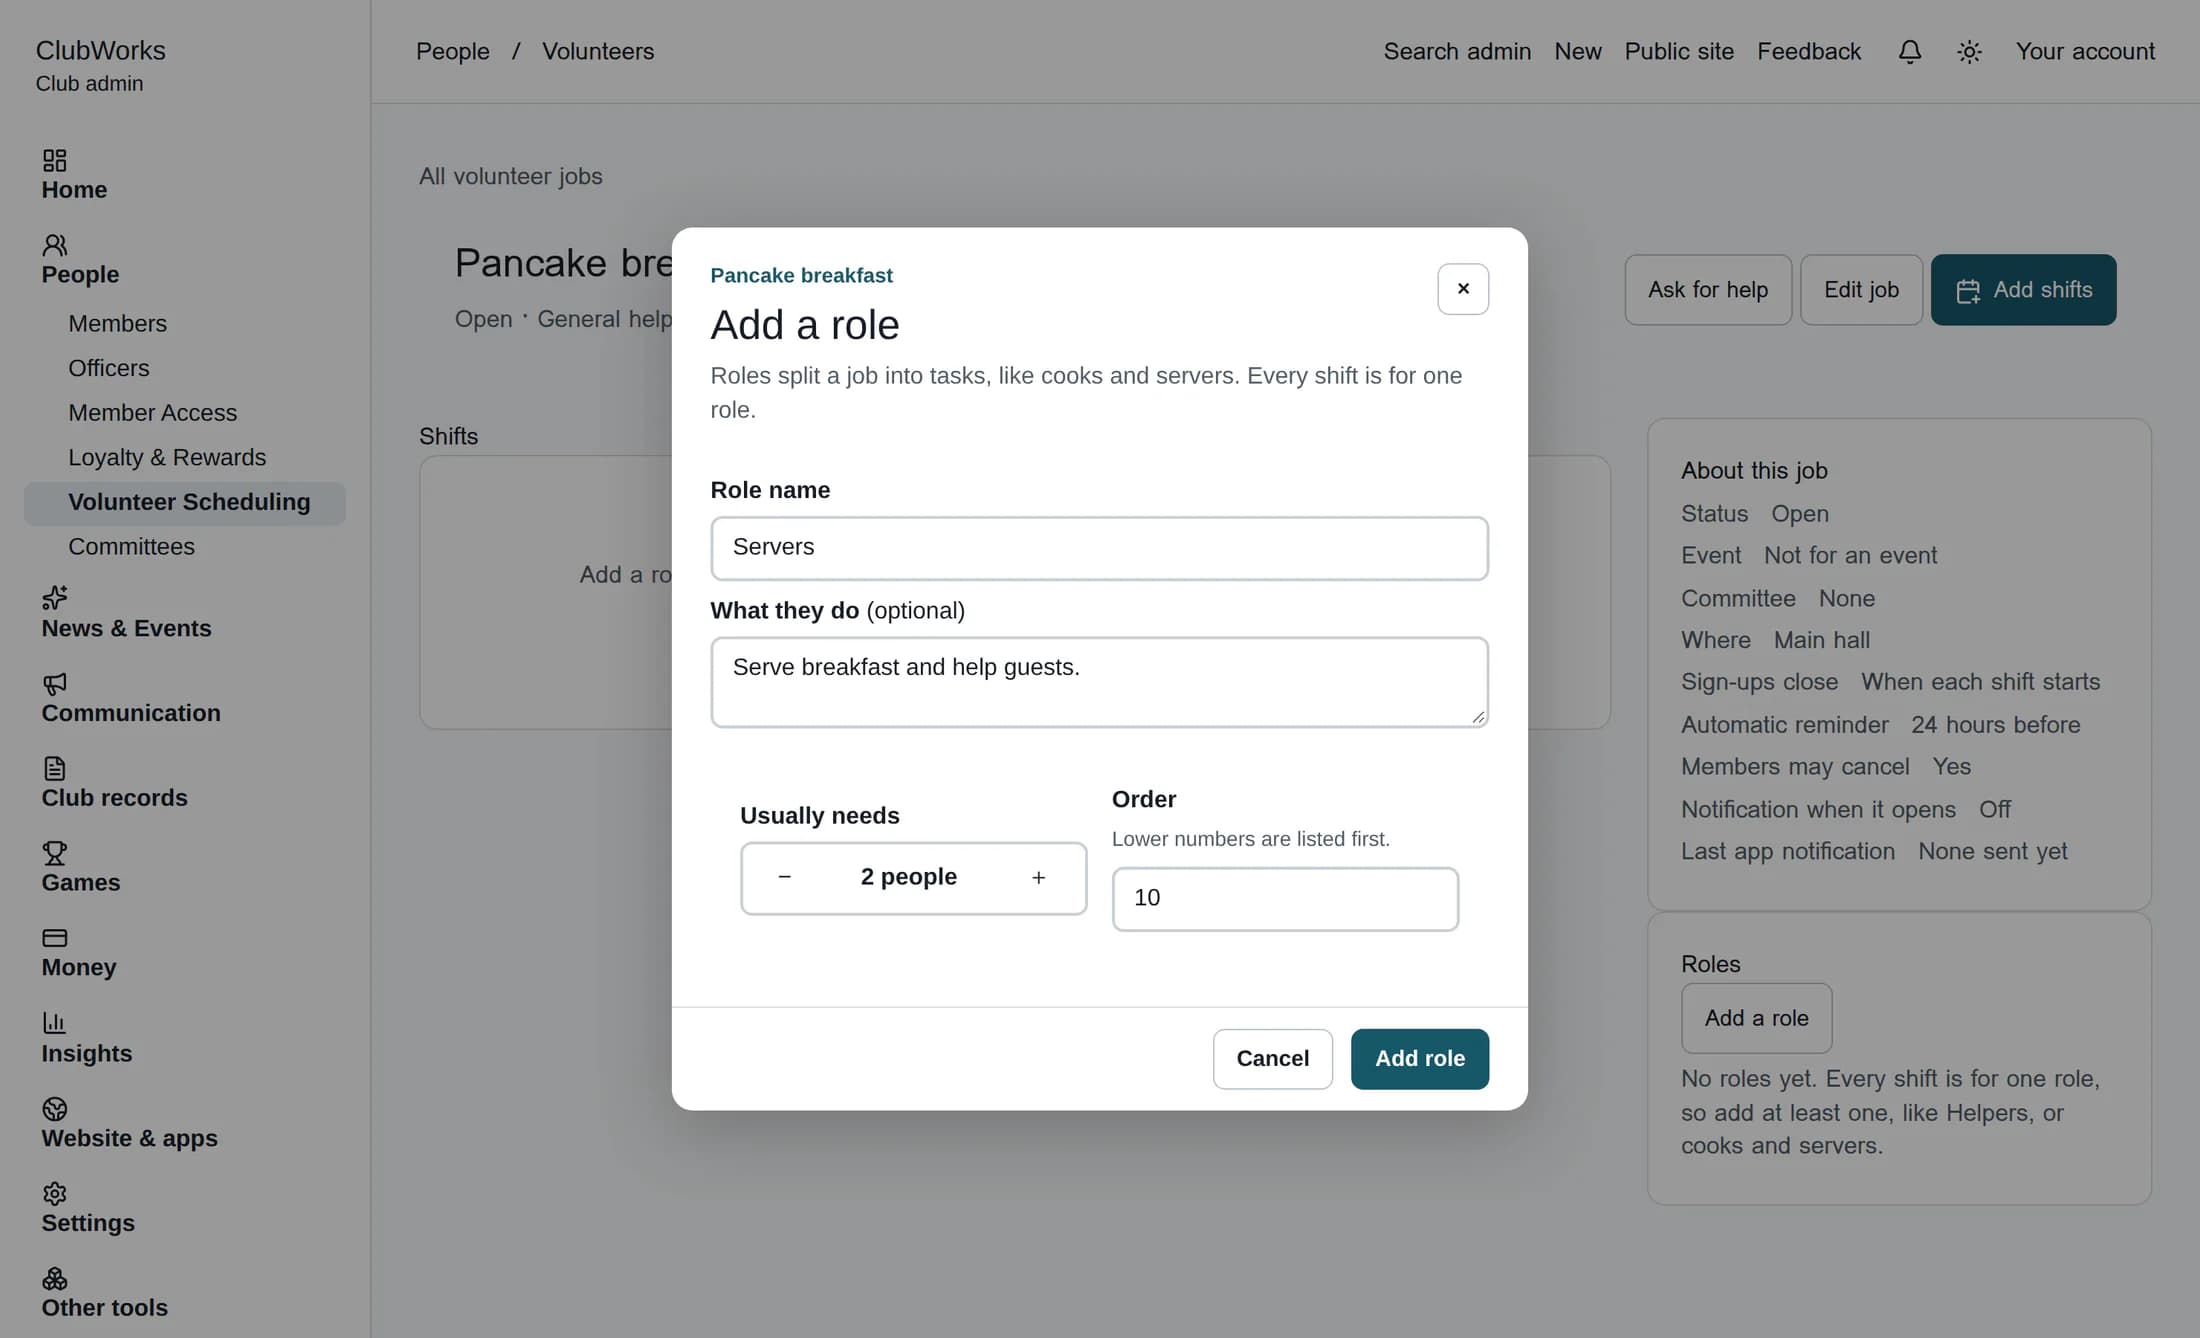
Add a role
Enter a unique Role name, such as “Servers,” and optionally describe What they do. Set Usually needs to the usual number of people (1–500); it starts at two. Leave Order at its default or enter a signed whole number with at most four digits; lower numbers appear first. Select Add role. A role name already used in this job is rejected, ignoring capitalization.
Step 3 of 8
Start adding shifts
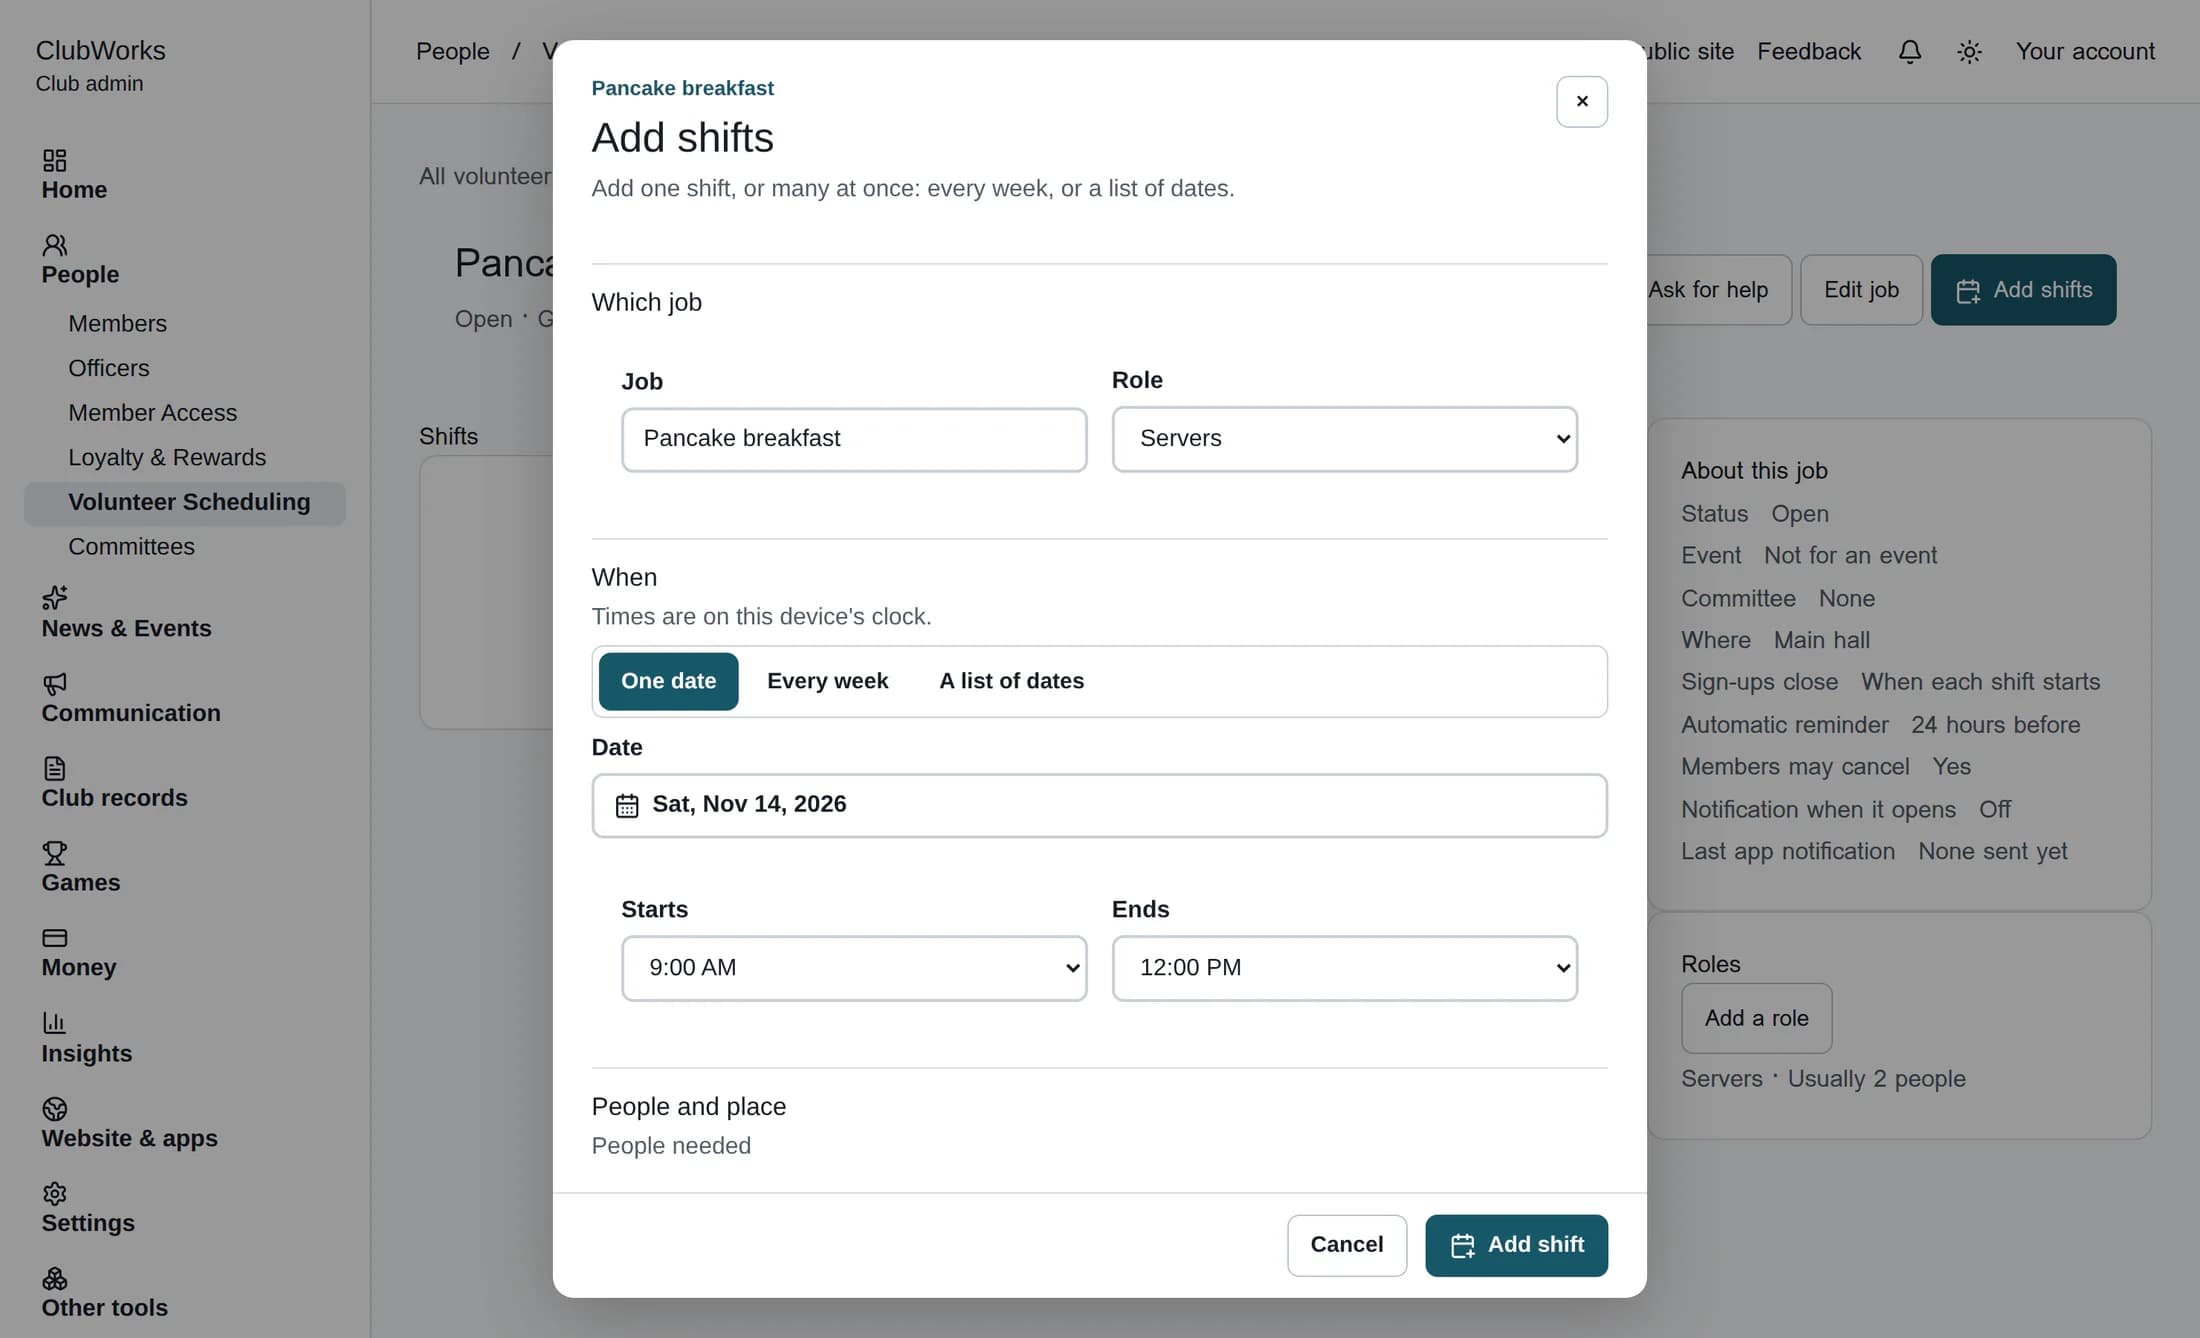
On the job page, select Add shifts. Choose the Role for these shifts. If the job has no roles, use Add a role in the dialog first. The selected role’s usual number is used for People needed until you change it.
Step 4 of 8
Choose dates and times
Under When, choose One date, Every week, or A list of dates. For one date, choose Date. For weekly shifts, choose the weekday under Every, the From and Until dates, then untick dates you want to skip; quick picks can fill a month’s range. For a list, choose each date and select Add this date; remove a date with its remove button if needed. New dates must be today or later. Weekly selection shows at most 60 matching dates.
Step 5 of 8
Set the shift times
Choose Starts and Ends using your device’s clock. Both are required and cannot be the same. If the end time is earlier than the start time, the shift ends the next day; the form identifies it as an overnight shift.
Step 6 of 8
Set capacity and sign-up options
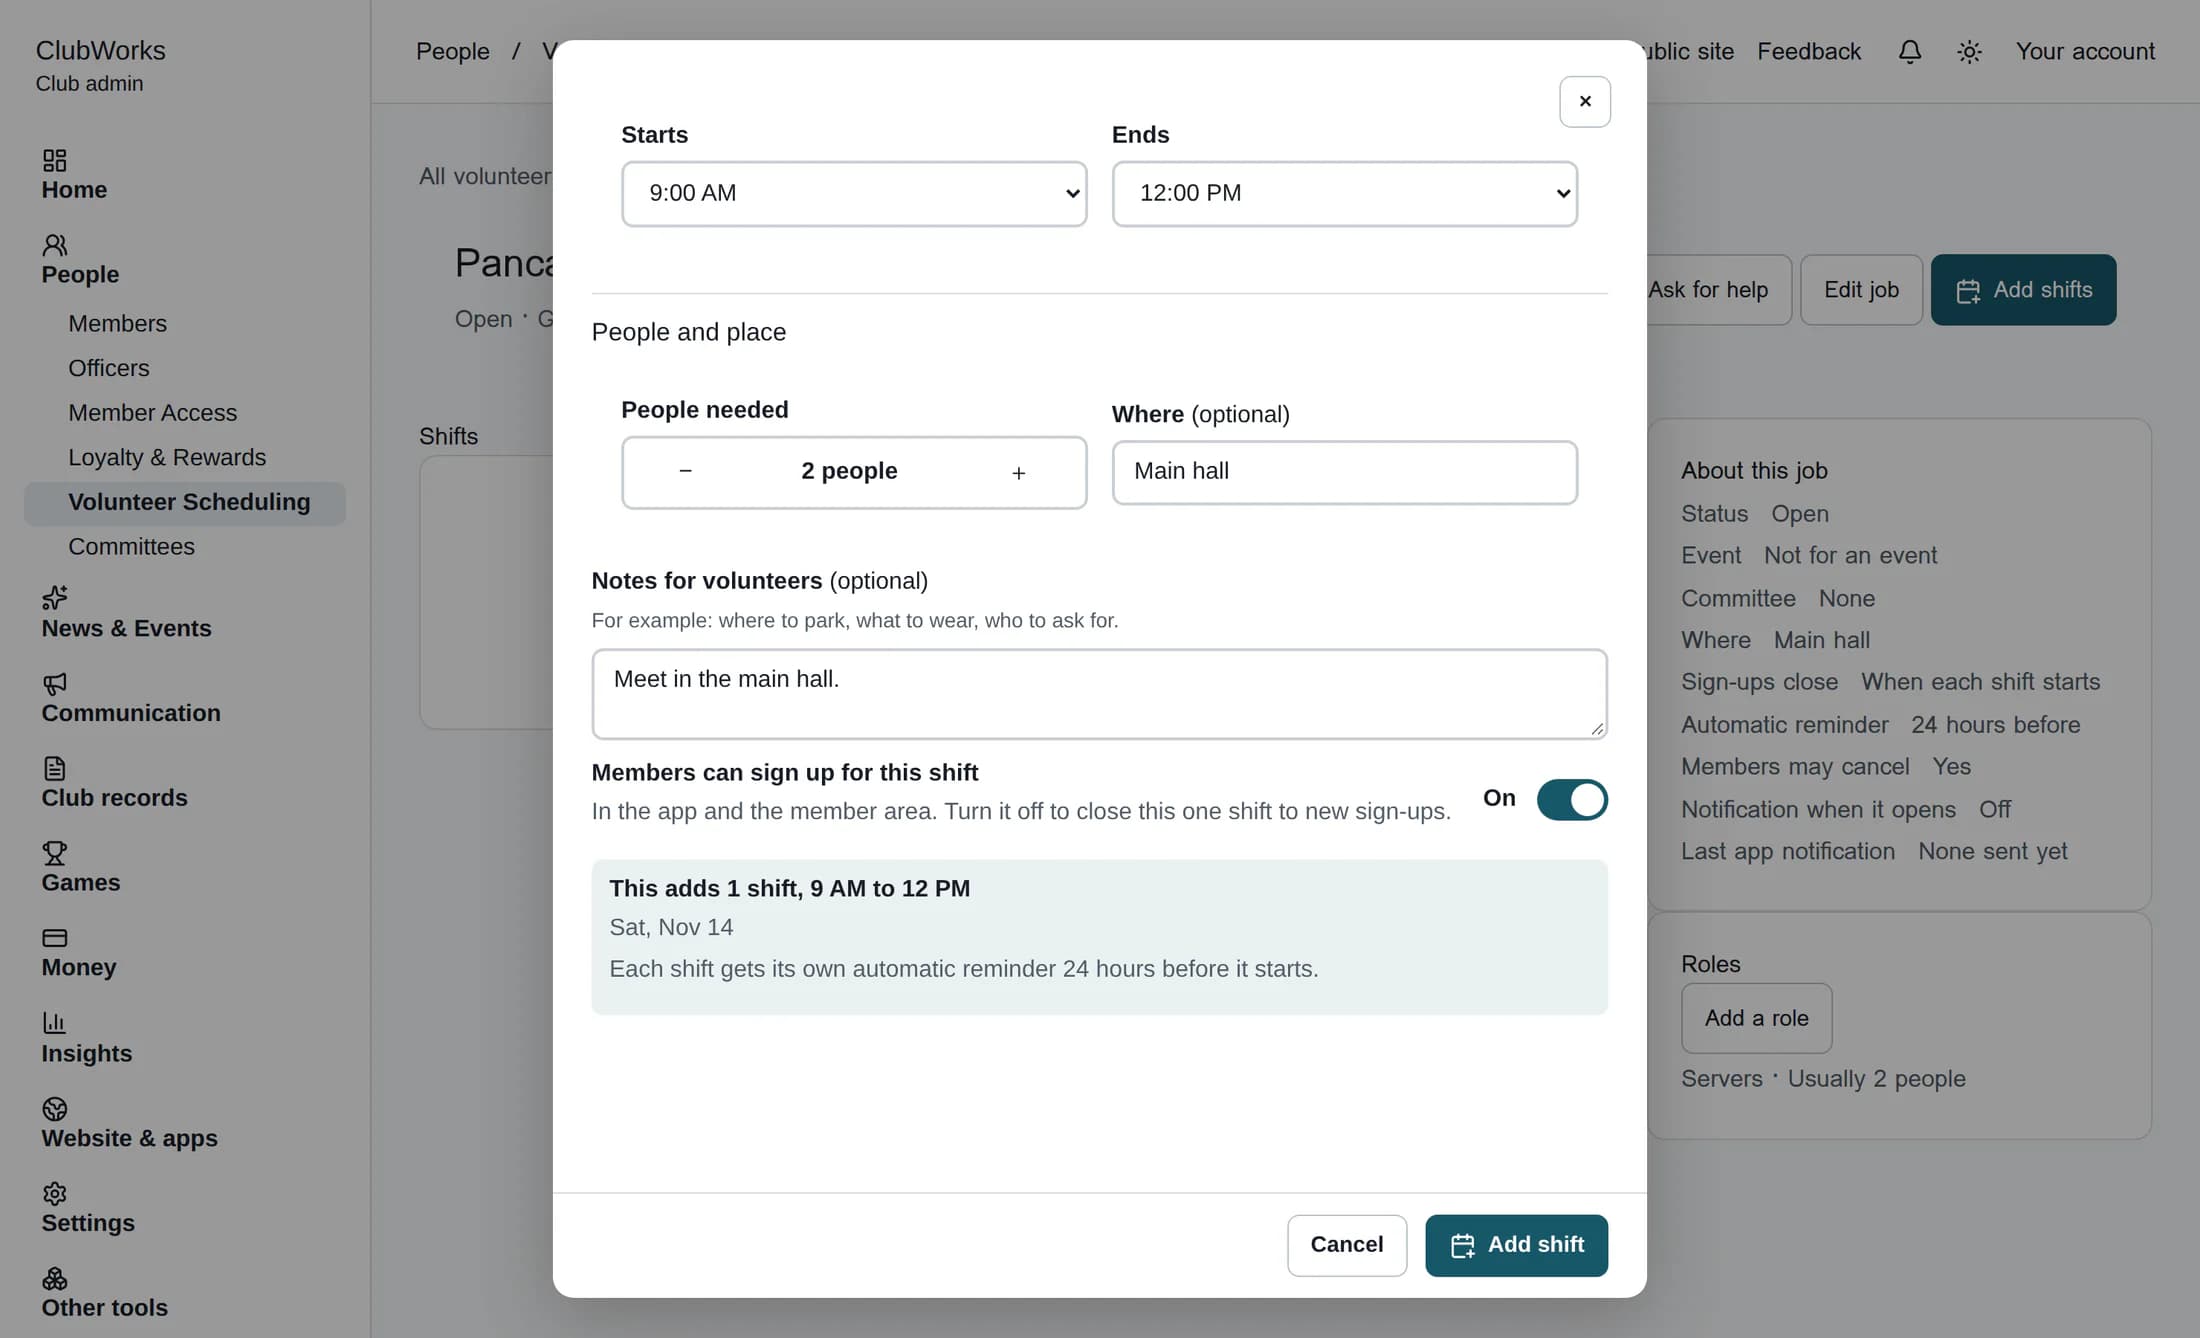
Under People and place, set People needed from 1 to 500 for each shift. Optionally enter Where and Notes for volunteers. The job’s location can be filled in initially; each shift may have its own place. Leave Members can sign up for this shift on to allow new sign-ups in the app and member area, or turn it off to close this shift to new sign-ups. The job also needs to be Open for members to sign up, and its deadline and available capacity apply.
Step 7 of 8
Review and add the shifts
Review What this adds and select Add shift or Add [number] shifts. A shift with the same job, role and start time is skipped; the preview and success message list skipped dates. If every selected date already has that shift, choose another date or role. If validation or saving fails, correct the message and try again; the batch is submitted together. On success, the job opens and confirms how many shifts were added.
Step 8 of 8
Understand reminders and visibility
Adding shifts does not itself send a call-for-help announcement. Automatic reminders follow the job’s settings and status, and only reach eligible signed-up volunteers through the available notification channels. Draft, Completed and Cancelled jobs do not send reminders; Sign-ups closed can still send them. Check the job’s status and settings before relying on reminders or member visibility.
Next
Check the job’s shifts and available places, then open the job when it is ready for members.