On this page
- Before you start
- Open the event editor
- Give the event a name
- Set the time and place
- Choose Draft before saving
- Keep it a one-off event
- Optional cover and contact details
- Save the simple public draft
- Confirm the draft saved
- Reopen the draft for a final check
- Publish the event
- Check what attendees can see
- What the optional settings do
- Publishing and notifications are separate
- If something does not work
- Related tasks
- Expected result
Before you start
Step 1 of 10
Open the event editor
In your club’s admin menu, open News & events, then Events. Select Create event.
Step 2 of 10
Give the event a name
Enter a Title, such as Community Games Night. Add a Tagline, Short summary and description if attendees need more detail.
Step 3 of 10
Set the time and place
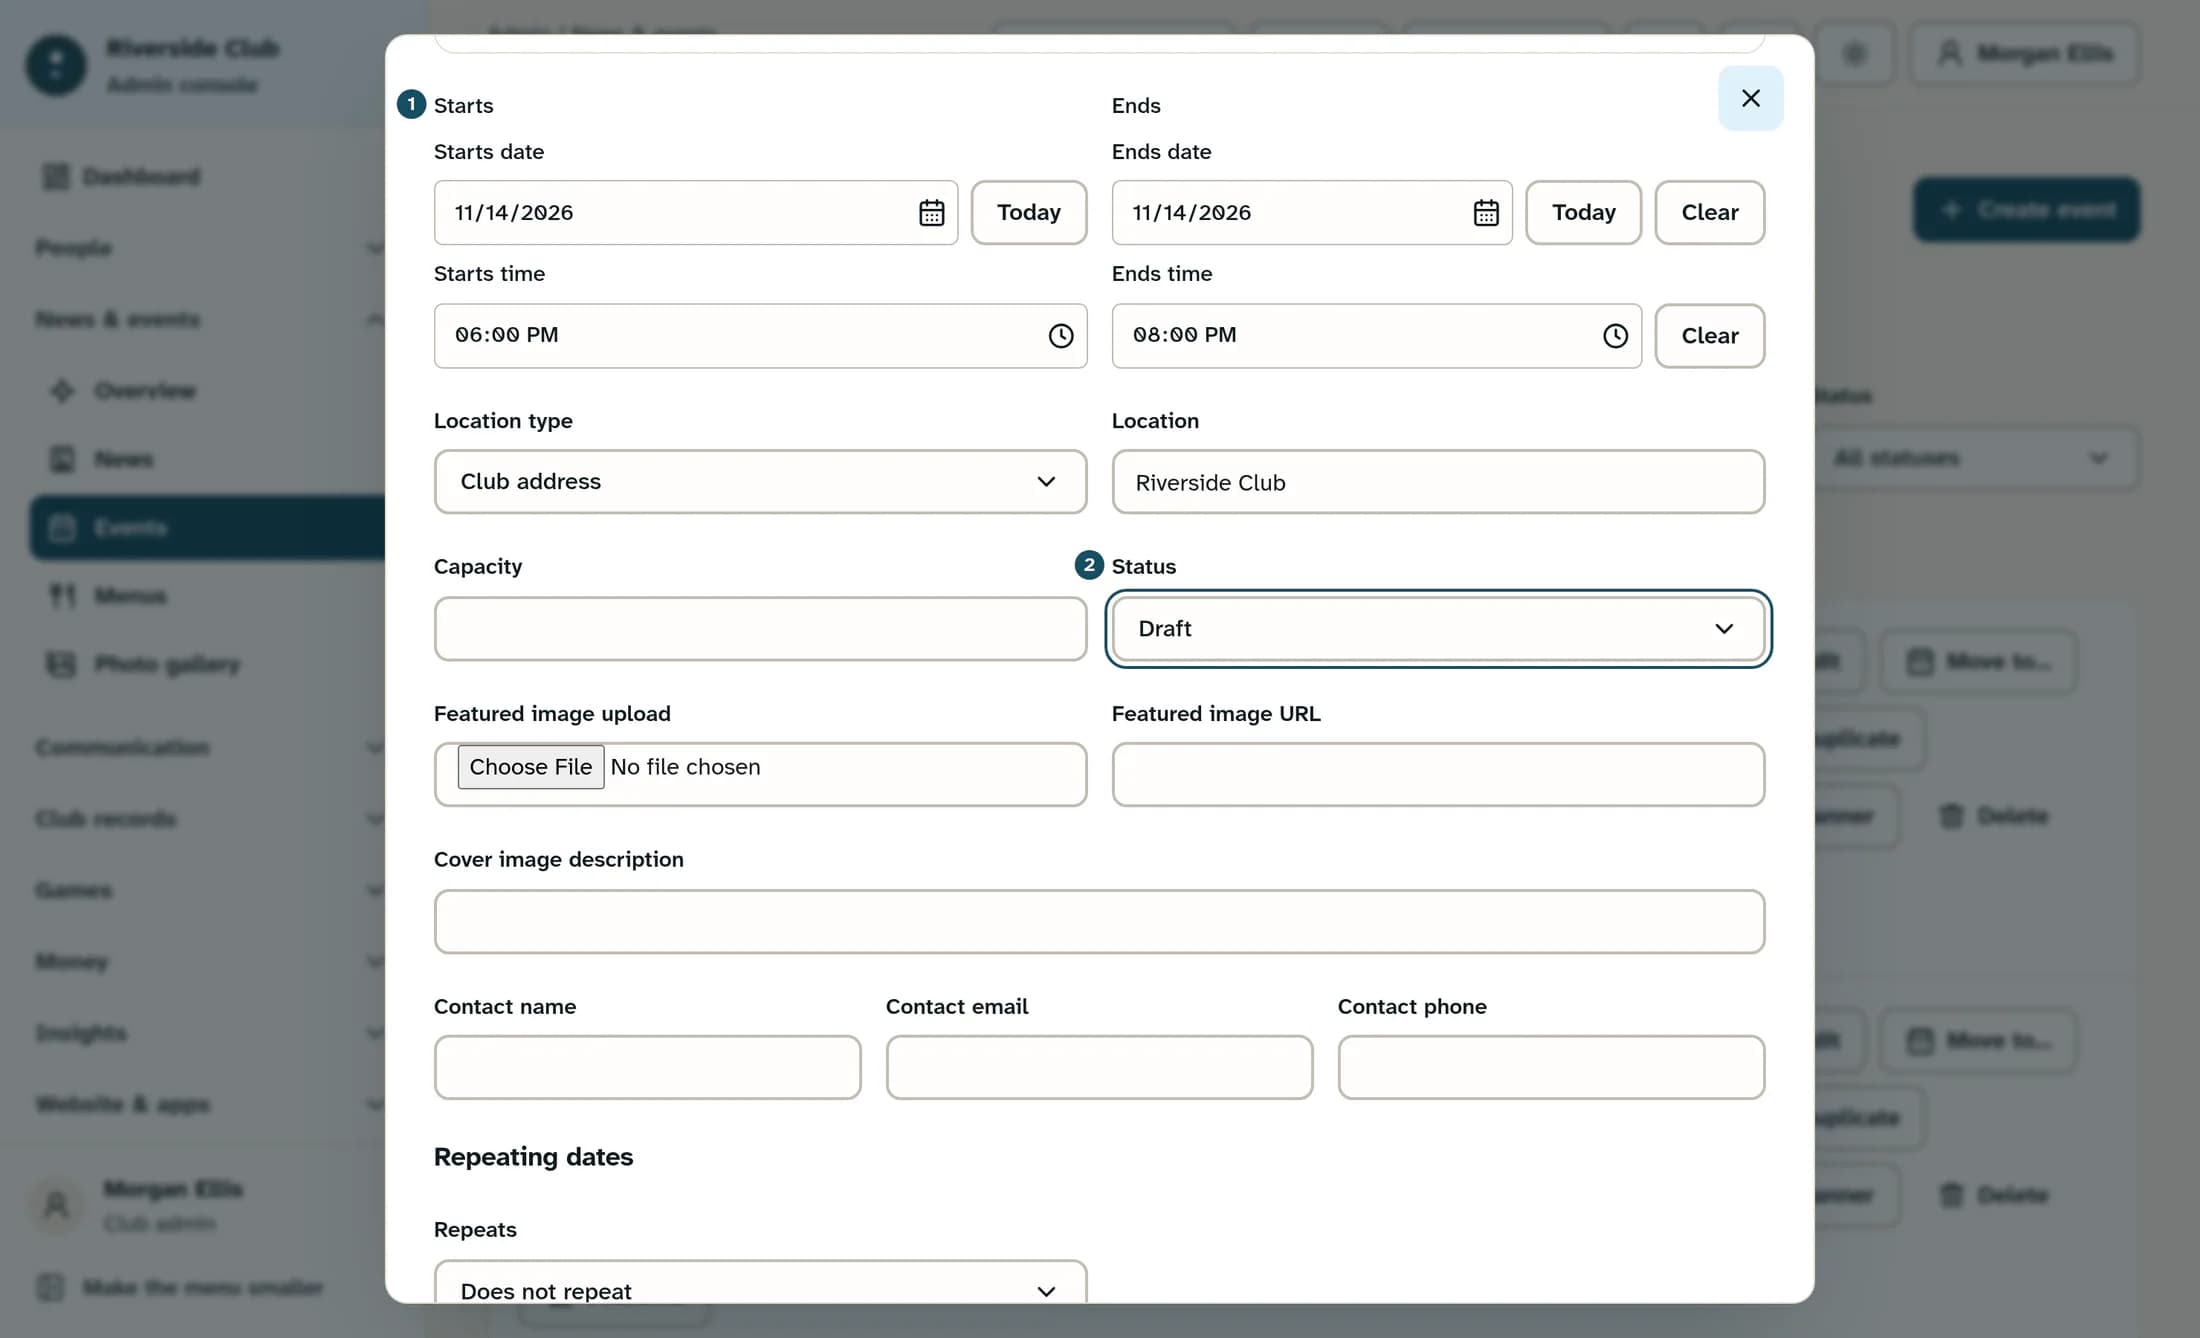
Choose the date and time under Starts; use Ends if you want to include an end time, which must be later than the start. Choose a Location type: Club address, Custom location or Online, and check the Location or Online link or note. Leave Capacity blank or use zero for no limit; otherwise enter a whole number.
Step 4 of 10
Choose Draft before saving
Change Status to Draft. New events start with Published selected, so this change is essential if you want to review the event before people see it.
Step 5 of 10
Keep it a one-off event
Under Repeating dates, leave Repeats set to Does not repeat. Leave Push reminders without added reminders for this example.
Optional cover and contact details
Step 6 of 10
Save the simple public draft
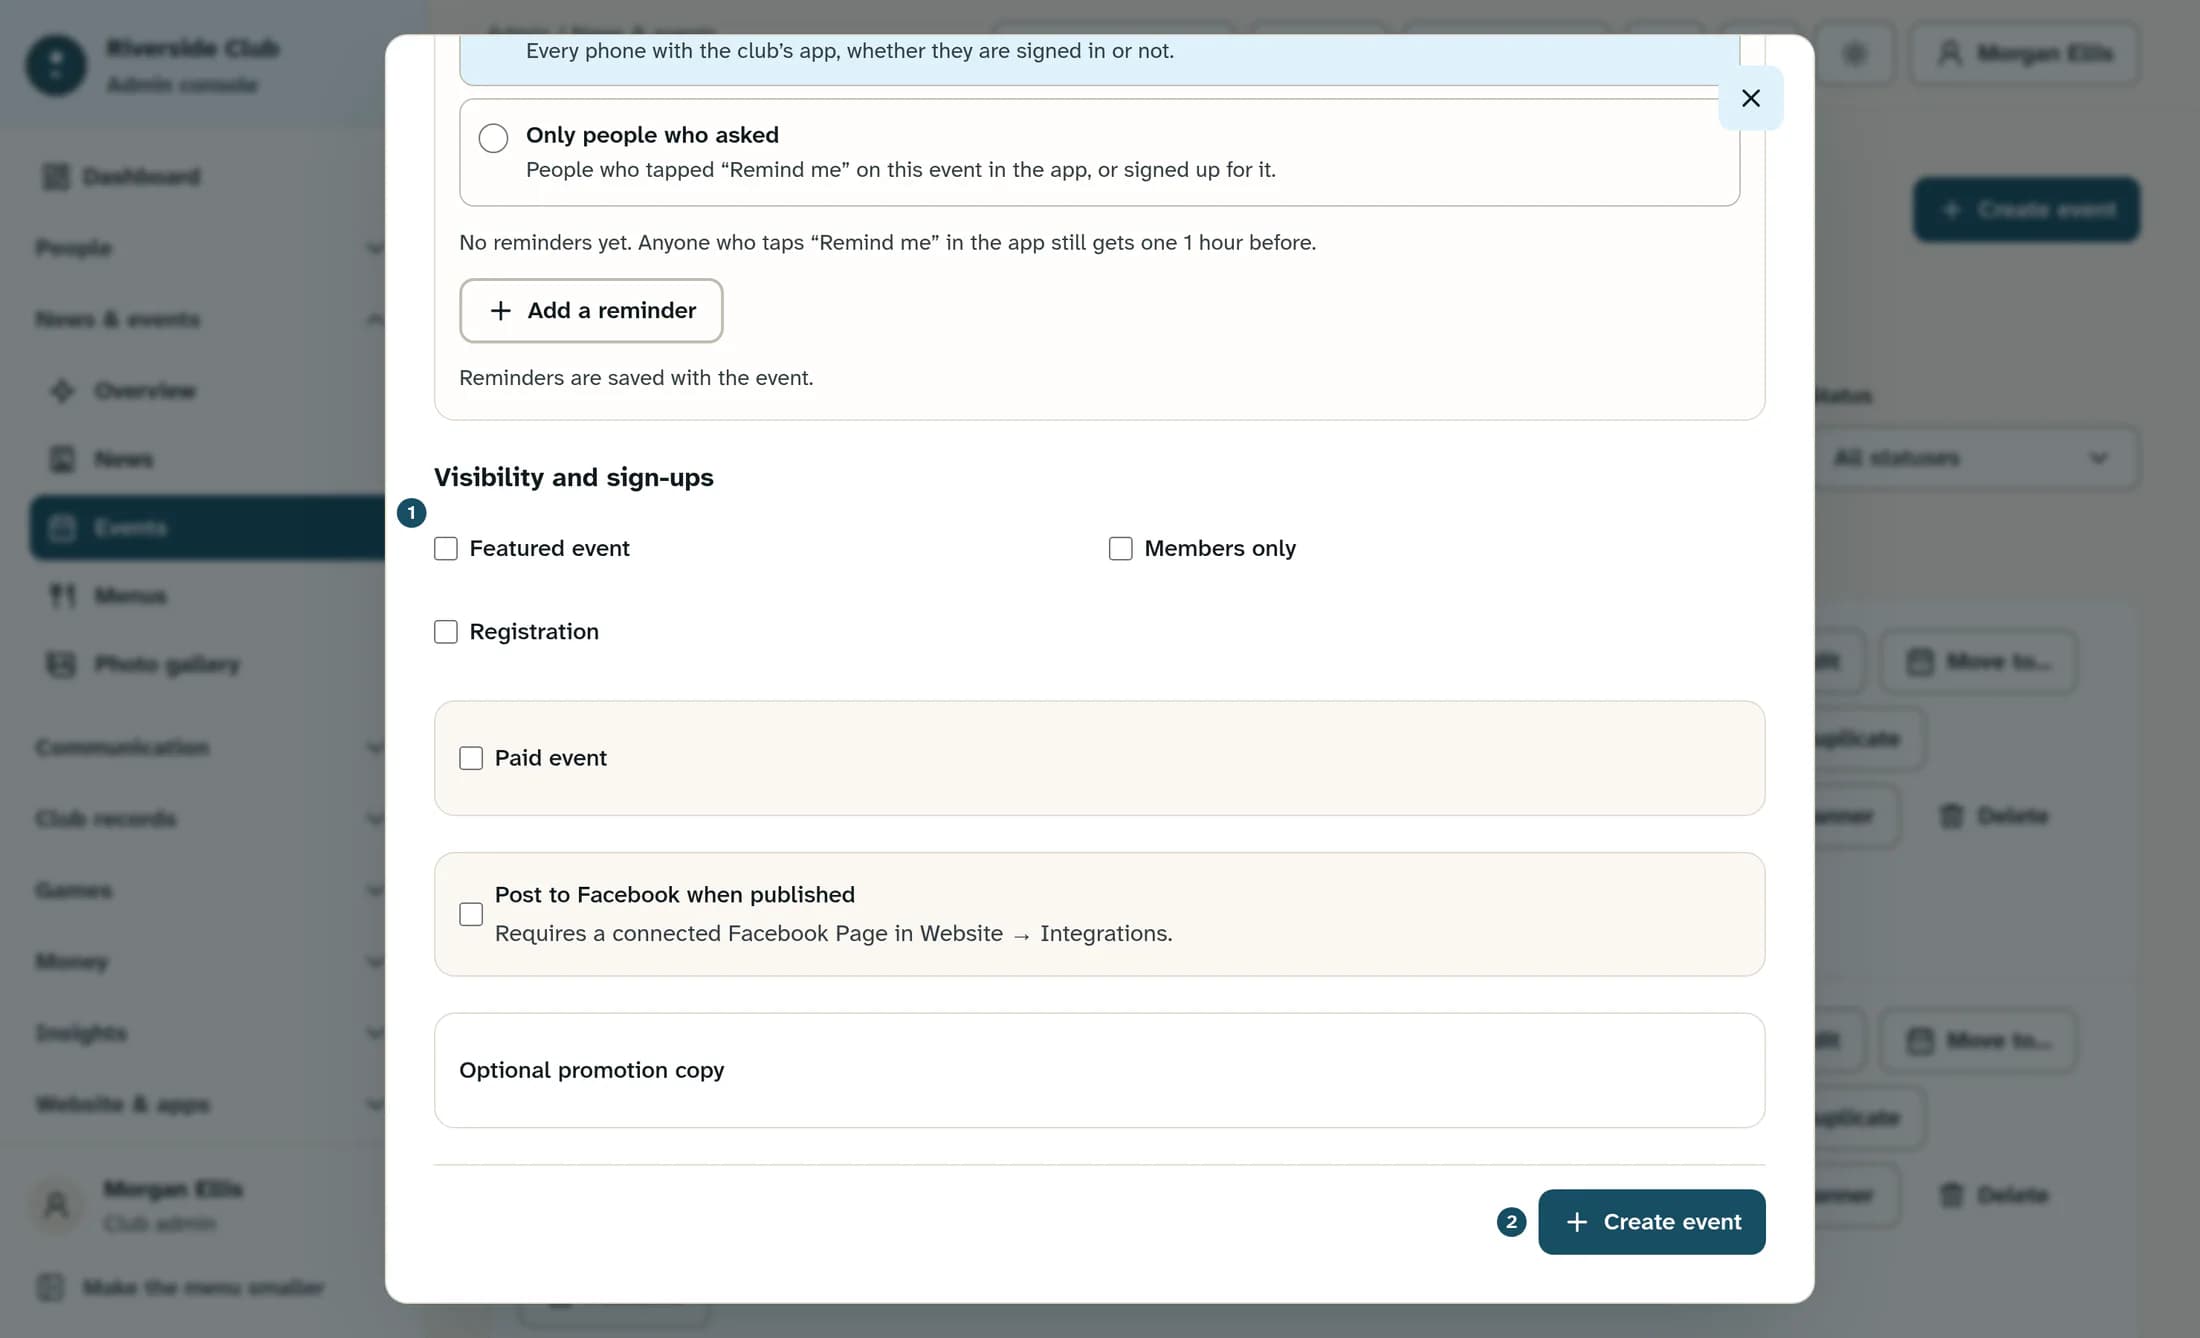
Under Visibility and sign-ups, leave Featured event, Members only and Registration unchecked for this example, and leave Paid event off. Leave Post to Facebook when published off and Optional promotion copy empty. Select Create event at the bottom of the form.
Step 7 of 10
Confirm the draft saved
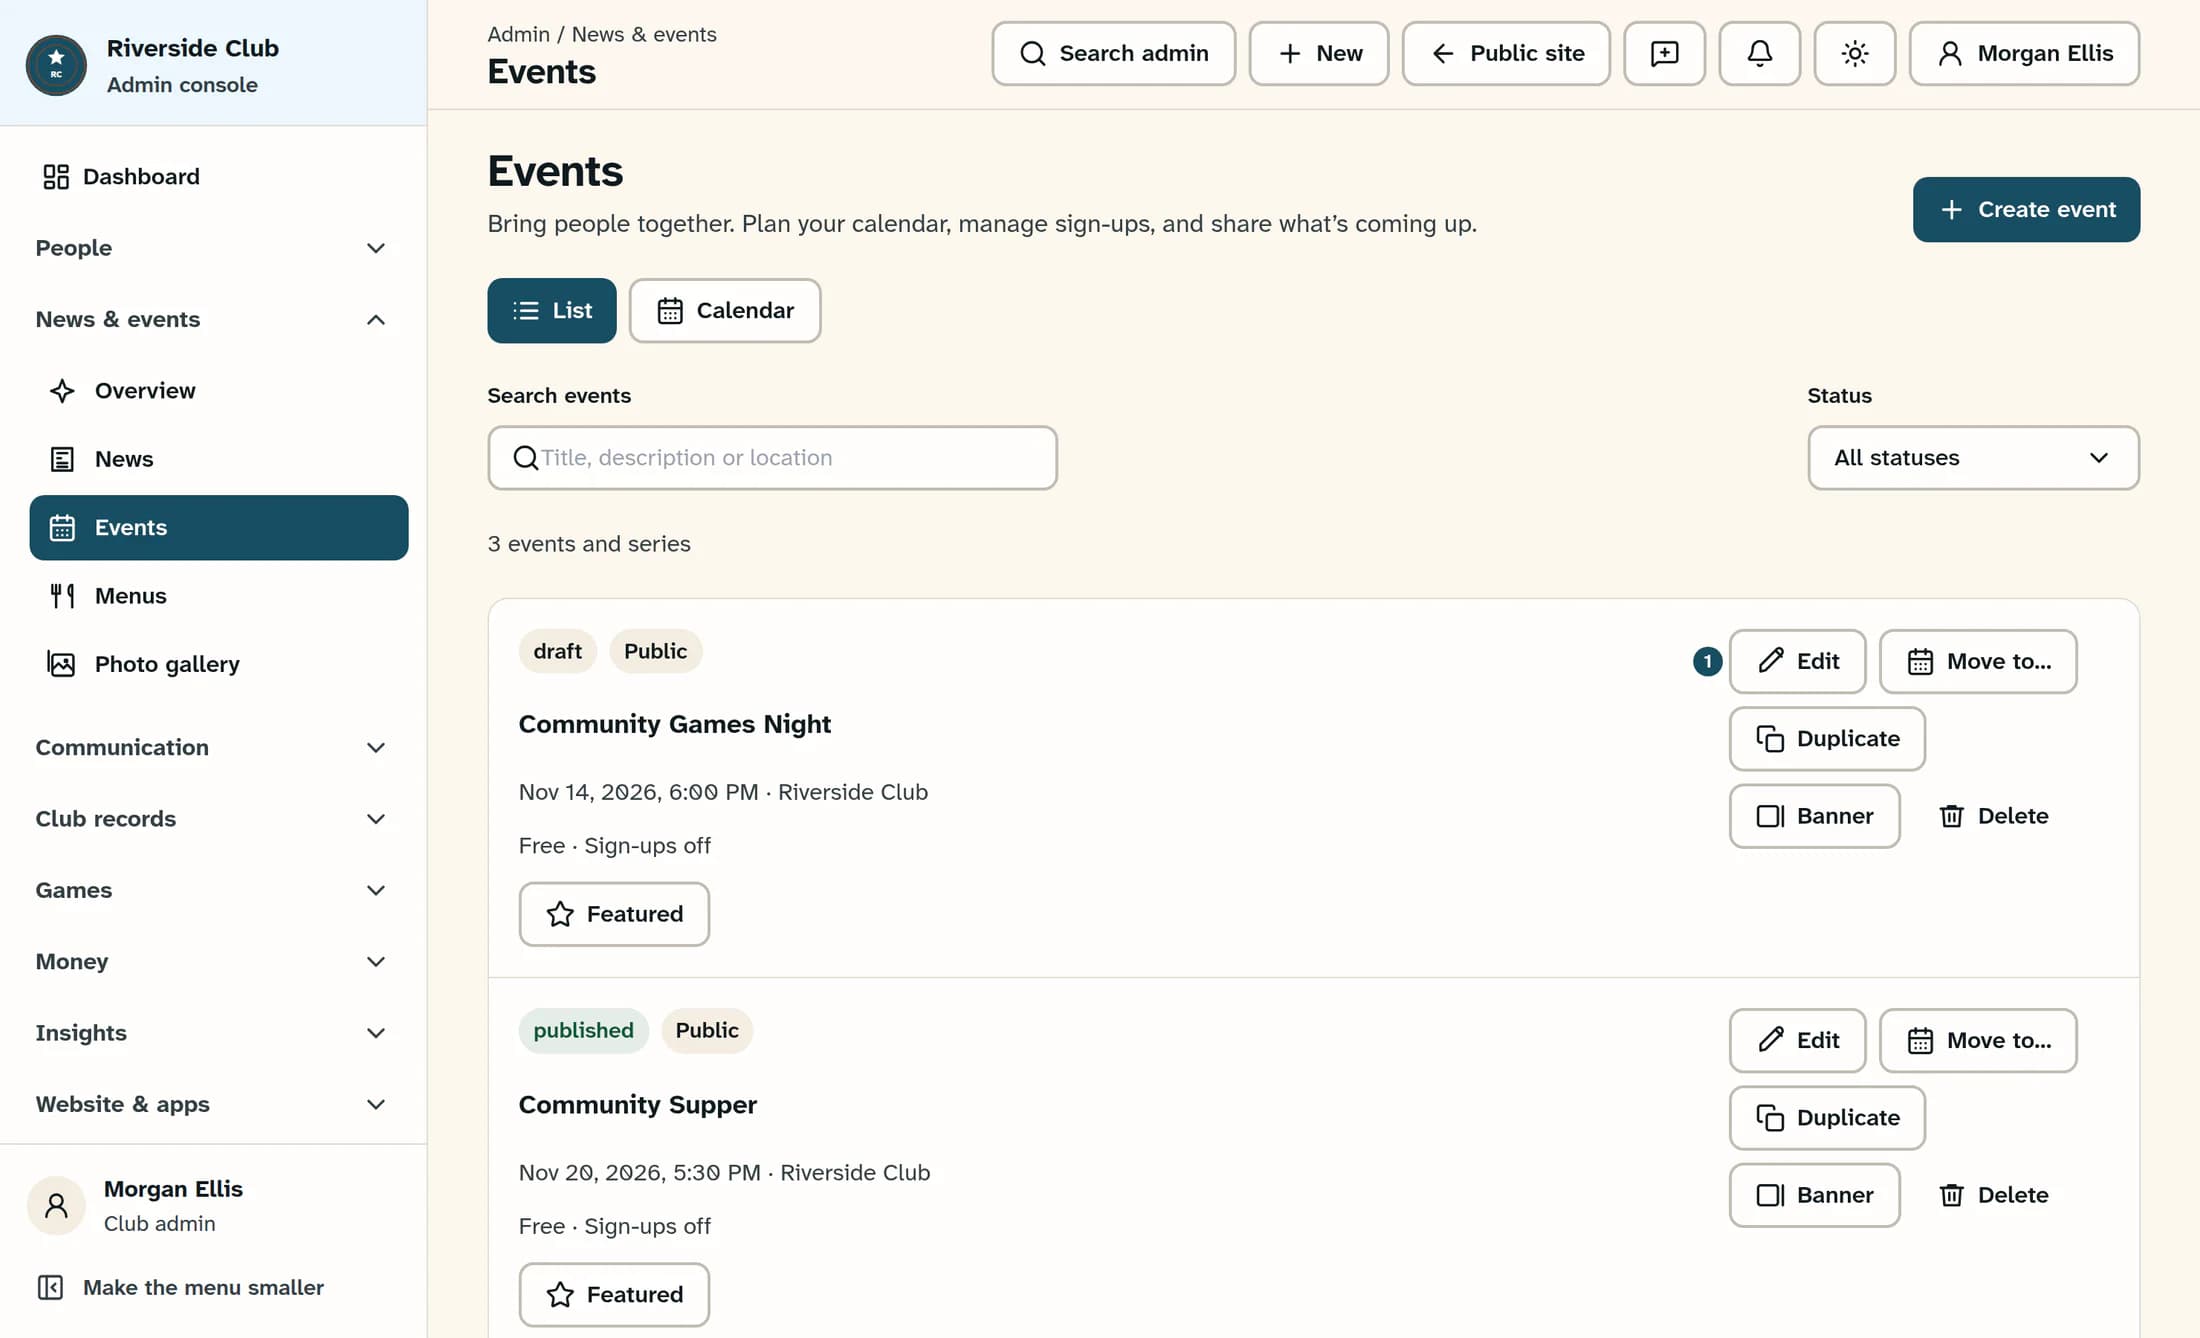
Look for “Event saved.” and your event in the list with a draft status badge. The Public badge describes its intended audience; a draft is still held back from public and member event pages.
Step 8 of 10
Reopen the draft for a final check
Select Edit beside your saved event. Check the title, time, location, audience and any optional settings before publishing.
Step 9 of 10
Publish the event
In Edit event, change Status to Published. Scroll to the bottom and select Save changes; this step requires permission to publish events.
Step 10 of 10
Check what attendees can see
Confirm the list now shows a published status badge and the intended audience, Public or Members only. Check the event on your club’s public events page for a public event, or in the signed-in member area for a members-only event. Confirm the date, time, location and details there too.
What the optional settings do
- Featured event marks the event as featured. Members only marks the event for members, but your club’s website settings can allow members-only events to appear publicly. Check those settings and the public page before relying on this choice to keep event details private.
- Registration turns on sign-ups. Paid event adds payment settings and needs a Price greater than zero; your club also needs its payment setup ready before taking payments. These are separate from the simple free event in this guide.
- Archived is another Status choice. Use Draft while preparing an event; Published makes it available to its permitted audience. The event’s start date is not a scheduled publishing control.
Publishing and notifications are separate
- Optional promotion copy stores Push title and Push message with the event. Saving those words does not send that notification, and publishing alone does not send an all-member email or push announcement.
- Push reminders can send before the event to Everyone with the app, including phones that are not signed in, or Only people who asked. Do not assume Members only makes reminder text private. Even with no added reminders, someone who taps Remind me in the app can still receive the default reminder one hour before the event.
- Post to Facebook when published can post when Facebook is connected, the box is checked and the saved event is Published. When editing an already published event that has not been posted, the label becomes Post to Facebook when I save. An event already shared shows information about that post; saving changes does not create a fresh Facebook post.
If something does not work
- The event will not save: check that Title is filled in, Starts is valid, and Ends is later than Starts. Capacity must be a whole number of zero or more; a paid event needs a price greater than zero.
- You cannot find the event: check Search events and the Status filter. All statuses includes drafts, published events and archived events.
- Creating works but publishing fails: ask your club administrator to check your event publishing access. Creation, editing and publication are separate permissions.
- “The event was saved, but its reminders were not”: the event already exists. Reopen that event, check its reminder settings, and save again. Do not create another event.
- The Facebook post failed or delivery could not be confirmed: the event may already be saved or published. Check the event list, the connected Facebook Page and Facebook itself before retrying from the existing event.
- The request did not finish: check the event list before retrying. Reopen an event that already exists rather than creating a duplicate.
Expected result
Your event is saved once and shows as published for the audience you chose. Check the attendee-facing page before sharing it with your club.
About this guide
Applies to the Clubhouse web admin checked on October 21, 2026. Menu options depend on your access, and the classic admin or phone apps can look different. Illustrations are reconstructed from the checked interface with fictional example data; they are not captures of a live event being created.
The screens in this guide show example clubs and people. Your club's name, colours and some labels may look different.