
On this page
Before you start
Step 1 of 5
Open the right system
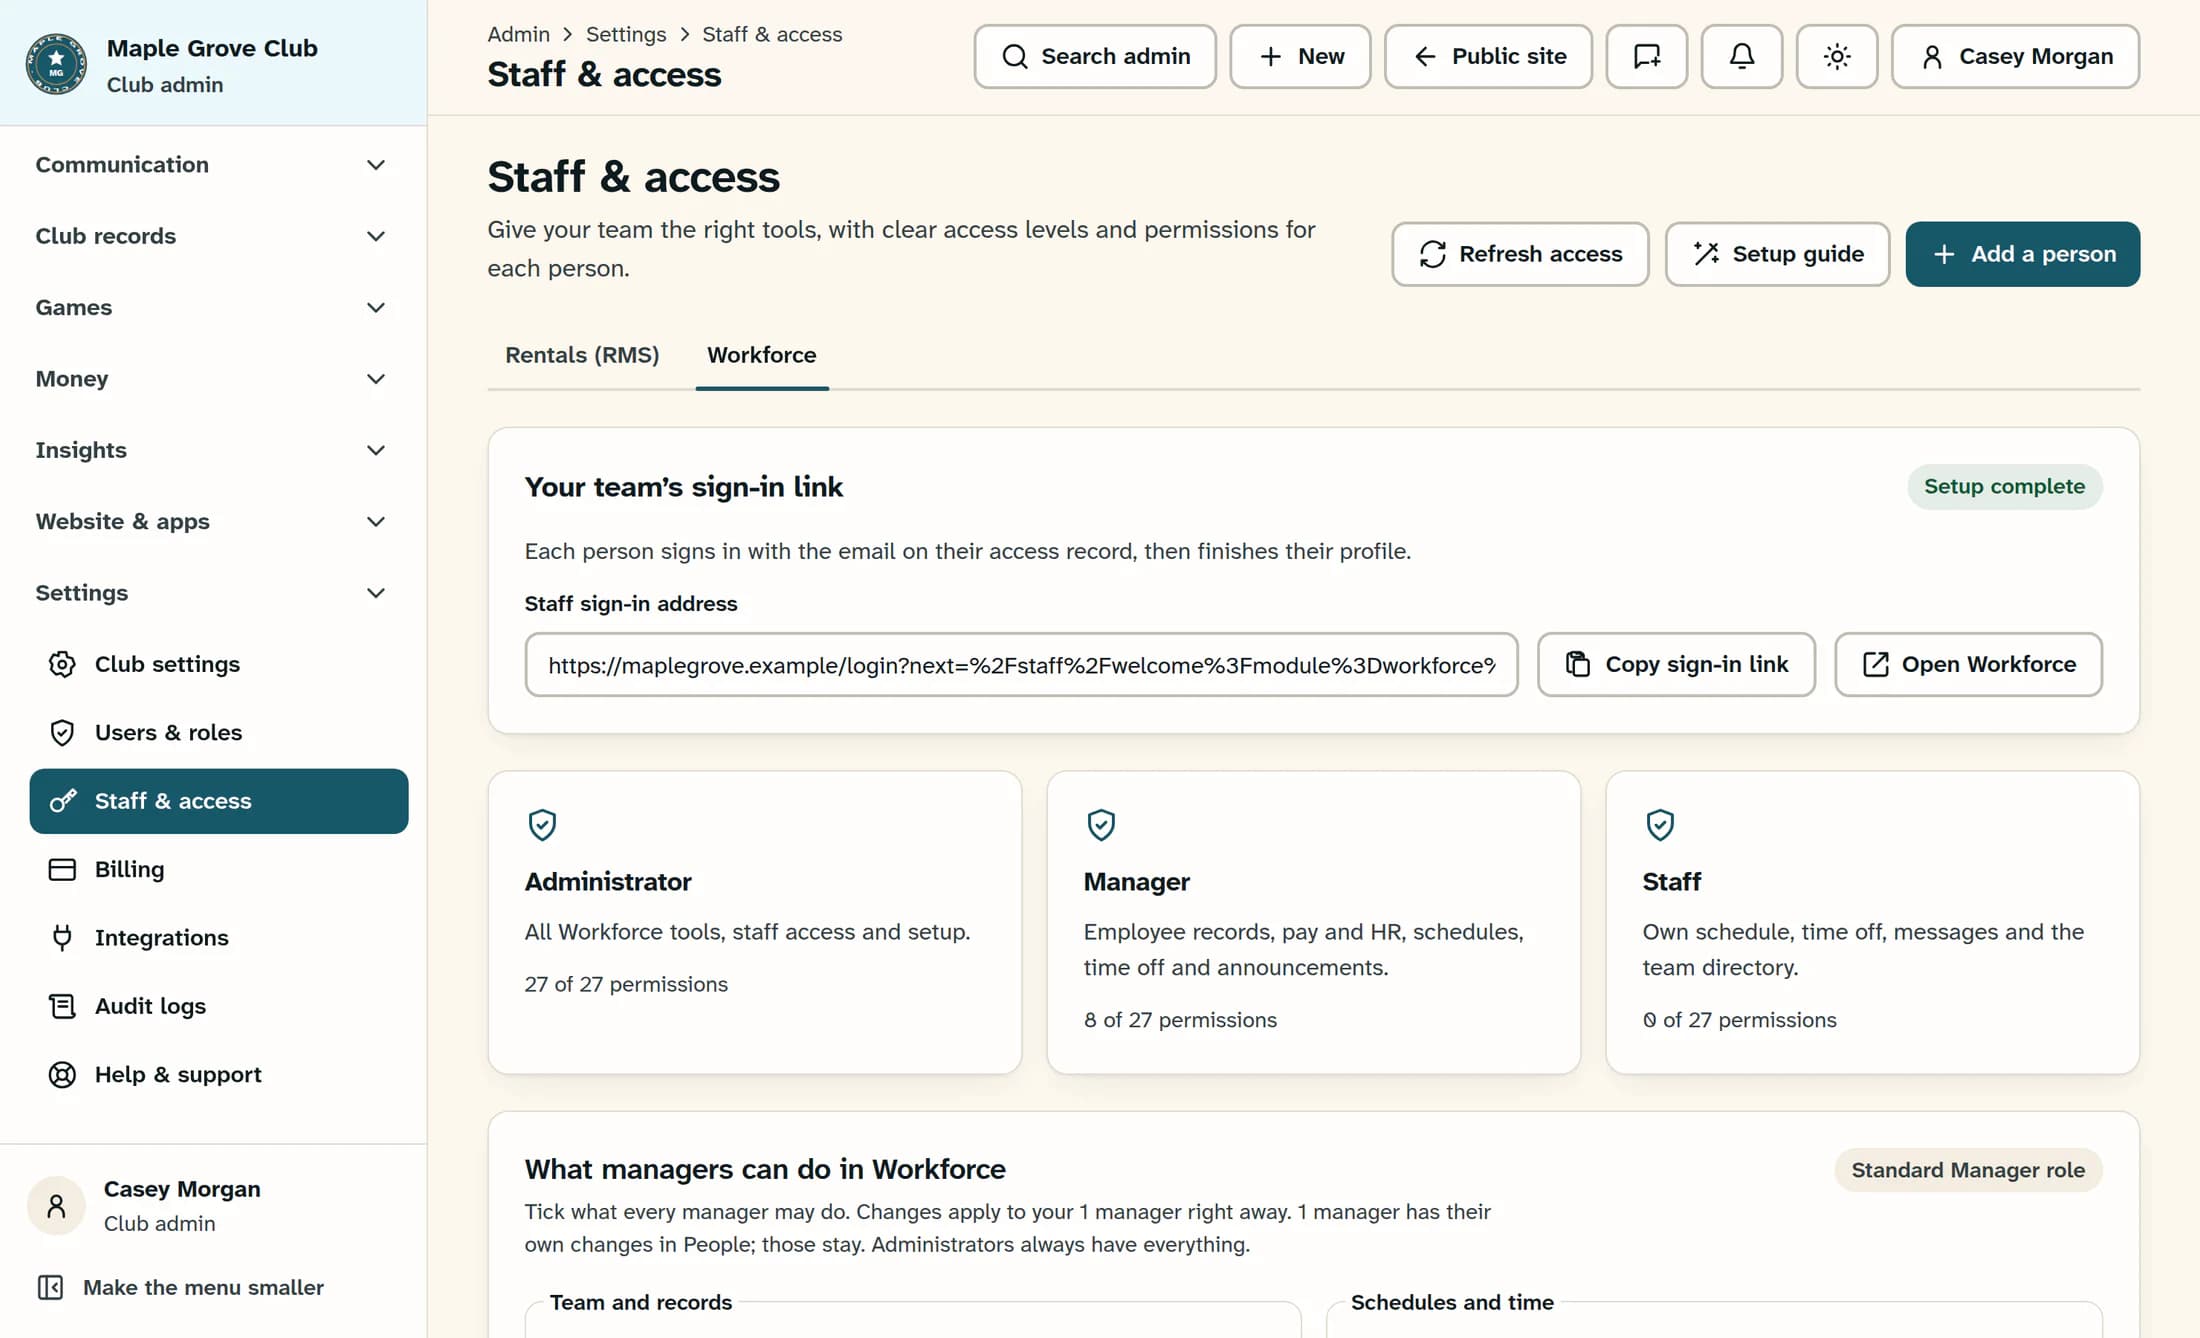
In the admin menu, open Settings → Staff & Access. Select Rentals (RMS) or Workforce at the top of the page. Check this before making changes: you’re managing access for the selected system.
Step 2 of 5
Find the person’s access record
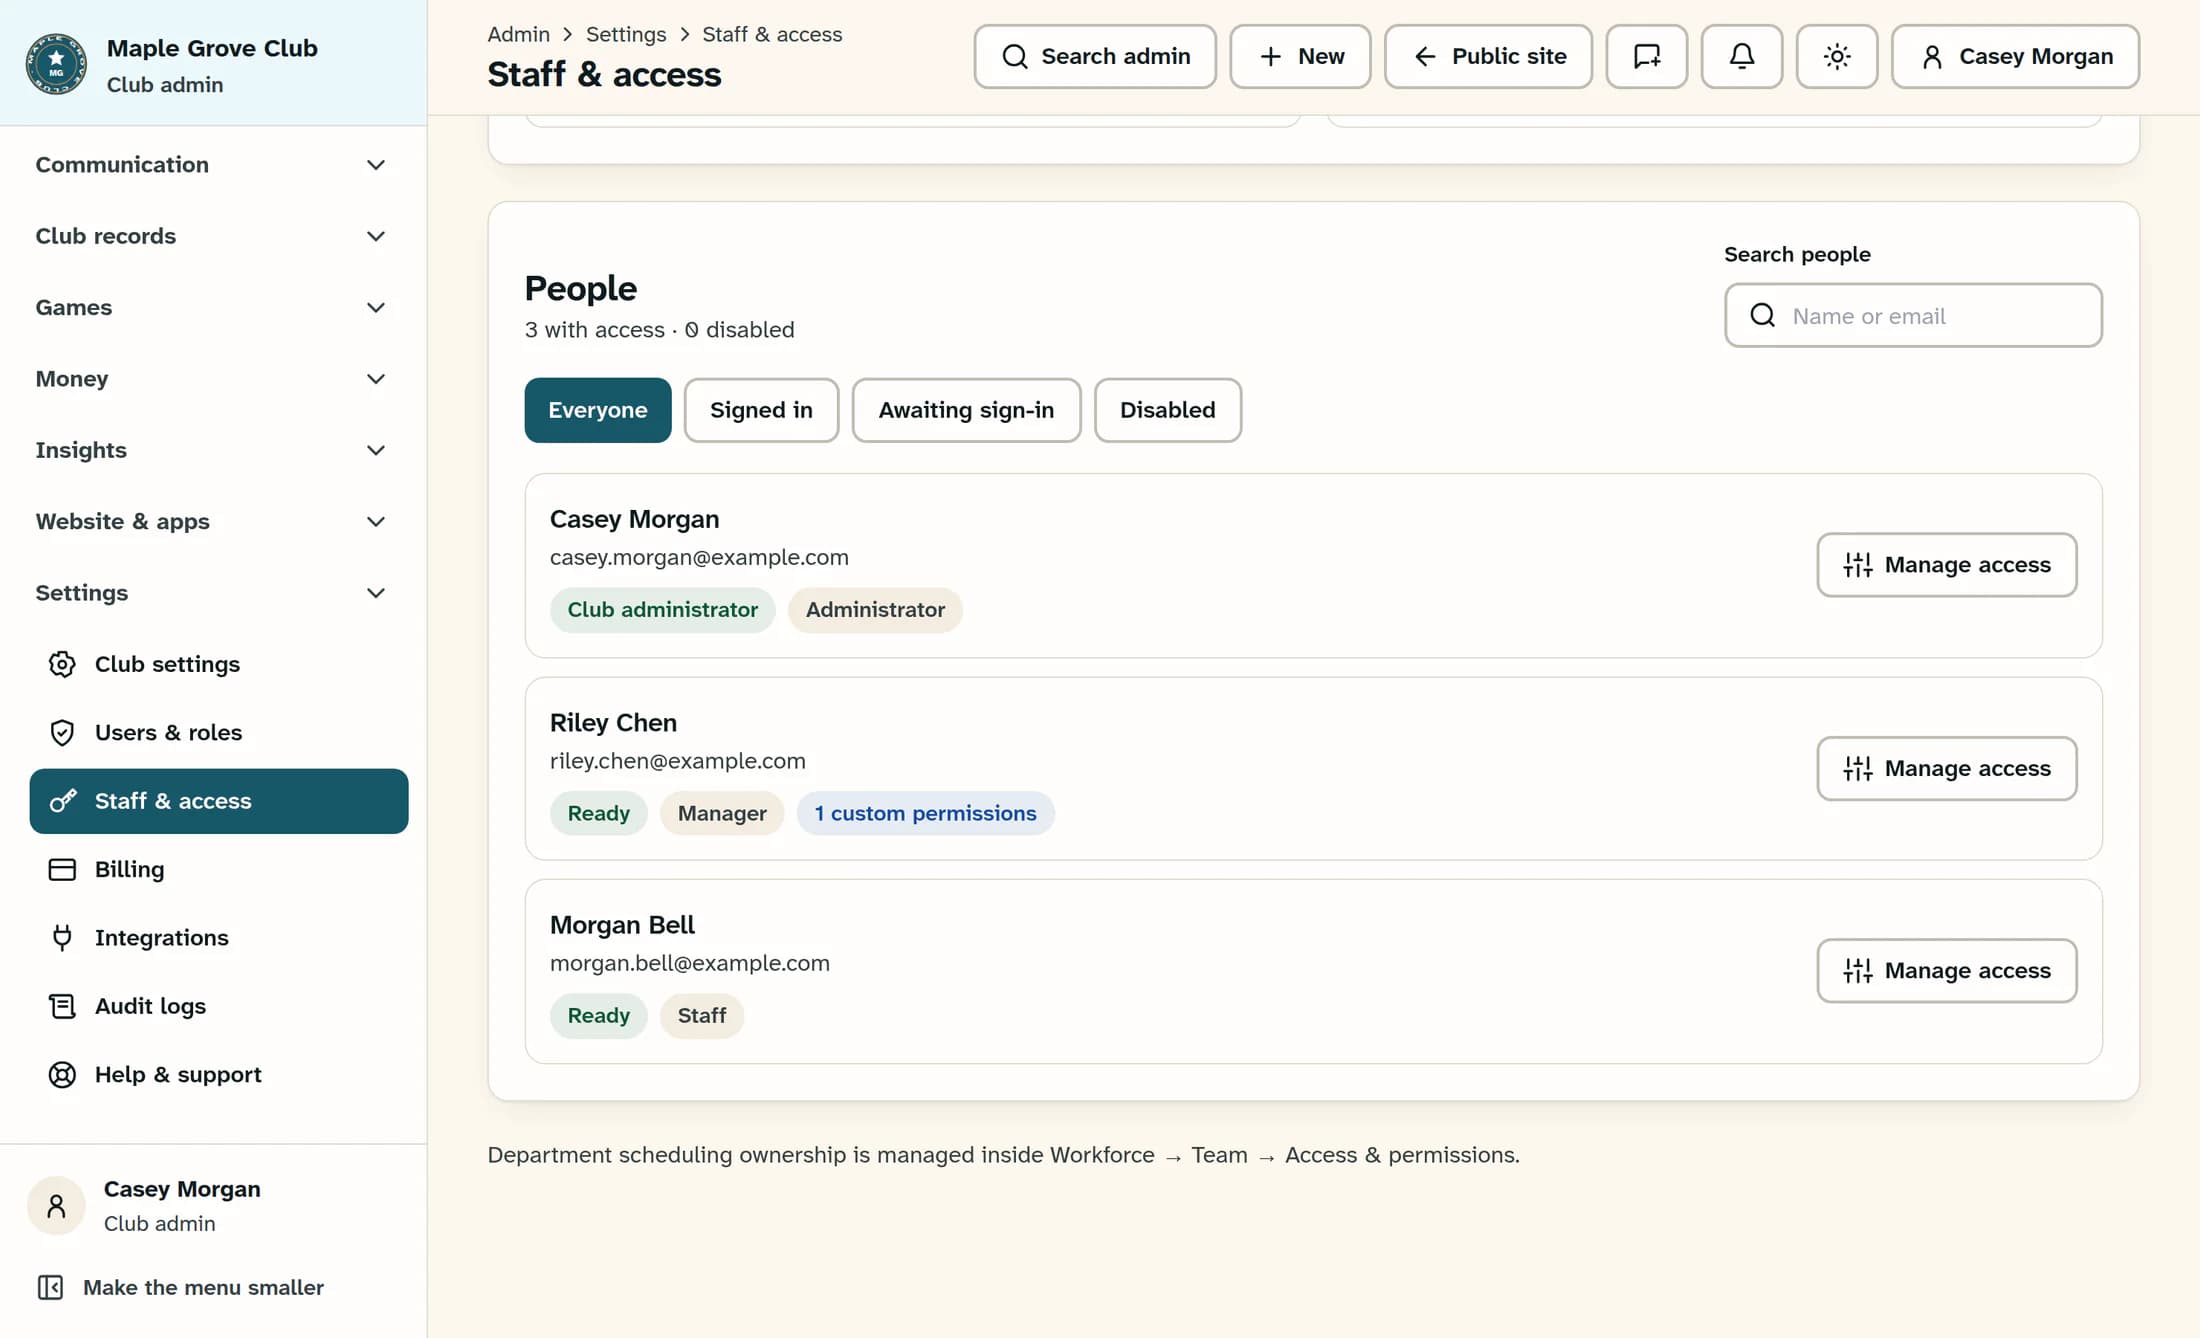
Scroll to People. Use Search people (the Name or email field) to find the person. The filters are Everyone, Signed in, Awaiting sign-in and Disabled. Choose Everyone if you’re unsure of their status.
Check the name and email, then click Manage access on the correct person’s row. Their details open in a panel on the right.
Step 3 of 5
Change their access level
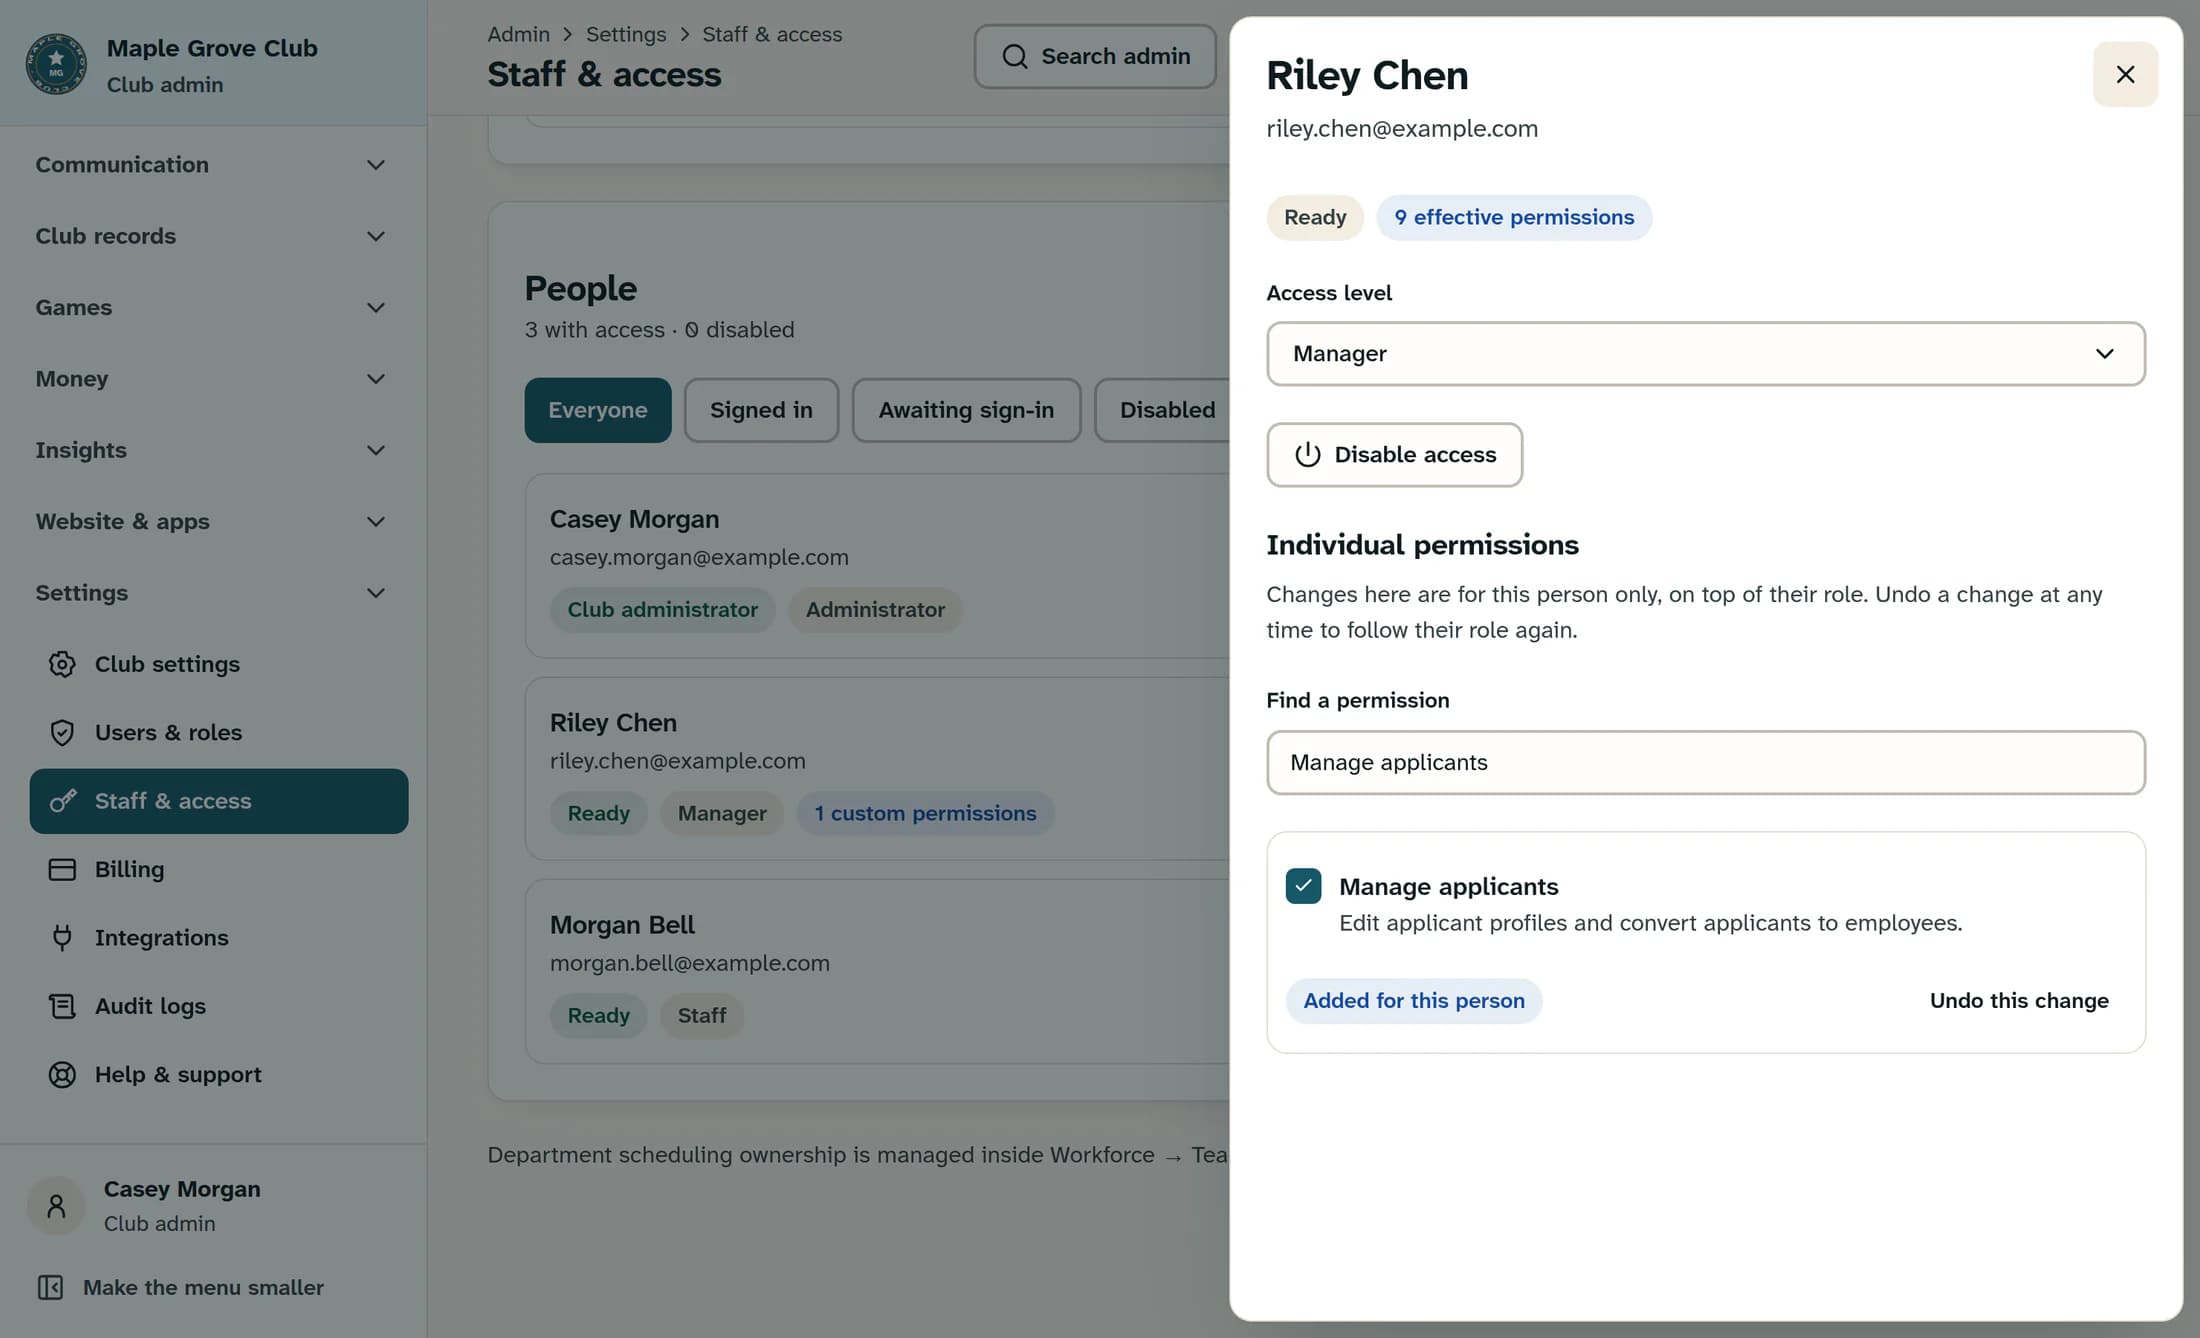
In the person’s panel, select Administrator, Manager or Staff from Access level. Choose the role that fits their work in this system. Role permissions can differ between Rentals and Workforce, and your club may have changed what managers can do.
The selection saves immediately. Wait for Access level saved. before making another change. There is no Save button for a role change.
If the person came from the Workforce Team roster and has no staff record yet, choosing an access level creates that record. Their employee profile needs an email first. Employment status is managed in Workforce.
Changing the access level keeps the person’s current active or disabled status. It does not re-enable a disabled record.
Step 4 of 5
Adjust permissions for this person
Under Individual permissions, use Find a permission to search by name or description. Tick a permission to give it to this person, or untick it to remove it. Wait for Permission saved. after each change.
These changes apply to this person only, on top of their role. The separate “What managers can do in Workforce” panel on the main page changes the role for every manager; leave that panel alone when you’re updating one person.
The labels help explain the current setting: Added for this person and Removed for this person identify individual exceptions. Given to this person separately means access comes from another grant. A role label, such as “From the Manager role”, identifies a permission included in that role.
Step 5 of 5
Undo an individual exception if needed
To clear a specific exception, click Undo this change beside that permission and wait for Permission saved. Check the resulting checkbox and source label.
Undo removes that person’s exception. Their role or a separate grant may still provide the permission, so undoing a change does not necessarily remove access.
Tips
Outcome
The person’s selected system now uses the saved access level and individual permission changes. Review their effective permissions and source labels to confirm the result matches what they need.
Troubleshooting
About this guide
This guide describes the Clubhouse web interface. Illustrations are source-based reconstructions, not live screenshots. Maple Grove Club, the people and their details are fictional examples.
The screens in this guide show example clubs and people. Your club's name, colours and some labels may look different.